


4 ways to find out where a program is installed in Windows 11
For one reason or another, you may want to find the location where a particular app is installed. This may seem a bit difficult, but actually, this is one of the easiest tasks if you know how to do it. In this article, we explain in some simple methods how you can easily locate an app installation folder on your Windows 11.
Note that the methods work only for those apps that you have installed yourself and not for native Windows apps like Calculator. Read on to learn how you can be the master of this simple trick.
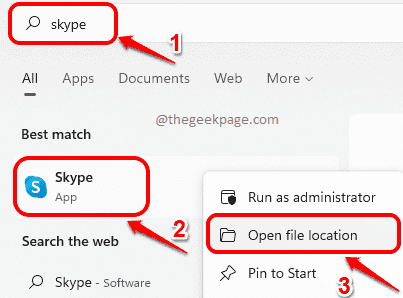
Paso 1: About him taskbar, click on the Search icon.
Paso 2: At search bar, writes at Name of the request for which you want to find the installation location. In the following example, I have taken Skype as an example.
From the best match results, the right button of the mouse about him request and click on the Open file location context menu option.
Paso 3: When the Start menu folder is opened, the right button of the mouse about him direct access to the application and click on the Open file location option once again.
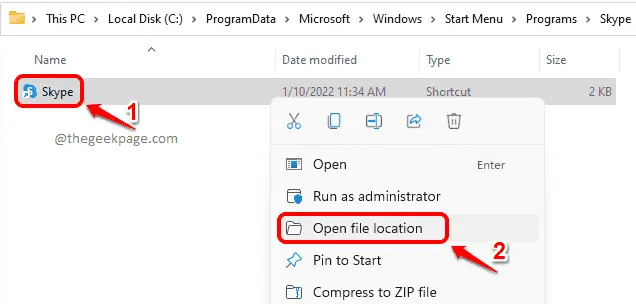
Stage 4: That’s it. Now you will immediately land in the folder where the required program is installed.

Method 2: From the properties window
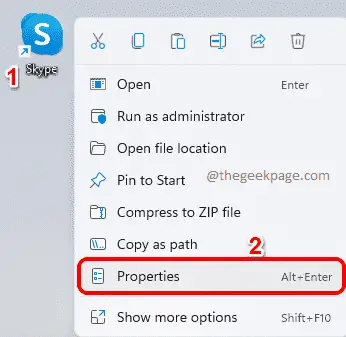
This method only applies if you have a shortcut available on your desktop for the application.
Paso 1: The right button of the mouse in the app and click the Properties option.
As an example, the Skype application is used.
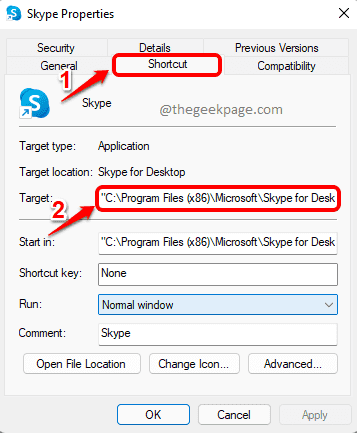
Paso 2: Once the application properties window opens, click on the tab called Shortcut.
now under the Target field, you can find the location where the app is installed.
Method 3 – Through Task Manager
This method requires the application to be running on your machine. For that, launch the app first. In the example, we have taken the Skype application as an example.
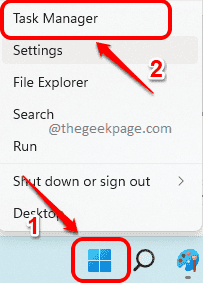
Paso 1: The right button of the mouse about him Windows Start Menu icon and click the Task Manager option.
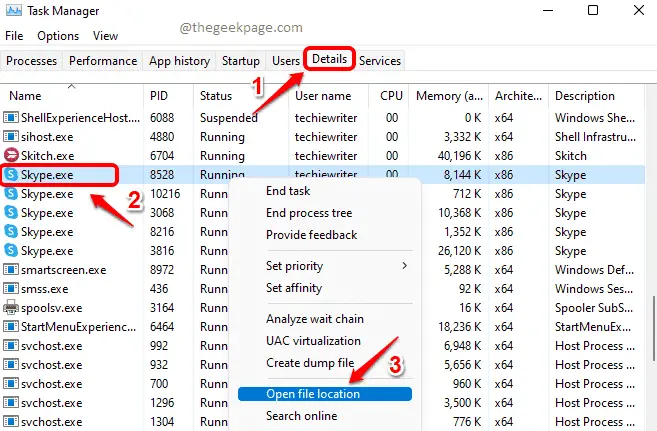
Paso 2: At Task Manager window, click on the Details tab.
Now in the process list, you have to to locate Y the right button of the mouse about him request for which you want to find the installation folder.
At the right button of the mouse context menu, click the option Open file location.
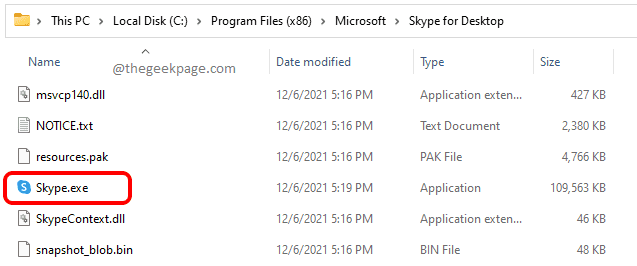
Paso 3: You will immediately be taken to the folder where your application is installed. That’s it.
Method 4 – From File Explorer
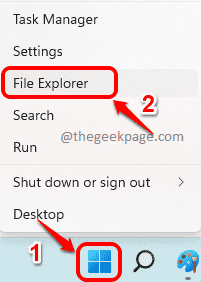
Paso 1: The right button of the mouse about him Windows Start Menu icon and click the File Browser option.
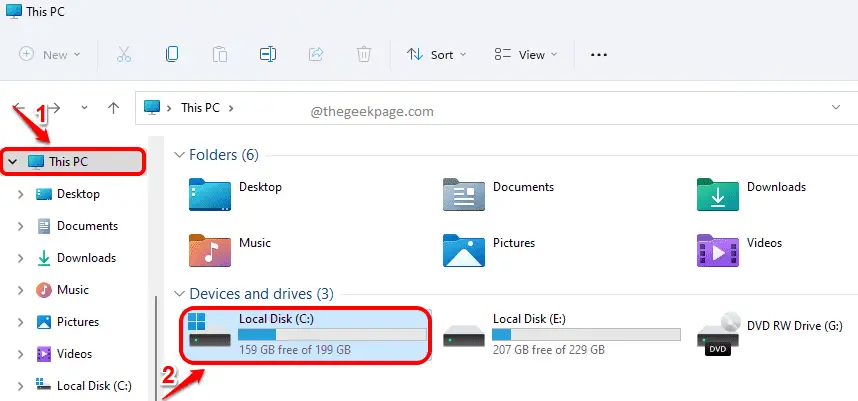
Paso 2: At left cristal of the window, click this computer and in the right window cristal, double click about him Drive where the app is installed. Usually, this is the C drive.
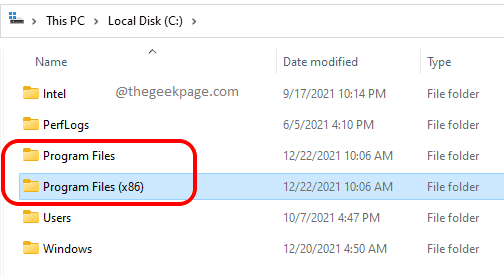
Paso 3: Inside C drive, your application will be in Program files the inside Program Files (x86). Check inside both folders.
Stage 4: Now inside the Program Files folder, you can to locate the application you are looking for easily.

That’s it. I hope you found the article useful.
Related posts:
 How to access Steam games without an internet connection
  How to view FPS with Xbox Game Bar in Windows 10: Steps Made Easy
  Hacked account? How to check and remedy
  How to make video calls from WhatsApp Web
  How to increase the RAM memory of a desktop or laptop + Tips and Tricks
  How to organize your YouTube subscriptions into categories
+ Tips and Tricks
How to organize your YouTube subscriptions into categories
+ Tips and Tricks


