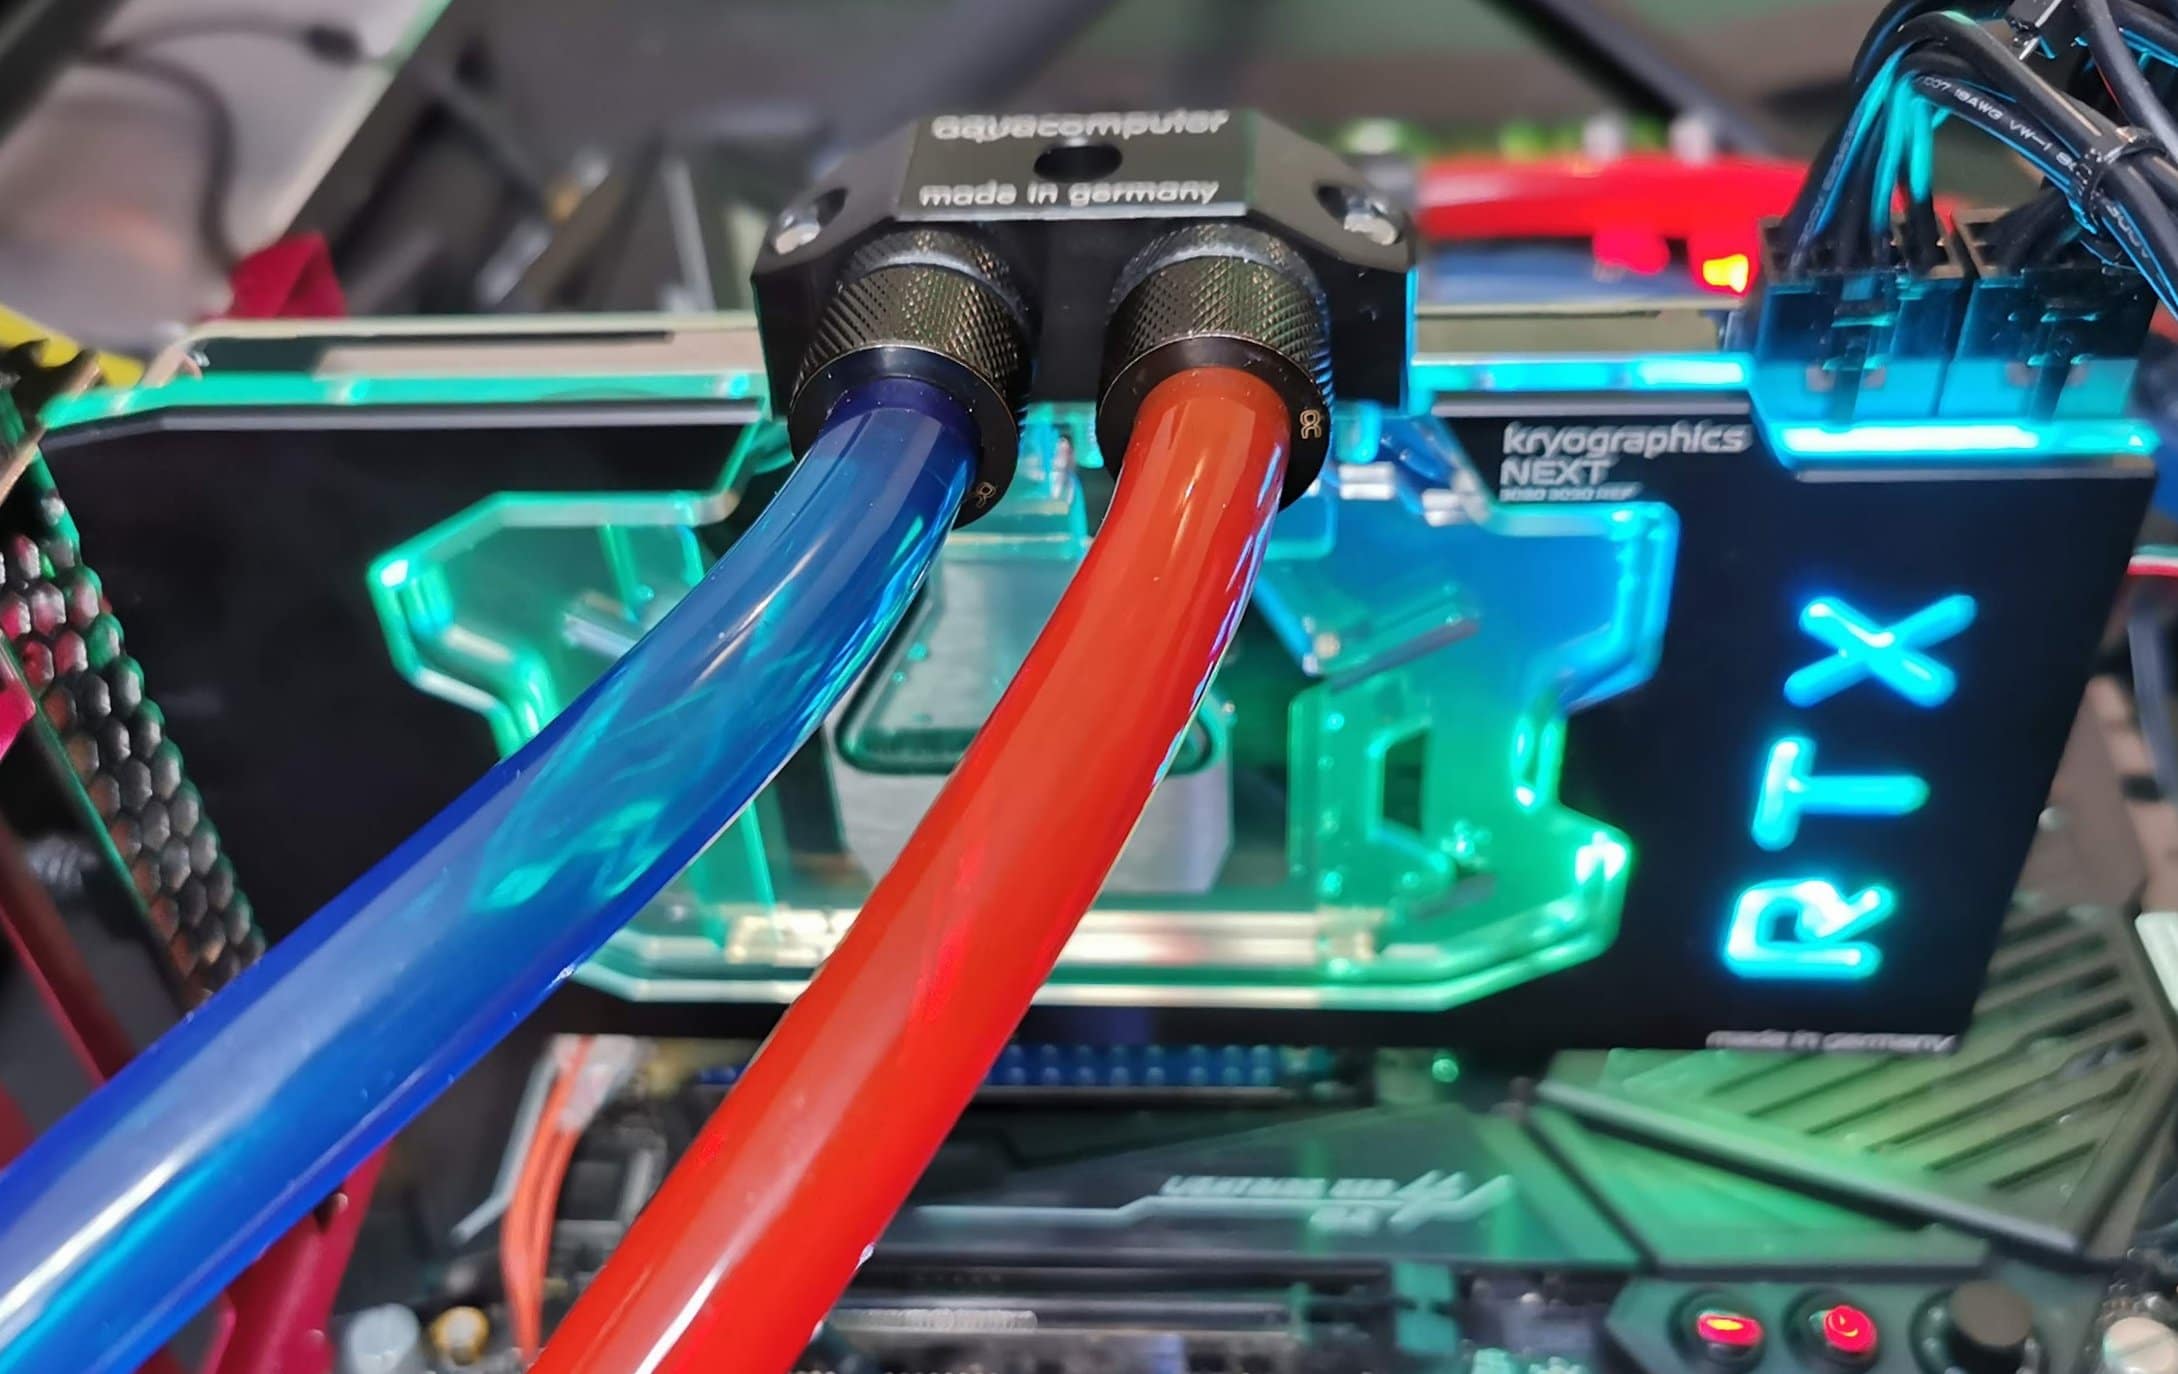
Aqua Computer Kryographics Next for the GeForce RTX 3080 and RTX 3090 in the reference design – Solid GPU water block in the test
A proper water cooling makes sense with power losses over 300 watts and thus creates real added value. With the Kryographics Next, Aqua Computer is continuing the path of precisely crafted coolers and is offering a GPU water block for NVIDIA’s current reference boards of the GeForce RTX 3080 and RTX 3090, which even works without thermal pads for the memory. However, we also know that these NVIDIA GPUs are not exactly precision world champions and have already attracted negative attention several times due to bending. How and whether that fits together, we will find out together today.
Scope of delivery and unboxing
The manufacturer has of course revised the cooler compared to its predecessors, but the basic principle remains. But let’s unpack all the fun first. What you get for just under 165 euros is a pre-assembled cooler with a terminal including an embedded 5V RGBpx strip, a 50 cm connection cable and a suitable preci-dip adapter, two plugs, all the necessary screws, 1 gram of thermal paste and 0.5 -mm thermal pads. The manual is available in printed and digital form, exemplary. A backplate with cooling function can be purchased separately as an option.
Which brings us directly to the water block. At 980 grams, this is a pretty heavy chunk, which is primarily due to the 12 mm copper block used. Why is it so fat? Let’s remember the reference design of the card! NVIDIA leaves it up to the board partners to decide whether to use flat SMD capacitors (SP or POS caps) or the conventional and cheaper cup capacitors on the front, for example for voltage converters. However, they are relatively high, so you have to work with this enormous copper thickness if you don’t want to work with recesses like Alphacool or Corsair.
The cover is made of acrylic (PMA), i.e. normal Plexiglas, and is milled, plus a stabilizing panel made of black anodized light metal. Visually, everything is rather calm and timeless, which is absolutely not a defect, on the contrary. Of course, you also serve yourself to the intensely illuminated, colorful present and build in an RGB strip with 15 LEDs, which can also be connected to any suitable digital 5 volt aRGB output on the motherboard using a cable and adapter. The terminal is made of acetal and anchored in the acrylic block with three solid screws.
The material used for the cooling block is electrolytic copper (nickel-plated in this model), but unfortunately there is no information on the thickness of the cooling fins, the channel width and the remaining floor thickness. Interestingly, however, you work with an extra jetplate made of stainless steel and lead the water directly to the GPU, only to then lead it over the rest of the board.
The back shows the immense amount of material used, because the difference in level between the two external VRM cooling surfaces and the recesses for the caps is huge. Lots of copper and only one O-ring, that too is a philosophy that can be well represented. The thread inserts are fitted neatly and are also firmly in place. The acrylic block is screwed from the back and not from the front, which is also quite rare. Otherwise, like Corsair, all available holes on the board were used for screwing.
A special feature that cannot be seen with the naked eye is the slightly concave design of the GPU bulge, which was embossed here with a maximum depth of 4/100 mm. You can do that for whom you could easily compensate for something like that with thermal paste. We’ll see in a moment how well it works in the end.
If you want to use an RTX 3090 with RAM on the back, you will not be able to avoid the backplate, which is an absolute must to thermally tame the GDDR6X memory. In my case, I don’t need it for the RTX 3080, if I want to provide measurements that are comparable to the other coolers. I will explain next that this is only possible with the same board due to the unusually high tolerance limits in NVIDIA’s package. As a reminder and for better understanding, I have a link to the relevant article on NVIDIA’s manufacturing tolerances at this point:
Selection of the test card and general problems when using the GA102
The requirements are similar to Turing, even if this time I decided on a 340 watt setup and a very special GeForce RTX 3080, because it was almost impossible to find an RTX 3090 in the reference design especially for these cooler tests and also to get a card that is in the middle of the tolerance range for the package heights. At this point I have to add a few more important application tips, because the cooler will not always fit these curved packages optimally.
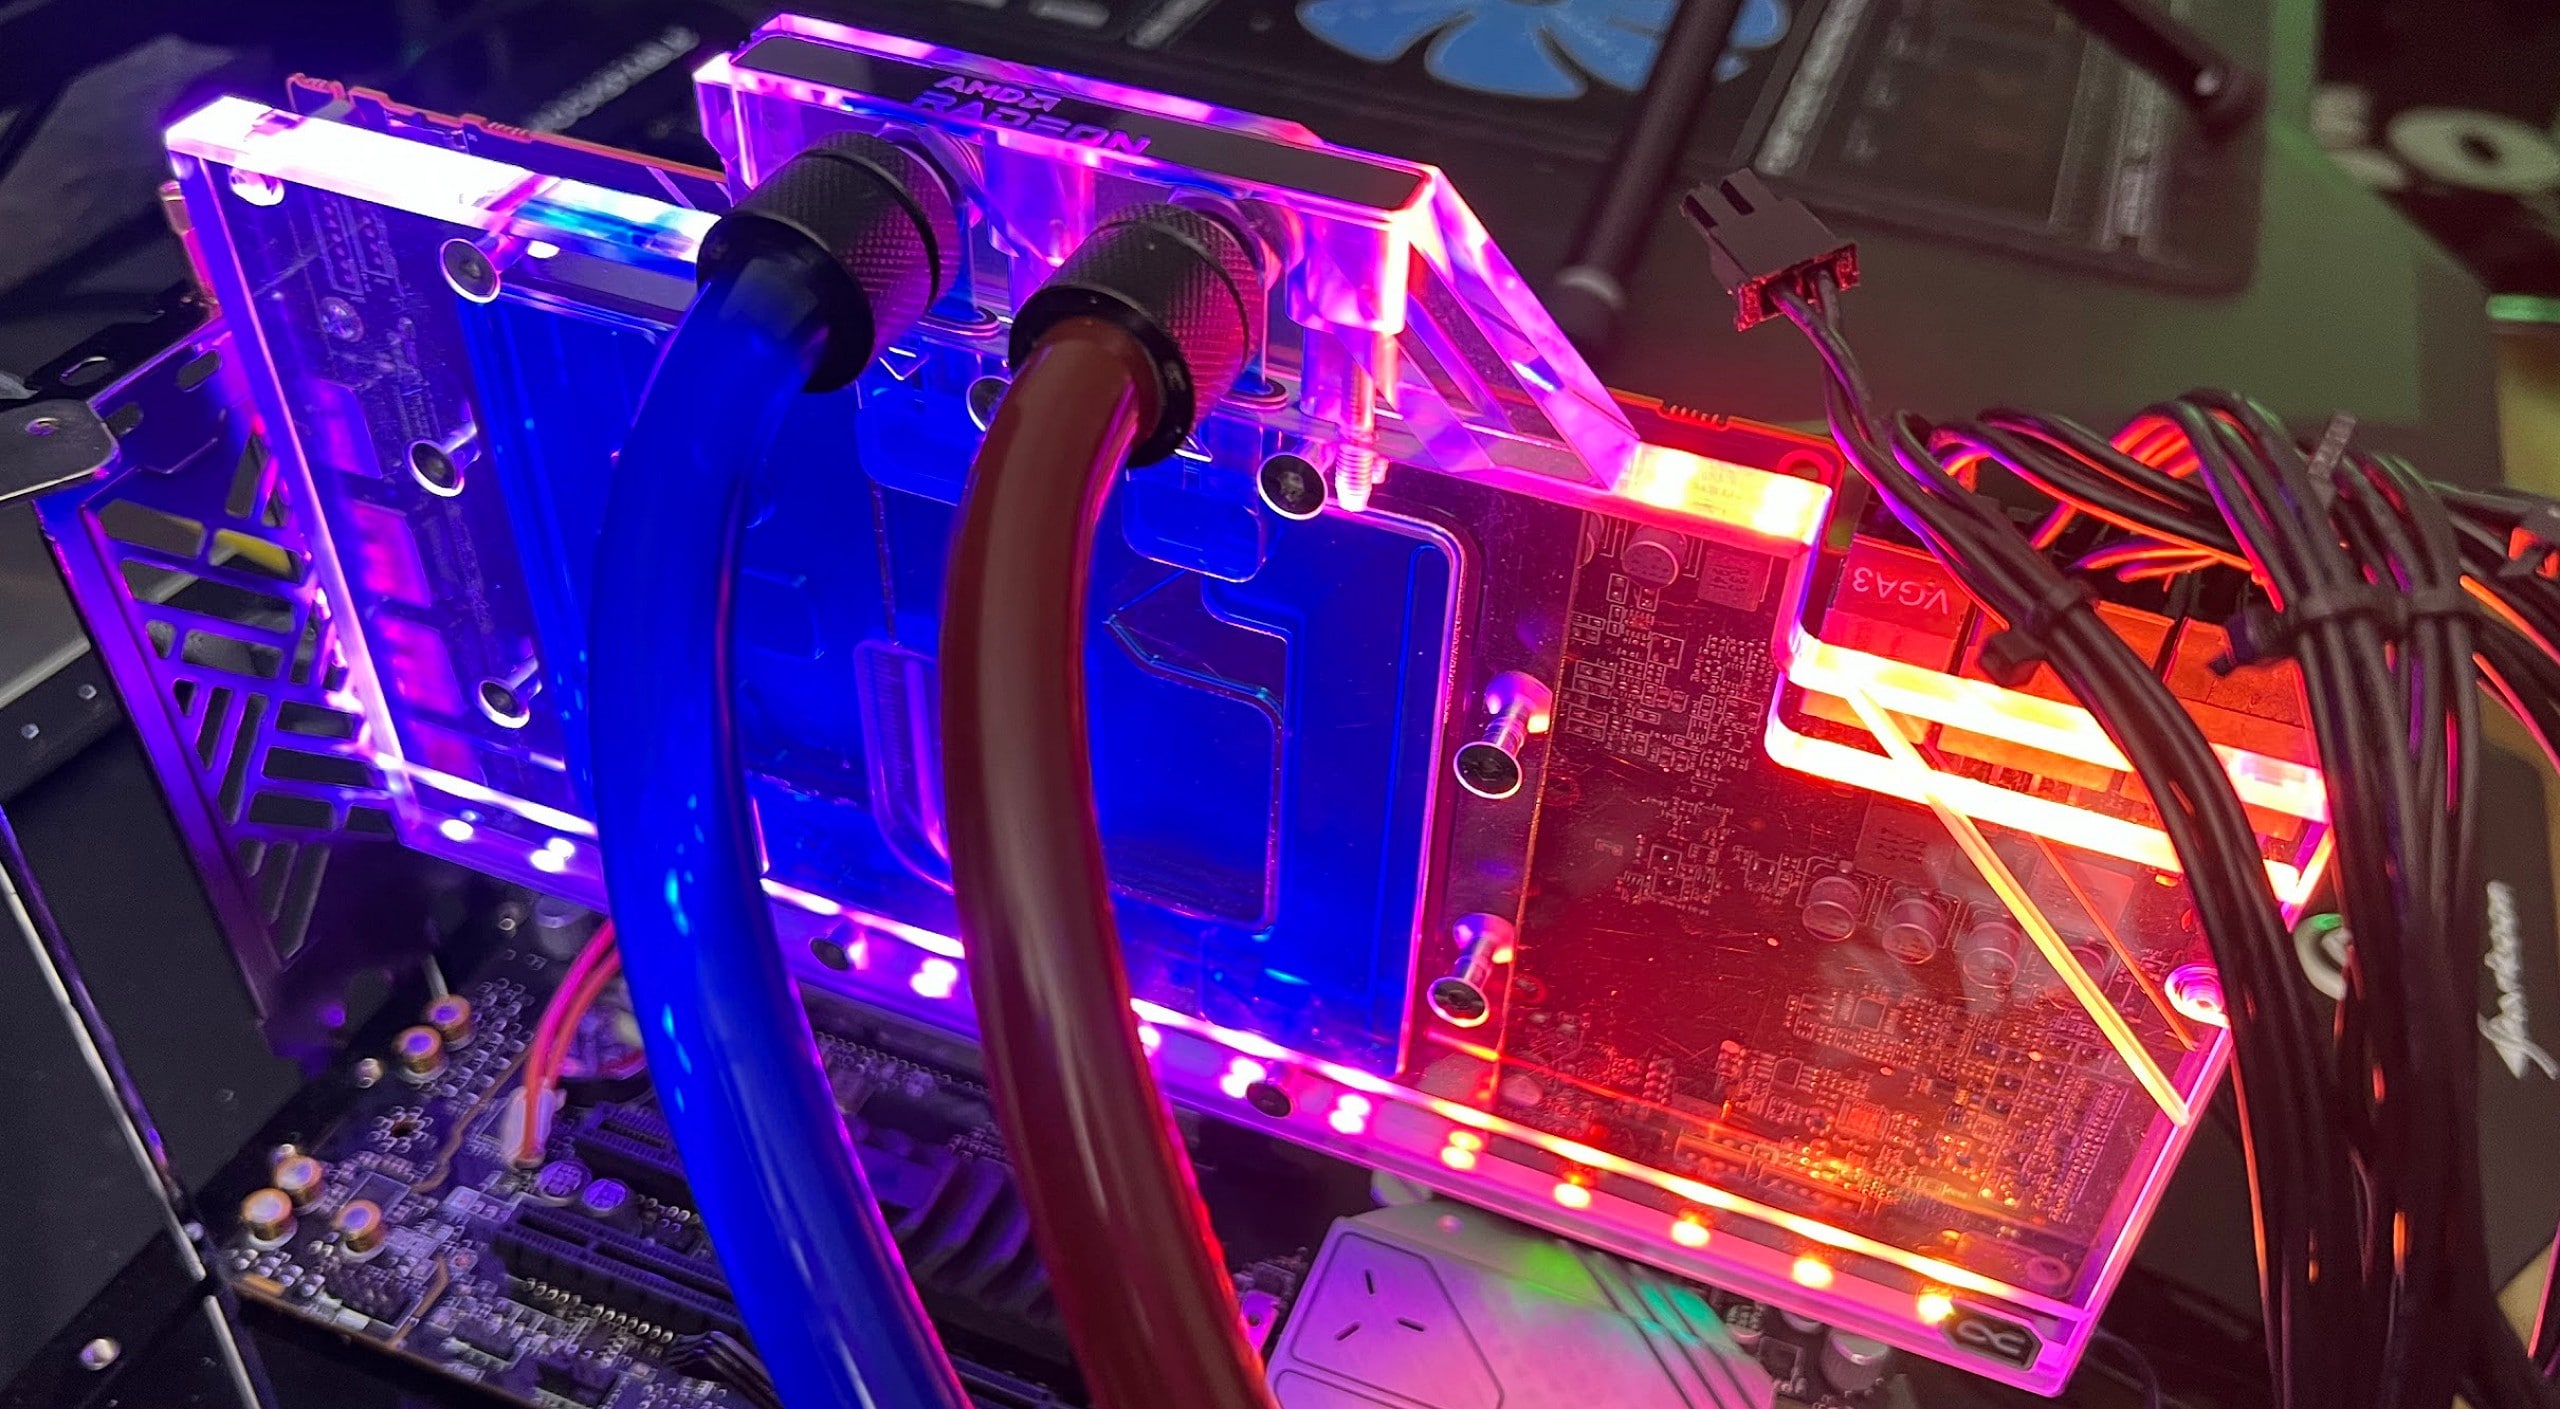
Are the really extremely small gaps based on the manufacturer’s specifications in the end perhaps more of a curse than a blessing, just because you did the math without the host, i.e. NVIDIA? If you have cleaned the PCB as usual, you should first test it with a few thin, if possible always equally high, blobs on the GPU and the memory modules. The picture shows that the slight bending of the GPU package and the circuit board underneath leads to differently sized impressions, which is due to the very uneven contact pressure.
Of course, some things can easily be compensated for with more paste, but if it is even more extreme, then you have to use 0.5 mm pads for the memory modules and up to 1 mm pads for the voltage converters ultra-soft pads with a crumbling factor should be used in order to be able to adapt well to the contours without great resistance. In my case, the package was still good average and it could really have been worse.
I also have an important word to say about thermal paste, because this time it’s not that easy. Either you take the very popular, very thin paste from the accessories and risk that if the layers are too thick, the paste will slowly run away or tear off when it dries out due to the curvature of the chip and package, or you better use an at least equivalent, but more viscous (and therefore more stable in the long term) paste that stays where it was applied.
For this reason, I use Alphacools Subzero, as with the other tests, but it could also have been Gelids GC Extreme or a similar good product. The main thing is not too slippery if the distances are too great.
Then you screw the whole thing together, connect the hoses and you’re done.
Related posts:
 G.Skill ENKI 360 All-in-One compact water cooling in the test – first attempt successful, but with weaknesses
  Office and gaming in one? We are building a work
  Cooler Master Hyper 212 RGB Black Edition – Tried and tested in a new look
  Scythe Ninja 5 in the test – cooling colossus with space problems
  Corsair Hydro Series XG7 RGB water block for the reference design of the NVIDIA GeForce RTX 3080 and RTX 3090 in the test
  Scythe Mugen 5 ARGB Plus in the test – Colorful all-rounder in many variants