Test – Arctic Cooling Accelero Xtreme IV: Specs | Price | CPU Performance| Hashrate| Setup| Config | Advantage (Pros) and Disadvantages (Cons) and other important features that will help you make better
Today marks the start of testing products from Arctic Cooling, very far from being a newcomer to the market and is known for its cooling systems with low noise pollution, whether fans, CPU or GPU cooling and j ‘on the way. I’m not starting with just any product as this is the brand’s premium graphics card cooling system, I named the Accelero Xtreme IV! Particularly designed to replace a too noisy original cooling system, the Accelero Xtreme IV as we will see is not there to put on pearls, a monster in every sense of the word! Offered at a price of around 60 € let’s see what the beast has in the belly.
Specification: Hashrate – Arctic Cooling Xtreme IV
| Arctic Cooling Xtreme IV | |
|---|---|
| Dimensions | 28.8 (W) x 10.4 (H) x 5.4 (D) cm (heatsink) 21.8 (W) x 9.8 (H) x 2.3 (D) cm (rear heatsink) |
| Total weight | 991 g |
| Calloducs name | 5 x 6 mm |
| Fans included | 3 x 92 mm PWM (900 ~ 2000 RPM) |
| Cooling capacity | 300 Watts |
| Compatible graphics cards | Nvidia GeForce: GTX 980, 970, Titan X, Titan (Black), 780 (Ti), 770, 760, 750 (Ti), 680, 670, 660 (Ti), 650 (Ti, Ti boost), 580, 570 , 560 (Ti, SE), 550 Ti, 480, 460 (SE), GTS 450, 250, 240 (OEM), GT 740 AMD Radeon: R9 290 (X), 285, 280 (X), 270 (X) , R7 265, HD 8870, 7870 (XT, GHz), 7850, 6970, 6950, 6870, 6850, 6790, 5870, 5850, 5830, 4890, 4870, 4850, 4830, 3870, 3850, 3690 |
| Guarantee | 6 years |
| Rate | 59,99€ |
The first thing that strikes you when you see the characteristics of the Xtreme IV is the weight, in fact the beast does not cut corners with a total of 991g, almost as much as a big CPU cooler of the Dark Rock 3 Pro or Noctua Nh type. -D15, as much to say that it is really not nothing! The dimensions are also clearly enormous with a length of 28.8 cm for the cooler part and 21.8 cm for the heat sink which is placed behind the graphics card, it’s really out of the ordinary!
To spoil nothing the beast is delivered with 3 original 9.2 cm fans, rotating at a speed ranging from 900 to 2000 RPM (in the 650-700 RPM in practice) which should ensure a very good noise level.
Compatibility level Arctic Cooling has done things well and its cooler will be able to cool Titan X, GTX 980, R9 290X, R9 290 and so on and the best, therefore cards that consume and heat a lot. Of course, “small” card models are also compatible, such as the Radeon R7 270 or GTX 750, but the interest of such a monster on these cards is really very limited.
Arctic Cooling offers its baby at around € 60, which is ultimately rather reasonable for a product of this type, when we see that an MK26 from Prolimatech is negotiating around € 70-75 to which the price must be added. fans. In addition the 6-year warranty is really a significant plus, in case fans break down for example.
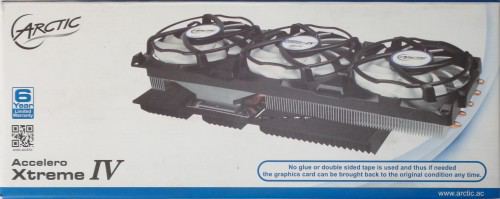
Arctic Cooling, used to transparent plastic boxes, changes the game and offers a box all that is more classic, on the front facade we find a photo of the beast accompanied by the logo of the brand, the model as well as a logo showing a 6 year warranty and a little message stating that there is no glue or double-sided sticker to use for installation, which is always good to know if the urge comes. remove the cooling system.
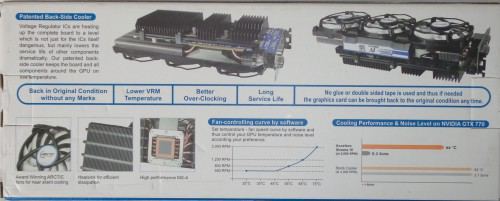
At the back we are entitled to 2 photos of the mounted product (what a monster), as well as a listing of the main strengths of the beast.
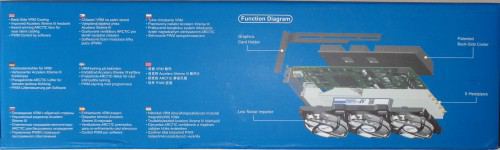
An exploded view of the system installed on one side.

On the other side, the technical specifications of the beast, maximum dissipation (300 Watts), number of callpipes and fins, fans included, a listing of compatible graphics cards (up to the R9 290X at AMD and GTX Titan at nVidia , the list is not up to date, however, you have to see directly on the site) as well as the contents of the box.
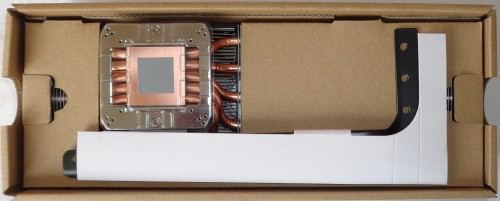
Once the box is open we fall on a cardboard, a fixing bar to support the graphics card is in the foreground placed on the cooler itself.
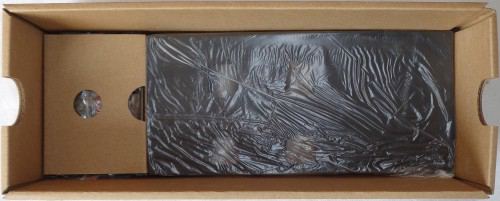
Under the cooler box the large rear cooling plate in its plastic bag next to a small piece of cardboard containing the remains of the bundle.
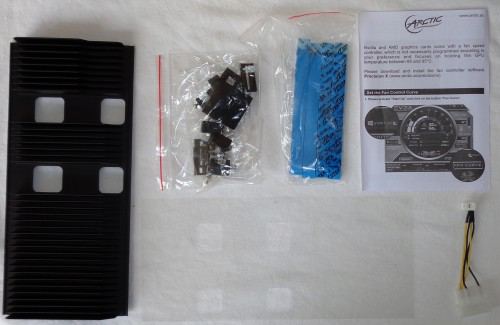

The bundle consists of:
- 1 x ventirad Arctic Cooling Accelero Xtreme IV
- 1 x rear cooling plate
- 4 x 10 cooling pads for the back of the graphics card (the blue bands)
- 1 x adaptateur Molex -> 12V ou 7V
- 1 x plastic sheet to be placed on the back of the graphics card to avoid short circuits
- 1 x support bar
- The necessary screws
As we can see the bundle contains everything you need to mount the cooler as it should, even the support bar which will allow the graphics card to hold in the case without it twisting, which is in the end really great when you know how they can tilt when a cooler is installed. There’s really nothing missing, except maybe a little tube of thermal grease (even though it’s preinstalled directly on the cooler).
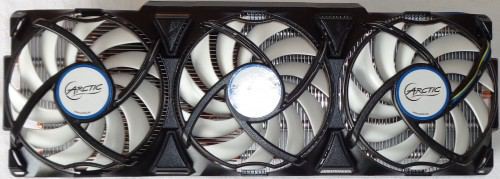
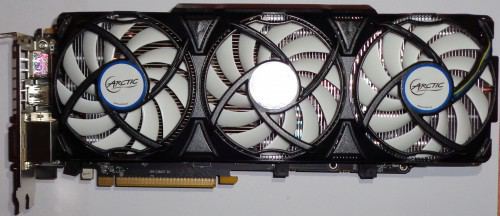
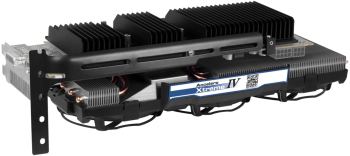
Here is the beast! The least that we can say is that it has a transom, 3 fans of 92mm for a total length of 28.8 cm, Arctic Cooling did not do in the lace!
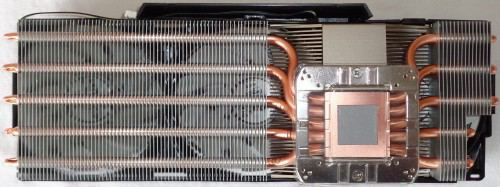
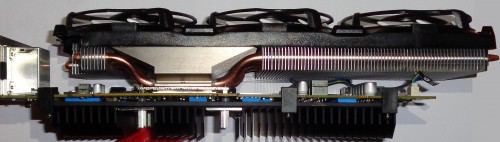
Once again Arctic Cooling didn’t do things by halves, 5 6mm thick callpipes, 83 aluminum fins, copper base and all the stuff. The build quality is very good, even if we do not reach the level of finish of a Prolimatech MK26 for example, but the price is not the same and Arctic Cooling provides 3 original fans 🙂

The thickness is not left out either with 5.4 cm, it will be necessary to have space in the PC! To be sure not to forget what you are buying, you will find the model written on the edge!
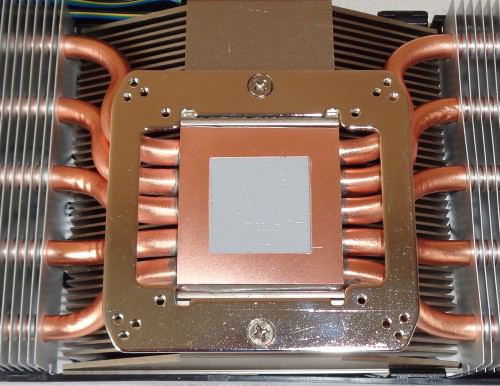
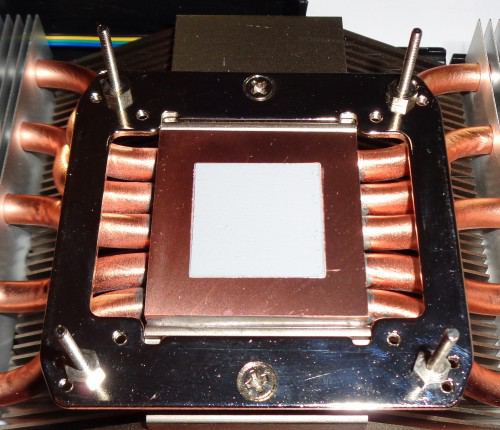
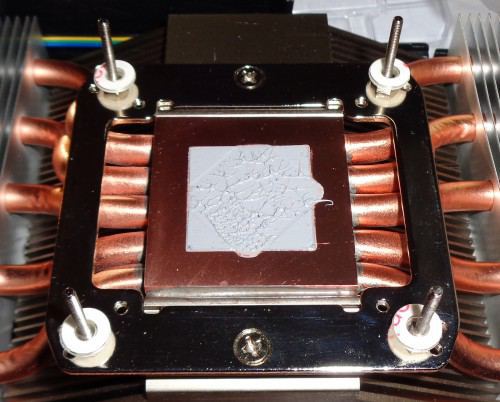
The base is copper, no mirror finish here however, a thin layer of thermal paste is pre-applied so you don’t have to do anything!
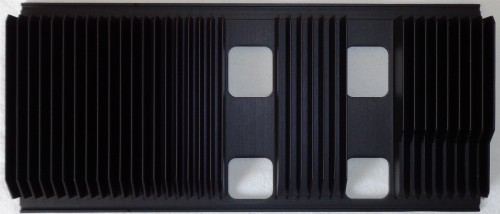
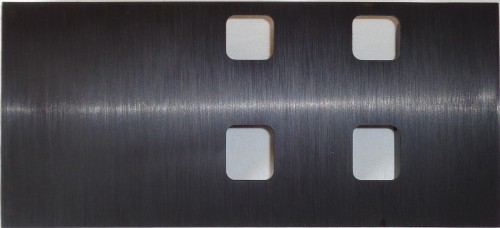

A quick note about the rear cooling plate, which is quite honestly also quite huge, 2.3 cm thick, 21.8 cm long and 9.8 cm wide, all in aluminum! It will be used to dissipate the heat produced by the various components, such as VRMs, memory and other components liable to heat up, Arctic Cooling has made the choice to cool all this little world at the back of the card and therefore has done so. ‘dead end for small radiators to be installed at the front.
The fateful moment has arrived! Changing the cooling system of a graphics card can be perilous, depending on the product to be installed (I wrote an article here on this subject). Before starting, please note that in most cases the change will result in the end of the warranty of your graphics card, and that I accept no responsibility for any damage that the installation of the Accelero Xtreme IV may cause if you follow my installation. !
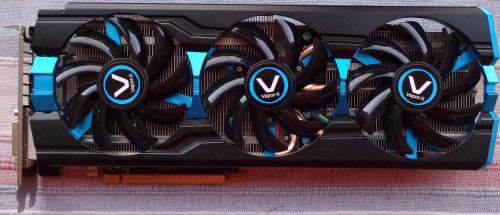
Today’s guinea pig will be the R9 280X VaporX TriX from Sapphire (tested here), a card with a rather high consumption that will be perfect! The original cooler is already very good, we will see how the Accelero Xtreme IV takes care of the small R9 280X!
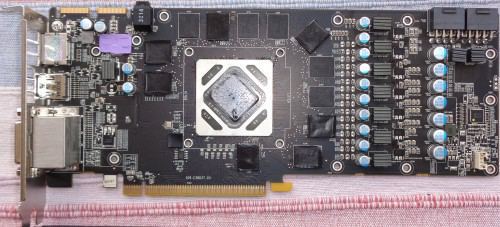
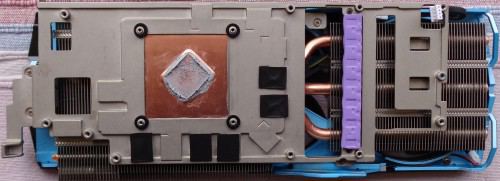
First of all you have to get down to removing the original cooler, nothing complicated, just remove all the screws on the back and gently remove the cooler.
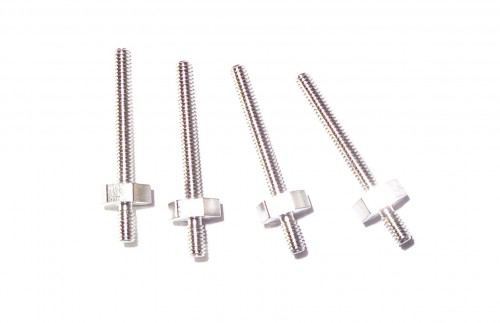
The first thing to do is take the above screws, look at the hole spacing on the graphics card and attach them to the cooler, like this:
Then you have to place the transparent plastic washers over the screws, like this:
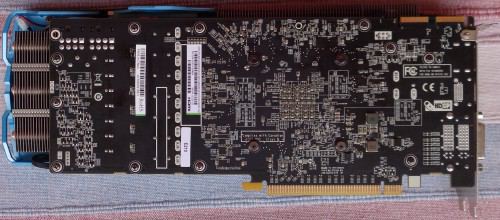
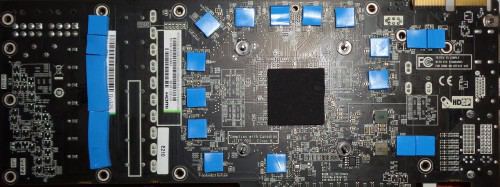
Now let’s take care of the thermal pads to be placed on the back of the graphics card, we must place them behind the hottest places (VRMs, memory, and others). The easiest way is to take the original cooler and see the places that are in contact with it:
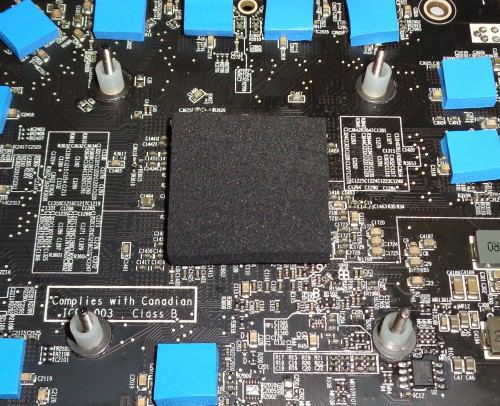
Once these are placed, we put the piece of black foam behind the GPU and just put the graphics card on the cooler, like this:
At this stage, it would be necessary to take the transparent plastic sheet, cut out the places where there are the thermal pads and place it behind the graphics card in order to avoid short circuits, I did not find it necessary to do it on the R9 280X VaporX TriX, so it will not be put!
Then place the plastic spacers on the screws, like this:
Let’s place the aluminum heatsink behind the graphics card now, like this:
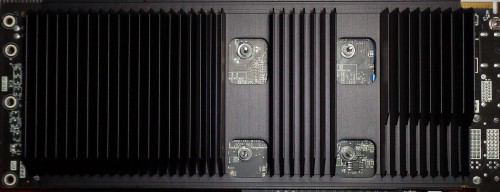
Now you have to place the fixing plates and fix them, using the nuts provided:
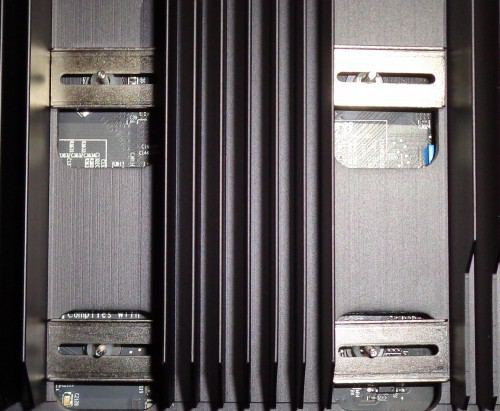
Now comes the somewhat difficult part, attaching the cooling plate to the card, for this there are 6 species of plastic hooks of 2 different kinds, as we can see:
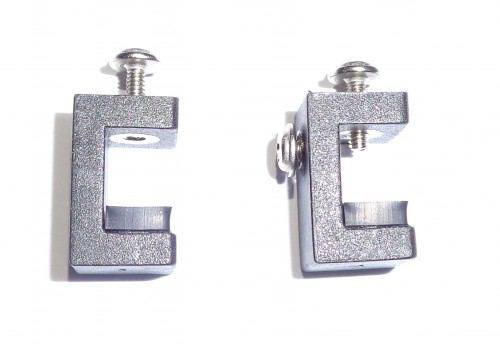
Those like the one on the left are placed on the side of the motherboard, while the others (those with 2 screws) are placed on the side of the side panel of the case (the additional screw will be used to secure the graphics card to the bracket).
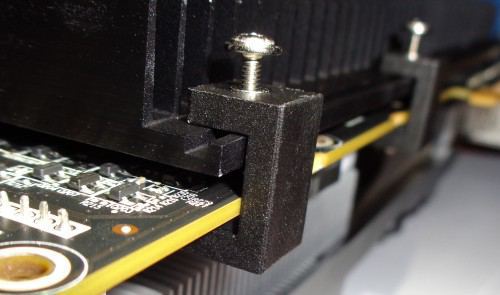
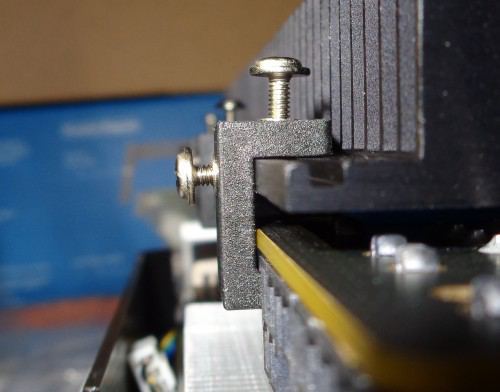
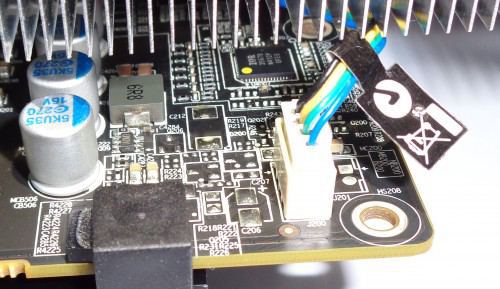
Note that you must really pay attention to the location of these hooks, they can conflict with the various components of the motherboard (such as a radiator, the graphics card socket etc … So take a look around the owner before to place it under penalty of having to move them several times (like me!) Once the hooks have been placed, simply connect the fans to the graphics card, or to the adapter supplied depending on your graphics card.
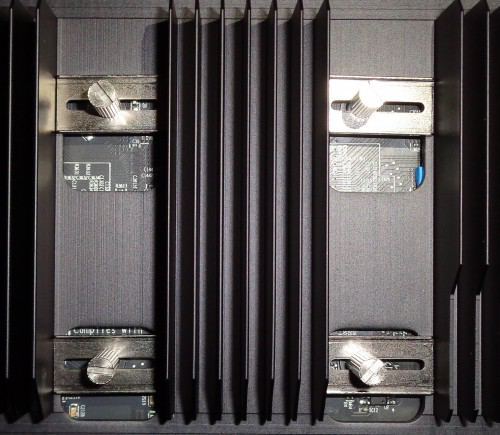
Now all you have to do is secure the hooks by screwing them in, and voila!
As we can see the beast is really monstrous, the R9 280X VaporX TriX equipped with the Accelero Xtreme IV takes up a lot of space! So much space that it was not possible to install it on the test motherboard equipped with the Noctua NH-D15! Note that the rear radiator takes more than one expansion slot, so even with an available slot between the cooler and the graphics card everything gets stuck! A word of advice, if you ever opt for the Accelero Xtreme IV, pay close attention to the components you choose with, in particular the motherboard and the cooler!
The test platform
The configuration used during the tests is as follows:
- Processor : Intel Core i4670K @ 4 Ghz
- Graphics Card : Sapphire R9 280X VaporX TriX
- Motherboard : Gigabyte Z87-UD5H TH (tested here)
- Memory : Kingston HyperX Fury 2 x 4 GB 1866Mhz (tested here)
- Disque dur: WD Raptor 150 Go
- Power supply : be quiet E9 580CM (tested here)
- Operating system : Windows 8.1 64bits
The test protocol
The temperatures will be read after 30mins of FurMark 1.13 which should correspond to the maximum temperature achievable by the graphics card in extreme conditions.
For the purposes of the noise pollution test, the coolers will be tested twice:
- The fans connected in PWM managed by the graphics card
- Fans connected in PWM managed by MSI Afterburner via a custom ventilation profile
As we will see, since the ventilation is not the same as the original cooler, the temperatures of the different components will be changed, particularly for VRMs, which is why a personalized ventilation profile will be used.
The temperatures
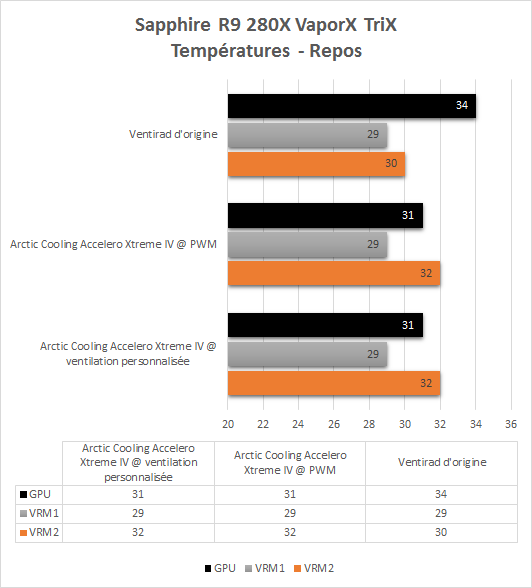
At rest, no particular problem, the GPU loses a few degrees when going from 34 ° original to 29 °, which is a good thing but there was already no problem with the original cooler. The VRMs for their part gain a few degrees, the VRM1 remains at 29 ° while VRM2 goes from 30 to 32, nothing too bad, we will have to see what this gives in load, and it’s right away!
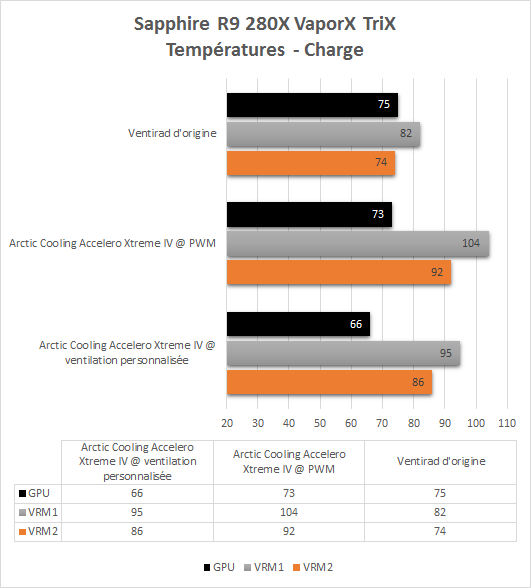
First of all at the level of the GPU the Arctic Cooling Accelero Xtreme IV proves to be very efficient, the original cooler of the Sapphire VaporX TriX being already very good we gain a few more degrees, in PWM mode managed by the graphics card we go from 75 ° to 73 ° while with a personalized ventilation profile we gain another 7 ° to fall to 66 °! Note that the profile I created does not run the fans fully so there is still room.
The thorny point on the other hand, and what prompted me to create a custom profile is the temperature of the VRMs, as you could imagine the cooling from the back of the card and without a radiator directly on them does not help. not compared to a well-studied original system. Indeed with the TriX cooler the VRMs go up to 82 ° and 74 °, which is very honestly excellent, with the Xtreme IV installed we still climb to 104 ° and 92 °, in other words the temperatures are not alarming because these small animals can take 130 ° without flinching but they might as well keep them a little better cooled. The personalized profile lowers the temperature of these little animals to 95 ° and 86 °, which is already more reasonable, even if not at the level of the TriX cooler,
Noise pollution
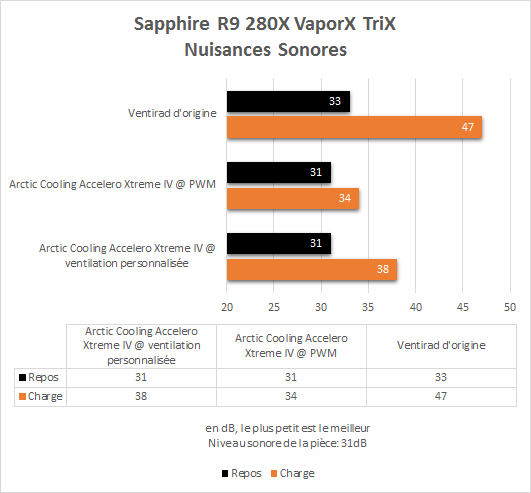
Ambient sound level: 31dB
The point that usually pushes people to change the original cooler, noise pollution, and well as you can see on the graphic Arctic Cooling offers us a solution that is not there to thread pearls! When the original cooler goes up to a noisy 47 dB, the Accelero Xtrem IV is content with 34 dB! At this stage it is very clearly silent and will not be heard in a configuration, even with a PC designed for silence. As seen above, the custom profile cools the GPU and VRMs better, so noise levels rise to 38 dB, which is still light years from the original cooler.
Note that the fans at rest rotate at a speed of about 650 RPM, they go up to about 1000 RPM in PWM and about 1500 RPM with the personalized profile. There is still some margin knowing that the theoretical maximum is 2000 RPM (about 2100 in practice).
Here we are at the end of this test, what about the Arctic Cooling Accelero Xtreme IV?
Anyone looking to make their “gaming” PC silent knows that the graphics card is one of the hardest components to silence as it gets hot, and of course, when you say heat, increase the speed of the fans in the end. end up with a machine that is not as quiet as expected. Arctic Cooling is part of one of those companies that wants good for your ears and as much to say that with the Accelero Xtreme IV the bet is really successful! The performance is excellent even if you have to pay attention to the temperature of the VRMs which are cooled via the aluminum plate on the back of the card and the noise pollution is simply exceptional and the beast can silence a “big” graphics card. without the slightest worry.
The performances and the very low sound level come with some concessions that said, it will be necessary to have a lot of space in the tower but also around the card (1 Pcie port minimum above, plastic clips to put according to the components of the motherboard, and 3 slots below) and the assembly is really not easy even if not complicated (patience is required!).
The price is very good for a product of this type when we see the competing solutions (the Prolimatech MK26 not to mention it) with its 60 €, including everything you need to set up the Xtreme IV without worries (as well as 3 very good fans). It will be a perfect candidate for a silent gamer setup.
Advantages
- Silence
- Performances
- Build quality
Disadvantages
- Montage
- Size / Compatibility with components
A big thank you to Arctic Cooling who allowed me to do this test.
Where to find the Arctic Cooling Xtreme IV?
Related posts:
 7-nanometer Nvidia GPU, TSMC will handle most of the production
  ASRock X299, a new BIOS allows you to install 2 TB of memory
  MSI Prestige X570 Creation Review: Test | Specs | Hashrate
 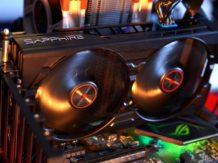 Radeon RX 5500 XT, PCI Express 3.0 castrates performance?
  An overclocker ran 1TB of RAM on an X299 motherboard limited to 256GB
  Best Review 2021: MSI MPG X570 Gaming Edge WiFi Under $250 ($200)