


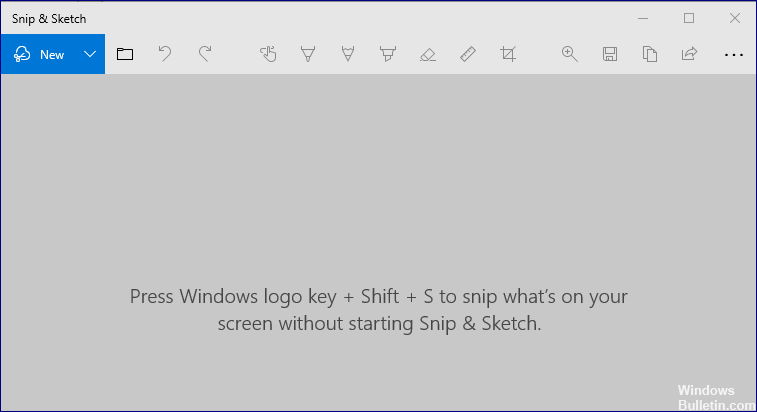
Windows 11: Snipping tool not working (Bug Fix): OneNote Shortcut + Download- Snipping Tool is a proprietary Windows screen capture tool that also allows you to edit screen captures. You can start Snipping Tool from Windows search menu -> Snipping Tool.
To update: Stop getting error messages and slow down your system with our optimization tool. Get it now at is the link
It works fine, but if you use the new “Windows key + Shift + s on your keyboard” key combination, you can use it to create a screenshot. But it does not allow you to edit or save this screenshot.
In this guide, you will learn how to fix this problem on your computer in a few easy steps.
What is the reason why the Windows Snipping Tool shortcut is not working properly?

Most of the time, programs like Snipping Tool are unresponsive because there is a temporary error in the application. You can easily solve this problem by restarting the Snipping Tool.
If you are unable to use the Windows shortcut for the Snipping Tool on your computer, it may be due to the Focus Assist feature. You can solve this problem simply by disabling Focus Assist on your computer.
Temporary errors, such as Snipping Tool error, can be caused by corrupted files on your PC. A quick and easy way to remove these corrupted errors caused by unwanted files is to use a reliable PC cleaner.
How to troubleshoot the Windows “Snipping Tool” shortcut not working
October 2021 update:
Now you can avoid PC problems using this tool, such as protecting against file loss and malware. Plus, it’s a great way to optimize your computer for maximum performance. The program fixes common errors that can occur on Windows systems with ease, without the need for hours of troubleshooting when you have the perfect solution at your fingertips:
- Paso 1: Download PC Repair & Optimizer Tool (Windows 10, 8, 7, XP, Vista – Microsoft Gold Certified).
- Step 2: Click “Start scan To find Windows registry problems that could be causing problems on the PC.
- Step 3: Click “Repair everything” To solve all the problems.

Check the properties of the shortcut key
- On your desktop, right-click the Snipping Tool icon and select Properties.
- If there is no shortcut on the desktop, type Snipping Tool in the search box.
- Right-click on the Snipping Tool icon and select Open File Location.
- Right-click on the Snipping Tool icon and select Properties.
- In the Properties window, click the Shortcut tab.
- If you see None in the Keyboard shortcut: field, it means that you have not defined a shortcut to access the tool.
- Press None and then press any key on your keyboard.
- Note that you cannot use the Windows + S key combination because it is already reserved for something else.
- Click Apply and OK to save your changes.
- Close the Properties window and press the key combination you assigned to run the Snipping tool, and you should be able to access the tool without any problem.
Use the new Crop and Draw tool
- Microsoft is trying to replace the Snipping Tool with a new app called Snipping and Sketching.
- That is why Microsoft has provided the Shift + Windows + S key combination for the new Snip tool.
- Press the key combination Shift + Windows Key + S, and the new Crop and Sketch tool will be available to you.
If you don’t want to use the long Shift + Windows + S key combination to open the Crop and Draw tool, you can use the PrtSc (Print Screen) key.
Do the following steps:
- Click Start and select Preferences.
- Click Accessibility.
- Under Interaction, click Keyboard.
- Scroll down to the Print Screen shortcut and check the Use PrtScn button to open the input screen option.
That’s it. Pressing the PrtSc key on the keyboard will open the Snipping Tool.
Frequent questions
- Press the Windows key and open Settings.
- Then select Applications and expand Snip & Sketch.
- Now open Advanced Settings and click Exit.
- Then check if the problem is solved.
- Otherwise, repeat steps 1-3 to open Snip and Sketch’s advanced options.
To open the Snipping Tool, press the Start key, type Snipping, and press Enter. (There is no shortcut key to open the Snipping Tool.) To select the crop type, press Alt + M, then use the arrow keys to select Freeform, Rectangular, Window, or Full Screen, then press Enter.
How do I defrost the compression tool? You can close the compression tool by pressing ALT + TAB. It will show all open windows and then you can choose to close the application.
If the Snipping Tool isn’t working properly, such as the Snipping Tool’s shortcut, eraser, or pencil isn’t working, you can exit the Snipping Tool and start it again. Press “Ctrl + Alt + Del” on your keyboard to display the Task Manager. Find SnippingTool.exe and close it, then restart it.
Snipping tool not working on Windows 11? How to fix the error
Sadly, the Snipping Tool hasn’t worked for many users lately, especially those who recently upgraded to Windows 11 from Windows 10, as they are getting this long error: ‘This application cannot be opened. One problem with Windows is that it prevents Screen Snipping from opening. Updating your PC might help fix it. ‘
Snipping Tool Broken Problem – How to Fix It
Image: Twitter
Here’s how you can repair Snipping Tool on your Windows 11 PC. You can use the first two fixes found by the community or use the last method suggested by Microsoft. Let us begin.
Solution n. # 1: use the older version of the app
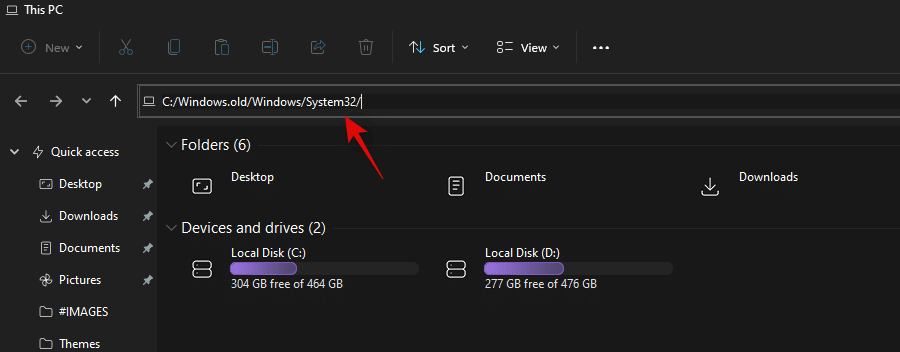
If you recently upgraded from Windows 10, you can use the older version of Snipping Tool that will be available on your boot controller. Windows stores your previous installation for the first 10 days from the date of your update. You can use this to your advantage to use the older version of Snipping Tool on your PC.
Navigate to the following route to get started.
C:/Windows.old/Windows/System32/
Find ‘SnippingTool.exe’ in the current folder and copy it to your clipboard.
Navigate to the following route now.
C:/Windows/System32/
Paste the file that you had copied to your clipboard earlier.
Afterwards, copy the file named SnippingTool.exe.mui from the path given below.
C:Windows.oldWindowsSystem32en-US
Paste the copied file into the following folder.
C:WindowsSystem32en-US
Replace each and every file if prompted.
Try using the Windows + Shift + S keyboard shortcut now and click + New. The Snipping Tool should now be working as intended and the message ‘This app cannot be opened. One problem with Windows is preventing Screen Snipping from opening. Updating your PC might help fix it. ‘ error.
Solution n. # 2: reinstall the Snipping Tool
If the above solution didn’t work for you, you can try reinstalling Snipping Tool. Follow the guide below to get started.
press Windows + S On your keyboard, find PowerShell and click ‘Run as administrator’.
Now type the following command and press Enter on your keyboard.
get-appxpackage *Microsoft.ScreenSketch* | remove-appxpackage
Snipping Tool will now be removed from your PC. We recommend that you restart your PC at this time. Once restarted, start PowerShell as administrator again and run the following command.
Get-AppXPackage *Microsoft.ScreenSketch* -AllUsers | Foreach {Add-AppxPackage -DisableDevelopmentMode -Register "$($_.InstallLocation)AppXManifest.xml"}
Once the application is installed, you can close PowerShell and use the Snipping Tool as intended. The application should now work properly on your PC.
Solution n. 3: last resort: upgrade your PC
Surprisingly, this is the official solution issued by Microsoft to get Snipping Tool working on your system again. Follow the guide below to update your PC.
press Windows + iand click on ‘Windows Update’.
Click on ‘Advanced Options’.
Now click on ‘Recovery’.
Click on ‘Reset PC.
Select ‘Keep my files’ and follow the instructions on the screen to update your PC.
We hope this guide has helped you get the Snipping Tool back up and running on your PC. If you have any issues or have any questions, feel free to leave them in the comment section below.
Related posts:
 How to access Steam games without an internet connection
  How to view FPS with Xbox Game Bar in Windows 10: Steps Made Easy
  Hacked account? How to check and remedy
  How to make video calls from WhatsApp Web
  How to increase the RAM memory of a desktop or laptop + Tips and Tricks
  How to organize your YouTube subscriptions into categories
+ Tips and Tricks
How to organize your YouTube subscriptions into categories
+ Tips and Tricks


