


Disable automatic connection to a particular Wi-Fi network in Windows 11
There is an option in the Windows operating system that will remember your Wi-Fi connectivity password and connect to that Wi-Fi network as long as it is in range automatically. This is very useful when the wi-fi network is yours or you don’t mind connecting it every time. But imagine you are using someone else’s Wi-Fi for once or at the public coffee shop, then you may not want to automatically connect to that Wi-Fi network next time. So there is no point in remembering your password on your system. So, in this post, we will guide you on how to disable Wi-Fi network connection automatically on your Windows 11 system.
How to disable connection to a Wi-Fi network automatically in Windows 11 via Action Center
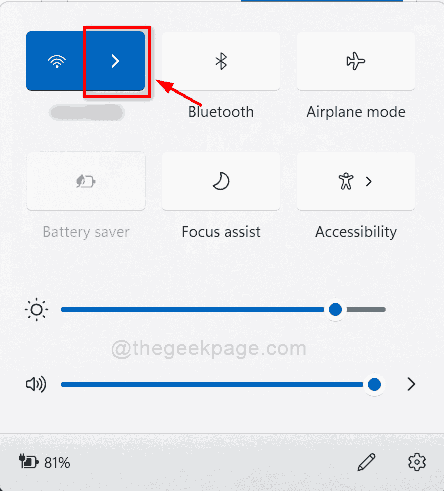
Step 1: Press Windows + A keys together on your keyboard to open Action Center.
Step 2: Then, click the right arrow button on the Wi-Fi icon present in the Action Center as shown below.
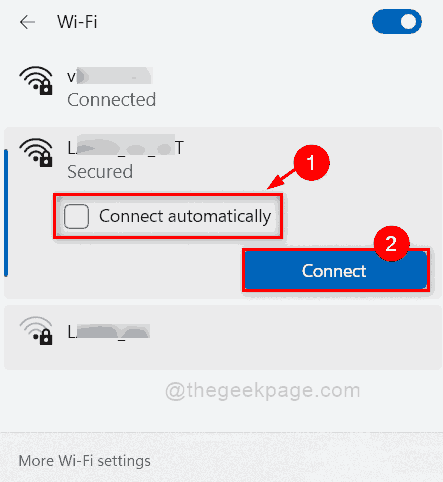
Step 3: Select the Wi-Fi network you want to disable to connect automatically.
Step 4: make sure to uncheck the Connect automatically check box, and then click Connect to continue.
NOTE: – This ensures that the connection to this Wi-Fi is made only once and that the system does not remember the password.
That is all.
How to disable connection to a Wi-Fi network automatically in Windows 11 using the Settings app
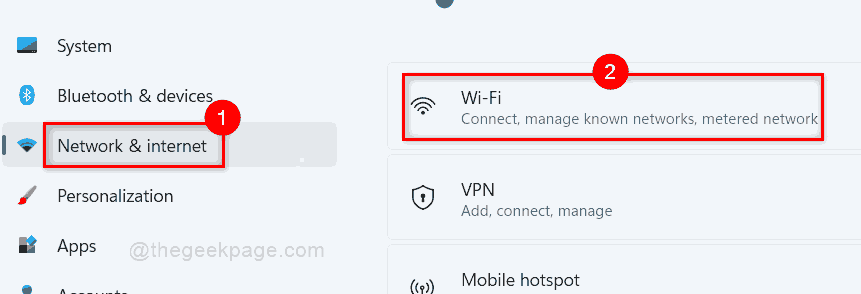
Step 1: Press Windows + I keys together on your keyboard to open Settings app.
Step 2: click Red and Internet option in the left panel of the Settings app.
Step 3: select Wifi on the right side of the window as shown in the following screenshot.
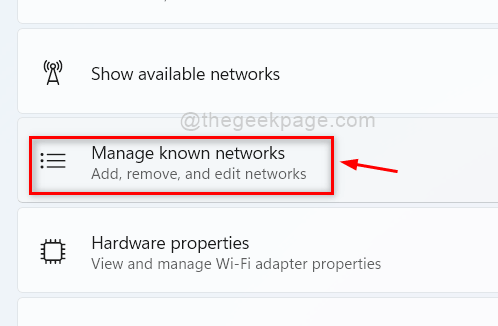
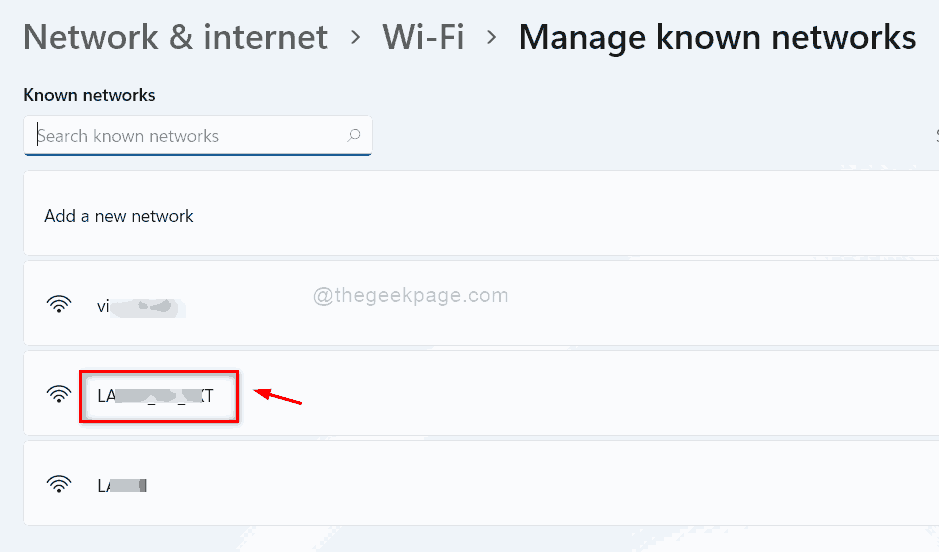
Step 4: click Manage known networks options on the Wi-Fi page as shown below.
Step 5: Select the Wi-Fi network that you do not want your system to connect to automatically.
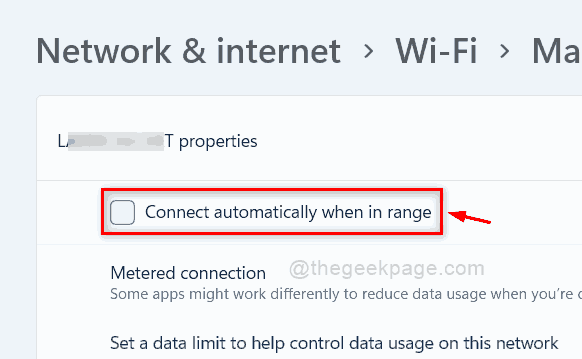
Step 6: Make sure the checkbox Automatically connect when in range is cleared. If it is checked, uncheck it.
Step 7: close the Settings app.
This will not allow the system to connect to this Wi-Fi network automatically from now on. You can do the same for all Wi-Fi networks on your system that you don’t want to automatically connect to.
That’s it guys.
I hope this post is informative and helpful.
Let us know in the comment section below.
Thank you for reading!
Related posts:
 How to access Steam games without an internet connection
  How to view FPS with Xbox Game Bar in Windows 10: Steps Made Easy
  Hacked account? How to check and remedy
  How to make video calls from WhatsApp Web
  How to increase the RAM memory of a desktop or laptop + Tips and Tricks
  How to organize your YouTube subscriptions into categories
+ Tips and Tricks
How to organize your YouTube subscriptions into categories
+ Tips and Tricks


