


Edit all screenshots: remove bars
– Take a look at these tips, tricks, and solution you can use to make your life much easier with your devices whenever problems arrive and complications which you may find difficult to deal with.
When taking a screenshot on Android, the most important information within that image is generally always what is between the status bar (or notification bar) and the navigation bar. These two items can be useless to display in most cases. Being additional details in the image, they also make it a larger size.
If you don’t want distracting elements in your screenshots you can use the demo mode or the full screen mode of Android. If your captures are already made, you can use ScreenshotCleaner App, an application for Android that can help hide the status and navigation bars of one or multiple screenshots that are saved on the Android device. As it is not difficult to do this manually for a single screenshot, its most interesting utility lies in being able to batch edit and “crop” these two bars.
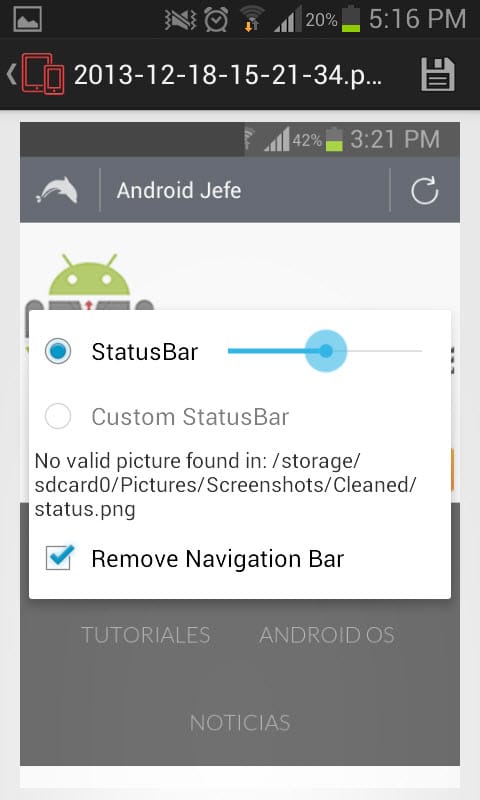
The application offers a slider control that allows you to completely or partially erase the items on the status bar. By default, in the app preferences, the configuration defines that only the clock, the battery icon and cellular connectivity will be kept. The rest of the elements of the bar will be eliminated. Anyway, before applying the edit you can move the slider to choose what to hide and what not.
The application completely removes the navigation bar in the screenshots.
As I said, the really useful thing about this application is the one that allows you to simultaneously delete the status bar and navigation of all the screenshots that are saved in the memory of our mobile. It can be done for every image, although I’m really not sure if many people will find this helpful.
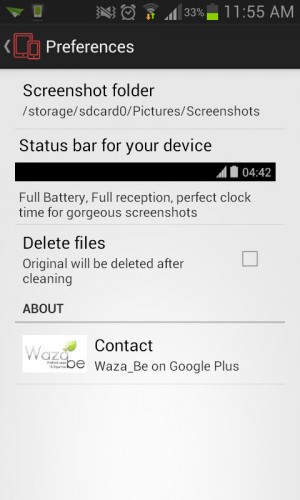
The only downside is that you can only edit one or all images. That is, you cannot make a multiple selection only of the screenshots that interest you. For this, you will first have to save those screenshots in a separate folder (something you can do with a file manager) and then select that folder in the Screenshot Cleaner preferences, option “Screenshot folder”.
In the same settings you have the option to delete the original images after applying the edit.
Conclution
This is a very useful application for bloggers or those of us who do Android tutorials, who need something like this every day to make it easier to edit the screenshots of the reviewed applications, or any other explanation within the Android screen.
Descargar Screenshot Cleaner APK: APKPure
Remove Scratches and 6 Things You Didn’t Know From Screenshots
How to capture an entire web page on Android
How to hide the status and navigation bar in Android 4.4 and higher versions (WITHOUT root)
Related posts:
 How to access Steam games without an internet connection
  How to view FPS with Xbox Game Bar in Windows 10: Steps Made Easy
  Hacked account? How to check and remedy
  How to make video calls from WhatsApp Web
  How to increase the RAM memory of a desktop or laptop + Tips and Tricks
  How to organize your YouTube subscriptions into categories
+ Tips and Tricks
How to organize your YouTube subscriptions into categories
+ Tips and Tricks


