


Is the WaasMedic agent consuming too many of your resources and slowing your computer down? This is not malware or virus. WassMedic or Windows Update Medic Service is a legitimate process that runs continuously in the background, tracking and fixing corrupted Windows Update components on your system. Do not worry. Just run these easy solutions to fix the problem on your computer.
Fix 1-Using Registry Editor
You must turn off WassMedic Agent startup.
Stage 1-
1. First, tap the Windows key and on the key R at the same time.
2. Once the Run terminal appears, type “ regedit “And pressure Enter .
IMPORTANT –
A single wrong change in Registry Editor can crash your computer. So it’s MANDATORY for you to follow these steps to create a backup.
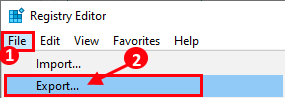
The. After opening Registry Editor, you will need to click “ File ” and then click “ To export “.
B. Save the backup in a safe place.
If something goes wrong, you can easily restore the registry back to its original level.
3. Once the Registry Editor terminal appears, navigate to this location-
Computer HKEY_LOCAL_MACHINE SYSTEM CurrentControlSet Services WaaSMedicSvc
4. On the left side you will notice that there are several values for this service.
5. Then scroll down and double click on the “ Start ” to edit it.
6. Finally, define or value for “ 4 “.
7. Then click “ OK ” to save this change.
This will disable the service on your computer. Now proceed to the second step.
Fix 2-Using Task Scheduler
Task Scheduler can and will automatically start the WaasMedic Agent service the next time you restart your computer.
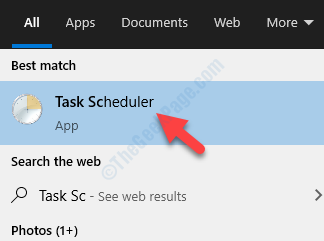
1. First press the keys Windows + S together.
2. Type “ Task Scheduler ” in the search box and click on “ Task Scheduler “.
3. When Task Scheduler opens, go to this location in the left pane.
4. Navigate to this location-
Biblioteca do Agendador de Tarefas-> Microsoft-> Windows-> WaasMedic
5. Now, on the right side, check if there are any tasks scheduled to run.
6. Then right click on the task and click “ disable ” to disable the policy on your computer.
( Example -On this computer, there is a task called ‘ PerformRemediation ‘. So we disable it.)
After doing all that, close Task Scheduler on your computer. So a simple reboot of your device and WaaSMedic will not run on your device again.
Fix 3-Use Windows Update Blocker (Wub)
You can use Windows Update Blocker (WUB) to mainly block Windows Update Medic Service.
1. First, download “Wub” on your computer.
2. After downloading, extract -O.
3. Open the location of the extracted files.
4. Here, double click on “ Wub_x64 ” if you are using 64-bit Windows.
Otherwise, run the application “ Wub ” if your machine is running a 32-bit operating system.
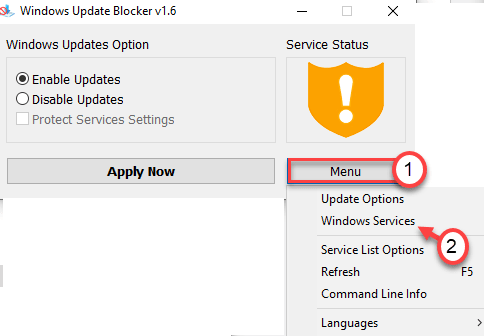
5. After opening the Windows Update Blocker screen, click “ Menu “.
6. Then click “ Windows Services ” in the drop-down list.
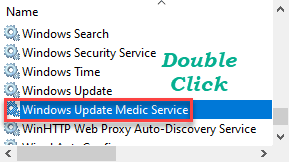
7. Now scroll down the list of services, double click in “ Windows Update Medic Service “.
8. Then click “ Service Name: ” to select it.
9. Right click and click “ Copy ” to copy the service name.
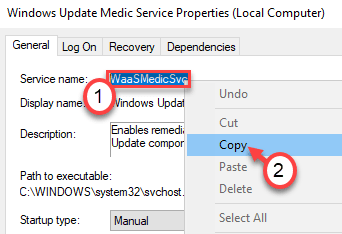
Close the Services screen.
Minimize a janela do Windows Update Blocker.
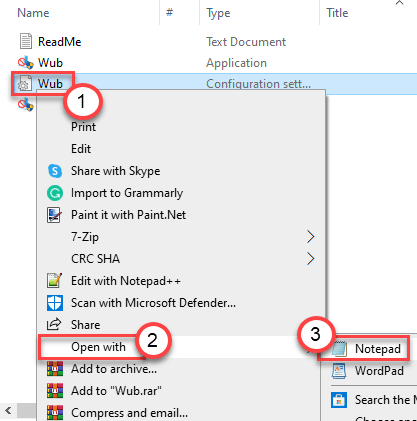
10. Then open the Windows Update Blocker application location.
11. After that, right click on the file “ Wub.ini “, click in “ open with> ” and click on “ Notepad ” to open the configuration file in Notepad.
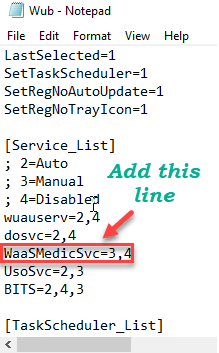
12. Here, scroll down until you see the line ‘ dosvc = 2.4 ‘ in Notepad.
13. Just below the line, paste the name of the copied service and put “=3,4 ” after pasting it.
14. Open Windows Update Blocker minimized.
15. Then click on “ Apply ” to apply these changes.
The WaasMedic Agent will no longer use a large amount of resources. That should have fixed your computer.
[ Observação -Este processo desativará o Agente de serviço do Windows Update Medic em seu computador. Portanto, se houver algum problema com o Windows Update, ele não o resolverá mais. Para habilitá-lo, siga estas etapas-
1. Novamente, clique duas vezes em “ Wub_x64 ” (para Windows de 64 bits).
Caso contrário, execute o aplicativo “ Wub ” (para 32-bit Windows).
2. Agora, basta clicar no botão de opção ao lado de “ Ativar atualizações “.
3. Em seguida, clique em “ Aplicar agora ” para aplicar as atualizações.
Isso ativará o Agente WaasMedic em seu computador.
]
NOTE-
Some users may be prevented from using Task Scheduler on their devices. Continue to use this special technique for using Task Scheduler.
1. Download Portable PSTools on your computer.
2. Just click on “ Download PsTools ” to start downloading the specific tool.

2. After that, extract the zip file to this default location-
C: WINDOWS system32
NOTE –
You must extract the file to the location where the command line pattern is set.
Example-in this case, the command line default directory is in-
C: WINDOWS system32

So we decided to extract the zip file to that specific location.
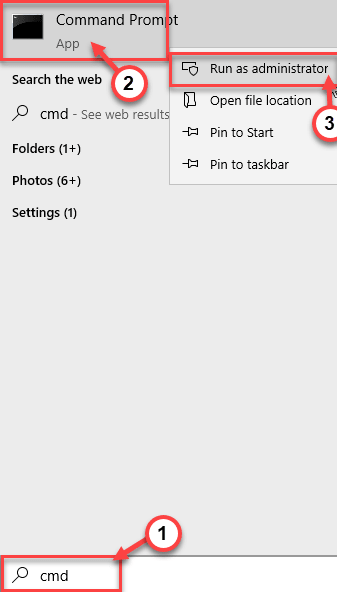
3. Now type “ cmd ” in the search box next to the Windows icon.
4. After that, right click on “ Command prompt ” and click on “ Execute as administrator ” to run the terminal as administrator.
5. Once the command prompt opens, type it this code according to your scenario and press Enter .
psexec.exe-i-s% windir% system32 mmc.exe/s taskschd.msc
Once the command is executed, Task Scheduler will appear on your computer. Now, just disable any task in the WaaSMedic Agent task following the service mentioned before.
Fix 4-Use Disk Cleanup
Unwanted files on your machine can cause this problem.
1. Press the keys Windows + R together.
2. After that, cole this command and press Enter .
cleanmgr/disco baixo
The Disk Cleanup window will open.
3. When the window Disk Cleanup: Drive Selection is displayed, click on “ Units: ” and choose the drive containing Windows 10 (usually the “C:” drive).
4. Then click “ OK “.
Wait a while for your computer to analyze the number of junk files.
5. Now, in the “ Files to delete: ”, tick all the boxes one by one.
6. After that, click on “ OK ” to start the cleaning process.
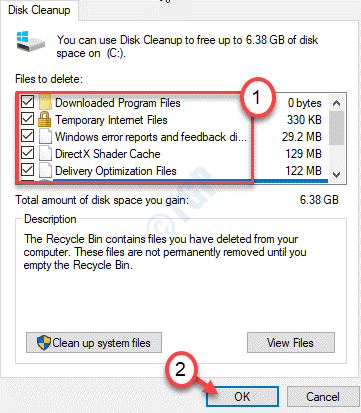
Disk Cleanup will clean all junk files from drive C:
Check if this helps.
Fix 5-Turn DEP on for Waasmedic
You can turn ON Data Execution Prevention on a specific application if it is infected with any malware or viruses.
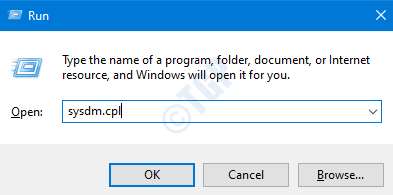
1. First, right click on the Windows icon and click “ To execute “.
2. Then type “ sysdm.cpl ” in the window To execute and click on “ OK “.
3. Then go to the tab “ Advanced ”.
4. Here, you should click on the box “ settings ” in the ‘ Performance ’.

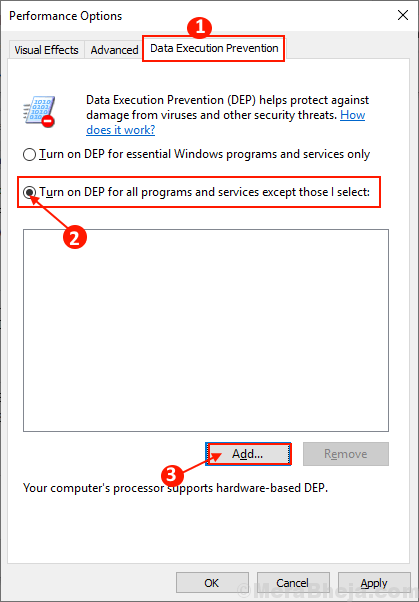
5. In the Performance Options window, go to the “ Data Execution Prevention ”.
6. Then Mark the box “ Enable DEP for all programs and services except those I select: ”
7. After that, click on “ Add… ” to add the specific program.
8. Now go to this location-
C: WINDOWS system32
9. Select “ Waasmedic.exe ” in the list of apps.
10. Then click on “ To open ” to add it to the protection in DEP.
11. After doing this, click on “ Apply ” e “ OK ” to complete the process.
Close everything and open Task Manager. Check if this prevents WaasMedic from using a large amount of resources.
Your problem must be solved.
Related posts:
 How to access Steam games without an internet connection
  How to view FPS with Xbox Game Bar in Windows 10: Steps Made Easy
  Hacked account? How to check and remedy
  How to make video calls from WhatsApp Web
  How to increase the RAM memory of a desktop or laptop + Tips and Tricks
  How to organize your YouTube subscriptions into categories
+ Tips and Tricks
How to organize your YouTube subscriptions into categories
+ Tips and Tricks


