Hive OS supports several popular algorithms, but not every one. For this purpose, we have added a new Custom Miner Integration feature that allows users to add miners that are not included in the OS distribution image . You have the option to either install a pre-built package or create one yourself. But in this guide, we’ll mainly cover the steps required to install a pre-built package.
Installing a custom miner
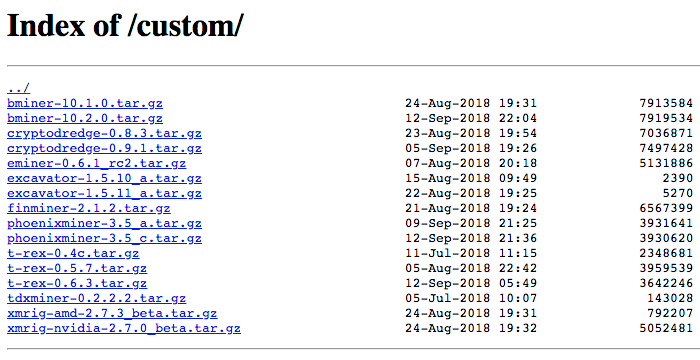
Start by going to the custom miner download page or just copy the url of the file.
To manually install your own archive on the platform, you can download it and unzip it to / hive / custom folder. Please note that even if you copied it locally, you still need the URL for the flight sheet.
Flight sheet setup
We covered the process of creating flight sheets and wallets that you will also need in one of our previous articles , so we will not go into details, assuming that you already know how to do this.
Go to the Flight Sheets tab in your farm’s control panel. In the “Add a new sheet” section, start filling in the following fields:
- Flight sheet name – Use the name that best describes the purpose of the flight sheet. For example, ETH on a nanopool using clymore; flypool zcash on dstm; etc.
- Coin – this works as a filter, you can only see wallets, pools and miners for the selected coin only. For example, if you select ETH, the filter will hide all your pre-created wallets and pools that do not support or are not associated with that coin.
- Wallet – select a wallet for this flight sheet. These are wallets created on the Wallets tab.
- Pool – Select Configure in Miner for Custom Miner.
- Miner – Select “Custom” and then click on “Miner Setup” to specify the parameters set by the user, then fill in the required fields. Please note that each miner may have a different set of parameters and required fields.
Since we are configuring an arbitrary miner, we need to manually configure these parameters using the Settings miner configuration window. Click the “Configure miner configuration” button and fill in the following fields:
- Miner name – use original name. For example: if the name is phoenixminer-3.5_c.tar.gz, then the name should be phoenixminer.
- Installation URL – direct URL where the miner itself is located in the repository.
- Hash Algorithm – Select a hash algorithm.
- Wallet and work template – this will depend on your specific configuration
- Pool URL – The address of the pool as well as specific pool parameters such as passwords, wallets, and ports. Note that we recommend entering values in the following format: WALLET:% WAL%, WORKER:% WORKER_NAME%. Also, all values must be comma separated.
- Pass – x is the default, usually left as is.
- Additional configuration arguments – These are user specific and are optional. Please note that this can be important in some cases, so we recommend reading additional information about your miner.
Click “Apply Changes” and you’re done.
After you are done, click the Create Flight Sheet button.
Example: Adding and Configuring Phoenix Miner
Now that we have shown you how to set up a custom miner, let’s add it in practice by installing Phoenix Miner 3.5c in the Hiveon Pool using the ethash miner algorithm as an example.
In the “Add New Flight Sheet” section, start filling in the following fields:
- Coin – ETH
- The wallet is an example of an ETH wallet we created.
- Pool – Select ‘Configure in miner’ for the ‘Custom miner’ option in the ‘Miner’ field to display.
- Miner – Select “Custom” and then click “Miner Config” to specify the parameters set by the user, then fill in the required fields. Please note that each miner may have a different set of parameters and required fields.
- The name of the leaf is Phoenix on Hiveon
Now we need to configure the miner. Click the “Configure miner configuration” button and fill in the following fields:
- Miner’s name – let’s call it phoenixminer
- Install URL – Add the package URL http://download.hiveos.farm/custom/phoenixminer-3.5_c.tar.gz
- Hash Algorithm – Select ethash from the dropdown list.
- Wallet and Work Template – Enter null as we are using the ETH wallet we already have.
- Pool URL – we will use the Hiveon pool:
POOL: eueth.hiveon.net:4444, WALLET:% WAL%, WORKER:% WORKER_NAME%POOL: eueth.hiveon.net:14444, WALLET:% WAL%, WORKER:% WORKER_NAME% - Pass – set to x
- Additional configuration arguments – in our case, we leave this field blank.
Click “Apply Changes” and you’re done.
How to create your own miner package?
Hive 2.0 supports custom miners that you can “build” yourself, and you will need to implement a few simple scripts to get your miner to work and send stats to Hive. However, we will not describe the process of creating these scripts in this article.
If you don’t see the specific miner you want to use on our custom miners download page, check out the Custom Miner Integration forum thread for more packages our enthusiasts have created for use with the Hive OS.
Alternatively, you can refer to the Custom Integration Miner Readme documentation on GitHub for script templates and examples on how to build and integrate your own miner.
Related posts:
 How to connect to HiveOS using SSH Teleconsole: It’s So Easy It’s That Easy
 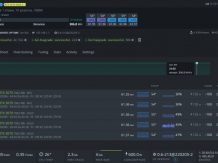 Dual Mining ETH + TON on Hive OS: Overclocking | 2022 Profitability | TONCOIN
  How to set up your Hive OS wallet 2022: ETH+DCR| Config EWBF Zec.mine + Ccminer
  Hiveon ASIC firmware: Cryptojacking | Hashrate Theft | Mining on Hive OS (Safe?)
  Dual mining ETH + TON Ethereum: I TON Coin lolMiner (HiveOS) | Max Loss 2022 Guide
  Dual mining ETH + ALPH: Ethereum I Alephium | T-Rex miner 0.25.0: ETH + ALPH (No LHR)