


How to change storage location in close sharing in Windows 11
Previously, if some user wanted to transfer files / folders to another device, they had to use a pendrive (USB device) for data transfer. Now Windows has a new feature called Nearby Sharing, which allows you to sign in with your Microsoft account and sync with other nearby devices via Bluetooth or Wi-Fi. This is by far the easiest way to exchange data with nearby devices. Users can not only share data, but can also receive files from other nearby devices. If you want to modify the location to save the received files via close sharing, this post will show you how to do it in 2 methods.
How to modify storage location in close sharing in Windows 11 using settings app
Paso 1: press Windows + I keys together to open Settings app.
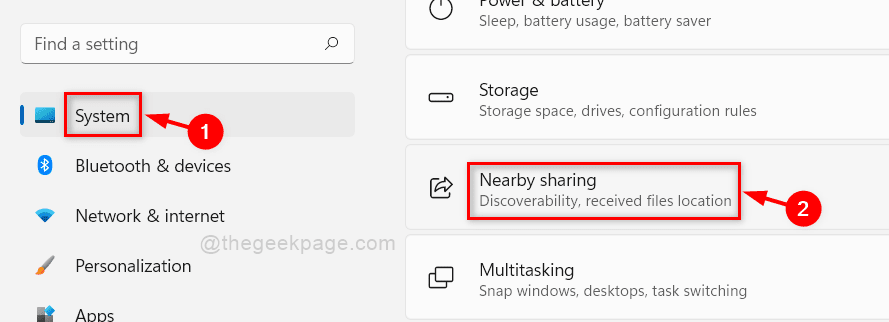
Paso 2: Click System on the left side of the window.
Paso 3: Then scroll down the page and click Share close on the right side as shown in the following screenshot.
Paso 4: Click on Change button to modify it.

Paso 5: Then select the folder in the pop-up window where you want to save the files received via close sharing (for example: Desk)
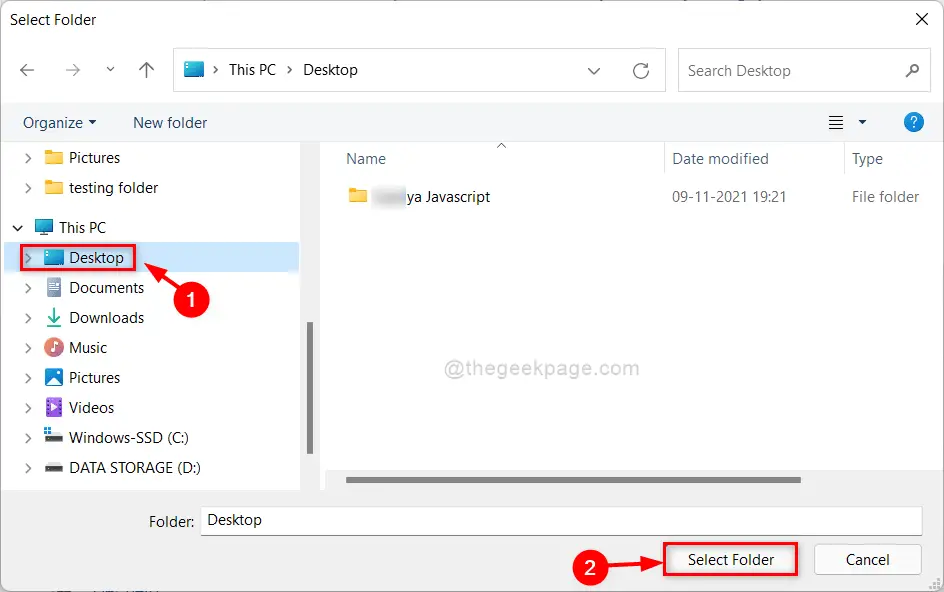
Paso 6: Close the Settings window after changing the save location to nearby sharing.
Hope this method has been helpful.
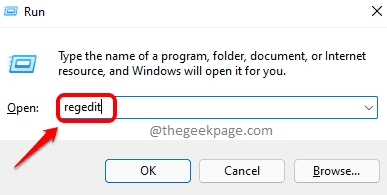
Paso 1: press windows + R keys together to open To run dialog box.
Paso 2: Writes regedit in the run box and press the Get into wrench.
Paso 3: Click Yes in the UAC message to continue.
Paso 4: Copy and paste the following path shown below into the empty address bar and hit the Get into wrench.
HKEY_CURRENT_USERSoftwareMicrosoftWindowsCurrentVersionCDP
Paso 5: Select the CDP registry key on the left side of the window.
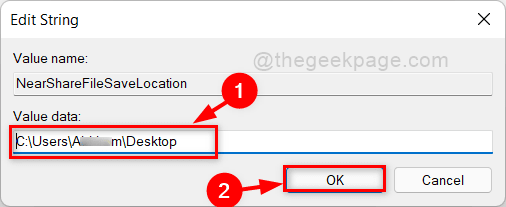
Paso 6: Double-click the NearShareFileSaveLocation string value on the right side.
NOTE: – If missing, create a string value in the CDP registry key by right clicking and selecting New> String Value and renaming it to NearShareFileSaveLocation.
Paso 7: Enter the path to the folder where you want to save the received files. (For example: – Desktop)
Click OK to make changes.
Paso 8: Close Registry Editor and restart your system.
From now on, all files received via close sharing are saved to the new selected location.
That’s it guys.
I hope this article has been informative and helpful.
Let us know in the comment section which method you liked.
Thanks!
Related posts:
 How to access Steam games without an internet connection
  How to view FPS with Xbox Game Bar in Windows 10: Steps Made Easy
  Hacked account? How to check and remedy
  How to make video calls from WhatsApp Web
  How to increase the RAM memory of a desktop or laptop + Tips and Tricks
  How to organize your YouTube subscriptions into categories
+ Tips and Tricks
How to organize your YouTube subscriptions into categories
+ Tips and Tricks


