


How to Clear Jump Lists Data in Windows 11
First of all, what do you mean by jump list data on your system? This is nothing more than data about any application that your system saves in a particular folder called AppData, which is then used to get the recently opened applications, recently closed tabs, etc. In short, this is to get the recently occurred events so that Windows users can undo their last task, like reopening closed tabs and all. If you are a Windows user whose job involves downloading / creating a lot of documents in a short time, this will bring together AppData (Jump lists) and also the list of recent items from the taskbar, which can be a tiring job to delete each and every one of the recent items in the list. Instead, you can immediately delete all data from jump lists in Windows 11. In this post, we will guide you on how to do that.
Steps to follow to delete data from Jump Lists in Windows 11
Step 1: Press Windows + R keys together on your keyboard to open To run Dialog box.
Step 2: Copy and paste the line below and press Get into wrench.
%APPDATA%MicrosoftWindowsRecentAutomaticDestinations
Step 3: Press CTRL + A to select all files in the open folder.
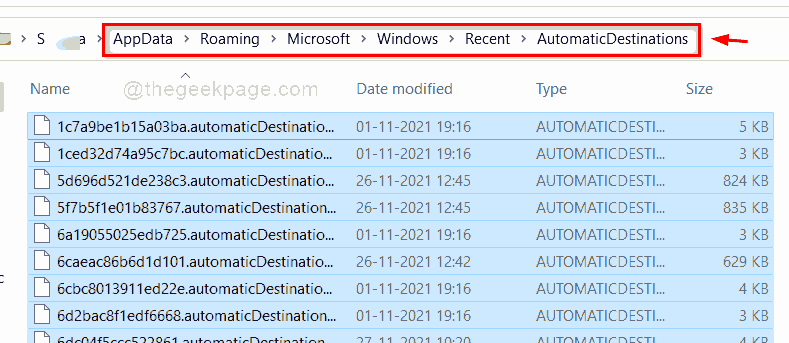
Step 4: then press SHIFT + DELETE keys together to permanently delete all files in the folder.
Step 5: click Yes button to continue.

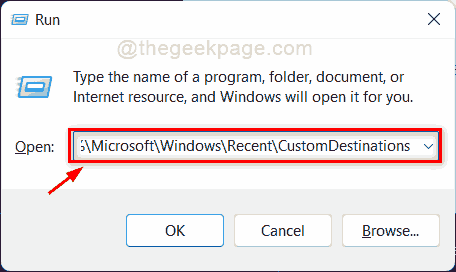
Step 6: Now press again Windows + R keys together to open To run box.
Step 7: Copy and paste the line below and press Get into wrench.
%APPDATA%MicrosoftWindowsRecentCustomDestinations
Step 8: Press CTRL + A to select all files in the open folder.
Step 9: Then press SHIFT + DELETE keys together to permanently delete all files in the folder.
Step 10: click Yes to proceed to remove all items.
Step 11: Close all folders after deleting them.
This will erase / remove all the data in the jump list folders on your Windows 11 PC.
That is all.
I hope this post is informative and helpful.
Let us know in the comment section below.
Thank you for reading.
Related posts:
 How to access Steam games without an internet connection
  How to view FPS with Xbox Game Bar in Windows 10: Steps Made Easy
  Hacked account? How to check and remedy
  How to make video calls from WhatsApp Web
  How to increase the RAM memory of a desktop or laptop + Tips and Tricks
  How to organize your YouTube subscriptions into categories
+ Tips and Tricks
How to organize your YouTube subscriptions into categories
+ Tips and Tricks


