


How to create a ghost image effect in PowerPoint
You must be seeing the trending ghost image effect on social media. Do you want to make one too, but don’t know where to start? Are you sad because you don’t have Photoshop or you don’t know how to use it? Do not worry. PowerPoint can also be used to produce a ghost image effect. It’s simple. Let’s see how we can take photos with ghost image effects in PowerPoint.
Steps to create ghost image effect in PowerPoint
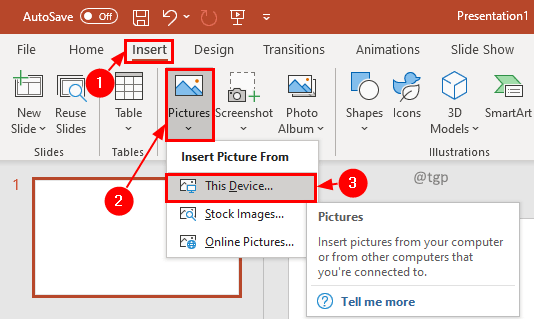
Step 1: insert the image on the slide by going to the Insert menu, selecting Images in the Images tab and selecting This device in the drop-down menu.
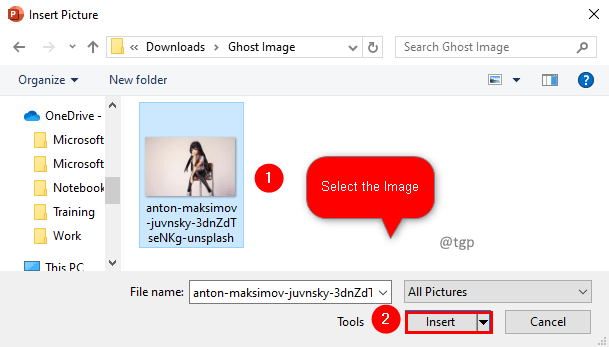
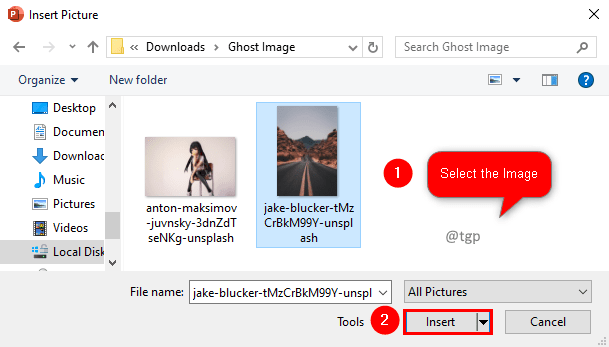
Step 2: Select the image you want in the Insert Image window and click Insert.
Step 3: Select the image and click on the Picture format menu. Click on the Remove background option on the Adjust tab.

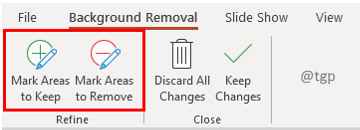
Step 4: once you select Remove background, the background that will be automatically detected for removal will be purple. You can use Mark areas to keep O Mark areas to delete on the Refine tab of Background Removal to modify the automatically detected background area.
Tip: It will be difficult to remove the background if the background color blends strongly with an image. Try using an image with a different background color.
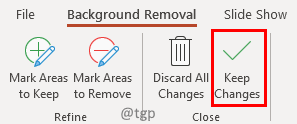
Step 5: Once the changes are complete, click Keep changes on the close tab of the Background Removal menu.
Step 6: Now insert one more image that you want to merge to create the ghost effect. Click on the Insert , on the Images tab, select Images, and from the drop-down menu, select This device.
Step 7: In the Insert Image window, select the image and click Insert.
Step 8: Select the image and in the Picture format menu, click Transparency. In the drop-down menu, select Image transparency options.
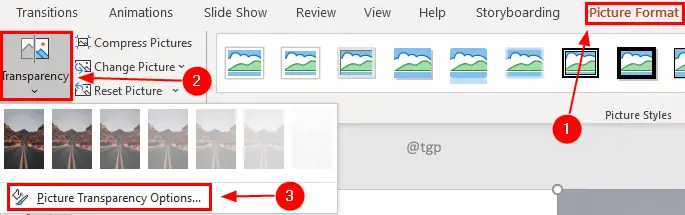
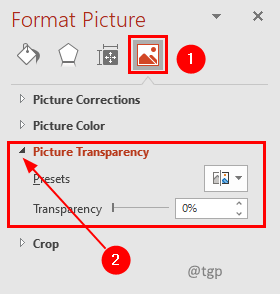
Step 9: On the Picture Format tab, select Photography and then click Image transparency. Adjust the transparency of the image so that you can see the other image through it.
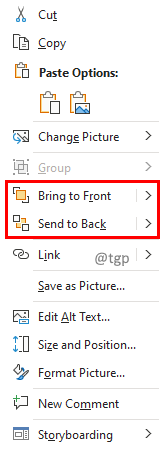
Step 10: You can move the image backwards or forwards and adjust its transparency to get the effect you want to have.
We hope this article has been informative. Thank you for reading. Please comment and let us know if it was helpful to you. Also, let us know if you have any problems. We will be delighted to help you.
Related posts:
 How to access Steam games without an internet connection
  How to view FPS with Xbox Game Bar in Windows 10: Steps Made Easy
  Hacked account? How to check and remedy
  How to make video calls from WhatsApp Web
  How to increase the RAM memory of a desktop or laptop + Tips and Tricks
  How to organize your YouTube subscriptions into categories
+ Tips and Tricks
How to organize your YouTube subscriptions into categories
+ Tips and Tricks


