How to create and use restore points in Windows 11
The creation of restore points in Windows 11 is a must-use function for a user who intends to stay ahead of any operating system errors. Its operation is as simple as it is effective: it saves a copy of the system when it works correctly so that, in case of problems, it can be reverted to that moment quickly and easily.
The flaws in Windows are inherent in the operating system itself, in its huge ecosystem of software and hardware, and in its use by hundreds of millions of users. And they can come from multiple fronts, be it internal after a system update, failed changes to the Windows registry or caused by the user himself when installing applications or drivers that destabilize it.
Although there are third-party solutions for this type of maintenance task, Microsoft has been offering it for years with System Restore. an application that cannot replace backup tasks since it does not back up or restore files, but it is tremendously effective against all non-critical system failures and that would already force a PC reset or a complete reinstall.
How does it work
If you don’t know how it works, imagine the “undo” command to understand it, because it works the same way. Technically, it is a system protection tool that takes snapshots of the essential file group and the Windows registry. These snapshots are saved as Restore Points, which are what allow the user to revert unwanted changes made to core system files and settings (drivers, registry keys, or installed applications) that are usually the cause of conflicts and errors. mistakes.
A ‘time machine’ that when activated makes the following changes to the system:
- All system settings are restored to the way they were when the restore point was created.
- All applications that were installed since the restore point was made are uninstalled.
- All drivers that were installed since the restore point was made are uninstalled.
- The same with all Windows updates that were installed manually or automatically.
- All personal files stored in user folders (Documents, Pictures, Music, etc.) or on partitions other than drive C: remain intact.
How to create restore points in Windows 11
The operation and management of this feature has not changed since Windows 7, except that in Windows 11 (as in Windows 10) it must be activated to use it. We see how to carry out the process in this step by step.
- Type “restore”, “restore points” or “system restore” or in Windows search. (You can also access the tool from the Control Panel)
- You will directly see the System Protection section and the partitions of the storage unit.
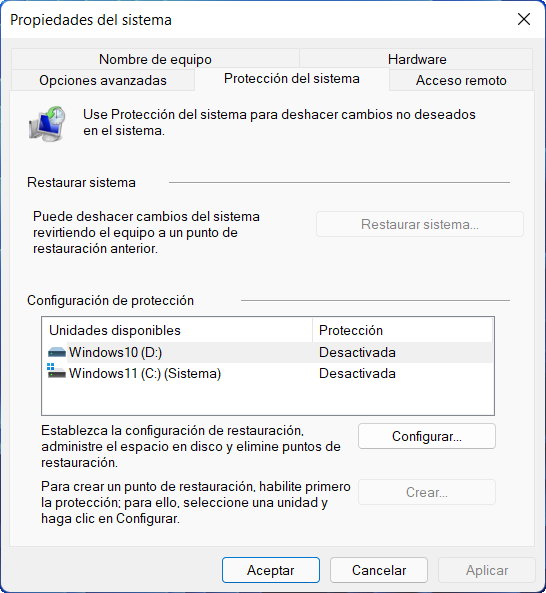
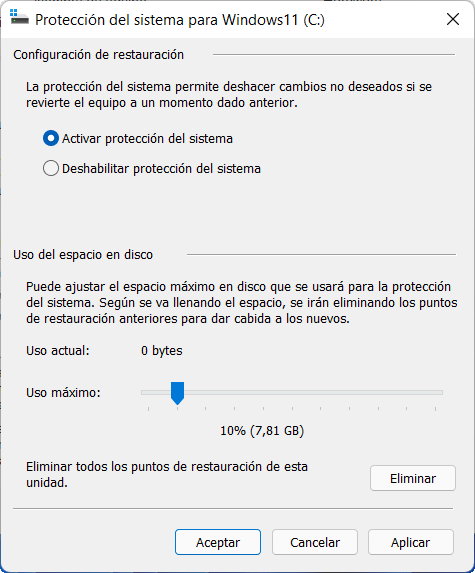
- We point to the active Windows 11 partition and click on the Configure button.
- We select to activate the protection and adjust the maximum space of the partition in % that we will dedicate to this task.
- On the main screen we can now create a restore point. (Obviously, we must create them when the system works correctly and before making changes to hardware, installation of drivers or applications that we doubt will work).
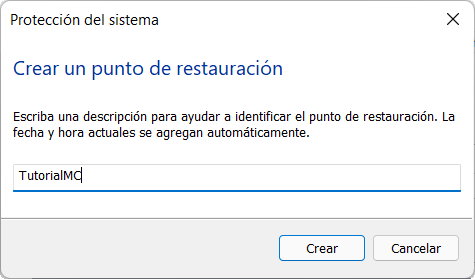
In a few seconds/minutes we will have created the first restore point. You can create as many as you need as long as you have available space, in addition to those that the system will automatically create once you activate this feature.
How to use these points
From the same ‘System Properties’ screen we can restore the system to revert the computer to a previous point that we have saved.
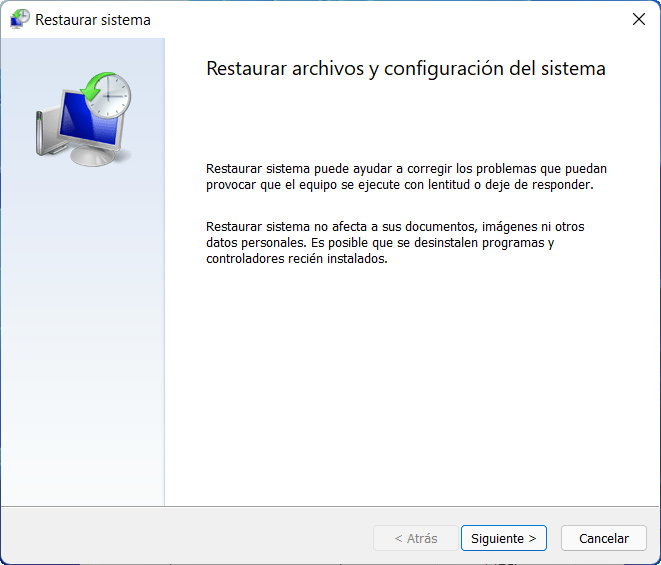
Simply click on the ‘Restore system’ button and choose one of the points that you have created manually or an automatic point created by the system itself.
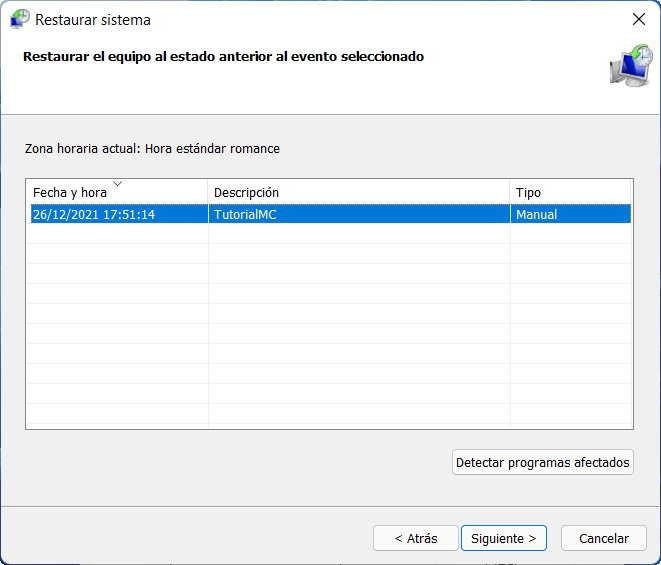
The tool can also check the programs affected by these changes:
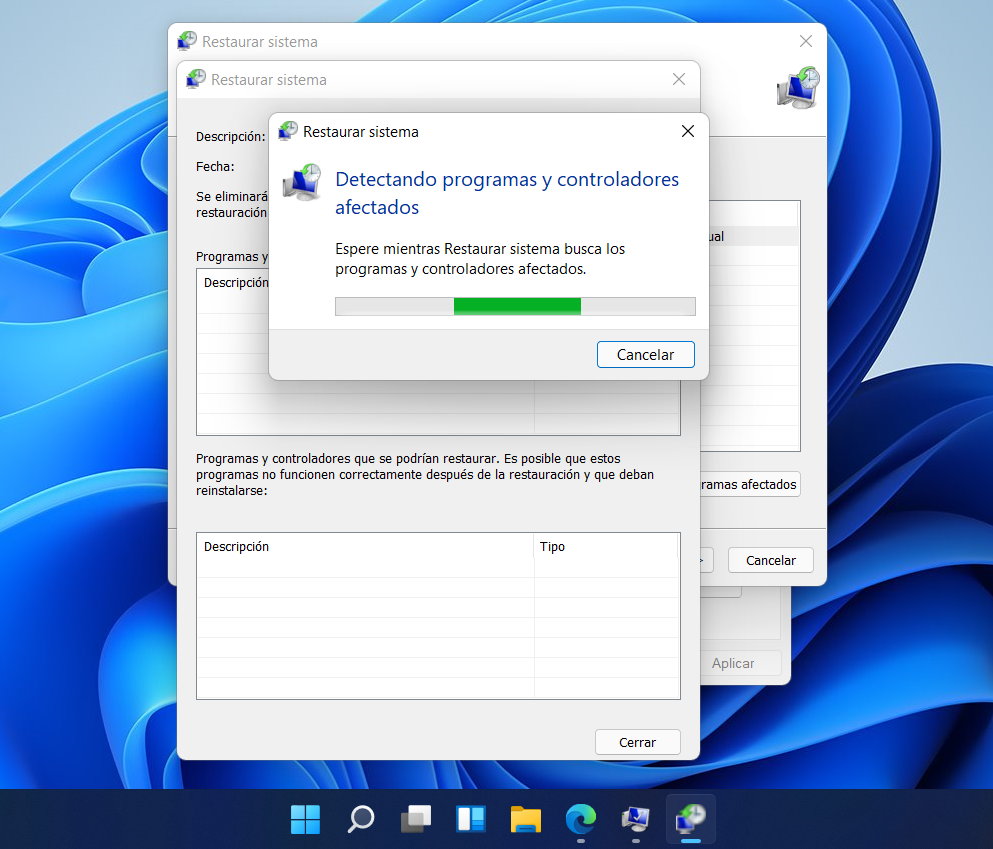
This function will restore the main operating system files and settings, settings, drivers, registry keys, or installed programs to the time they were created, thereby reverting the computer to a time of proper system operation.
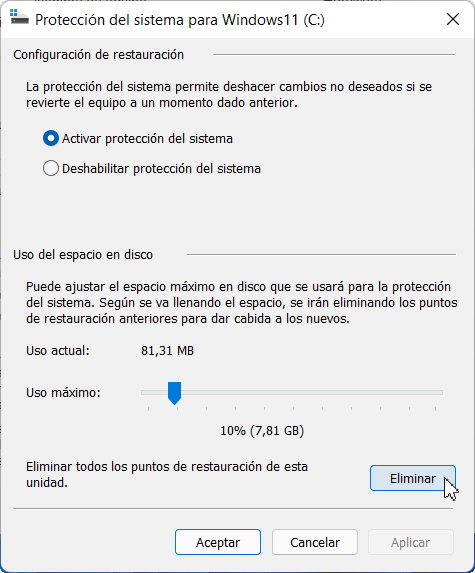
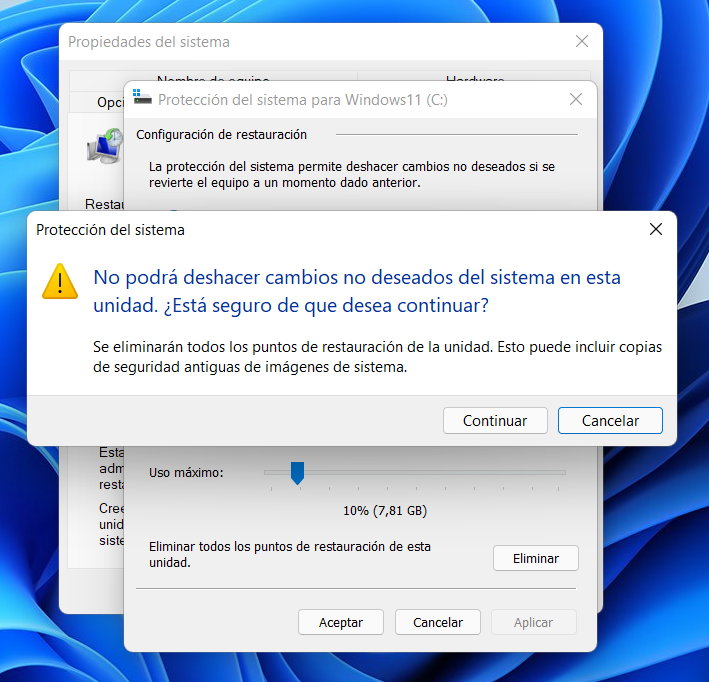
Finally, note that you can delete all restore points from the same tool if you ever need that free disk space.
What if I can’t access the restore?
There are times when system failures are so serious that they prevent normal access to the operating system and therefore the restoration cannot be accessed as we have seen in the previous point. For these cases, we can still access the restore points using the following ways:
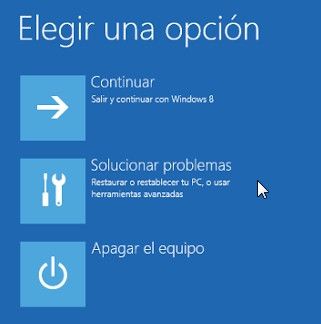
- Automatic repair mode if the system fails to boot for three consecutive times.
- System repair discs (CDs or DVDs).
- Boot from a recovery USB.
- Windows 10 Installation Drives.
Any of these methods will allow us to access the system when we cannot perform a standard boot and activate any of the restore points in Windows 11 that we have saved. A very useful function against those Windows failures that are inexorably repeated from system updates or the installation of incompatible applications or drivers that do not work correctly, cause errors or slow down your PC.
In case of critical failures, surely we will not be able to recover the equipment even with the restore points and methods such as factory reset or reinstallation will have to be used. But they are worth having for their ease of creation and use.
Did you enjoy reading this article? If you did, help to spread this article by simple leaving a like or a share to any social media network of your choice. Thanks for stopping by we appreciate your visit.


