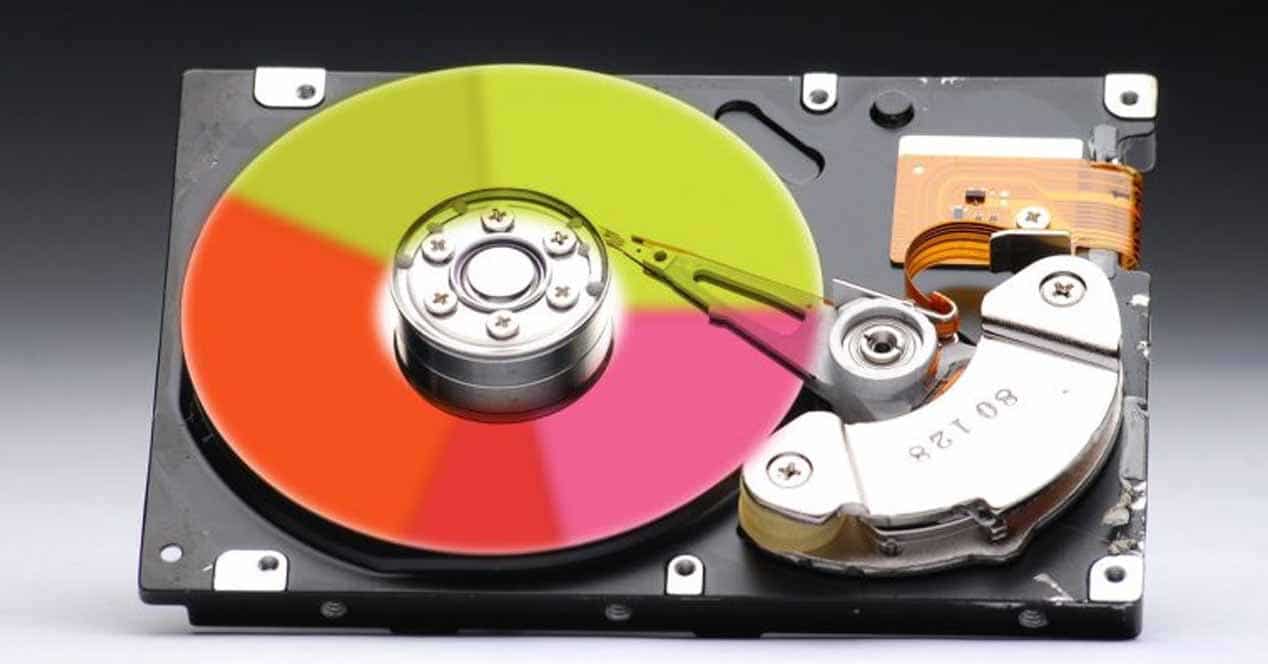
In this tutorial we are going to teach you how to create partitions on the hard disk using the Windows 10 operating system, which is the most used today, but in previous versions of Windows it works in a similar way. You can use any hard drive for it -even external USB drives or pen drives-, and in fact you don't even need to erase the data that you have stored inside.
Make room before creating partitions
This step is only necessary if you want to use a disk that already has data inside. In this case, it will be necessary to "shrink" the volume, using the remaining free space to create partitions and use them later.
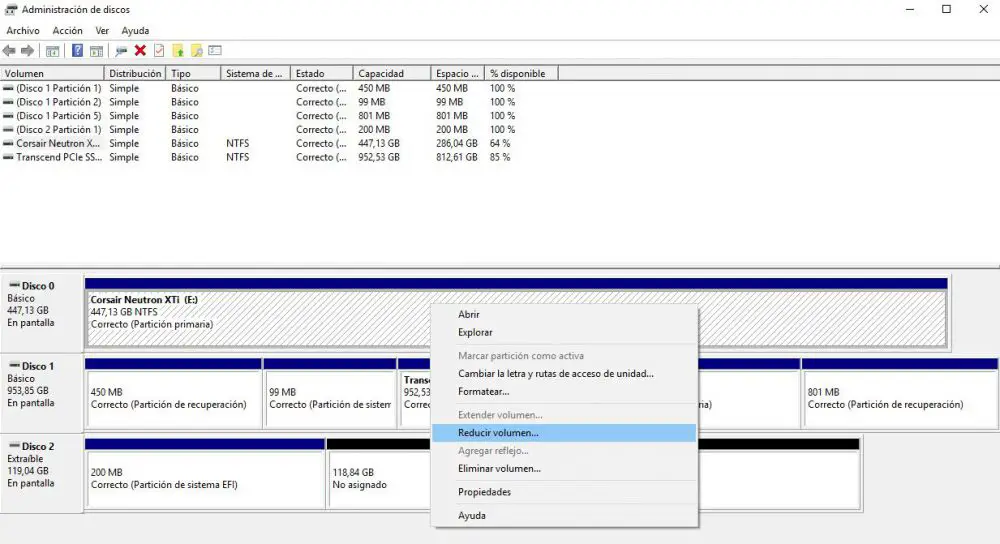
To do this, you must access the Windows 10 Disk Management, and for this simply right click on the Start button and select "Disk Management".
A window will open that will show us a list of all the storage units connected to the computer at the top, with a visual arrangement of their volumes and partitions in the lower area. You must select the disk you want to use to make the partitions, right click and select "Reduce volume".
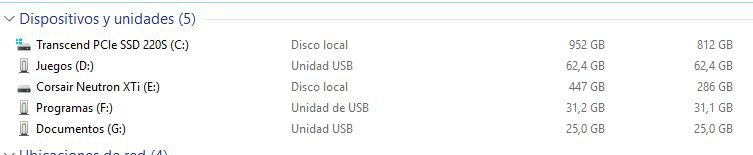
A wizard will open, asking us how much capacity we want to free. In our example, it is a 480GB SSD that has 286GB free; Even so, Windows is always going to suggest leaving plenty of free space on the remaining partition. With this, we will leave free space without partitioning with the size we select.
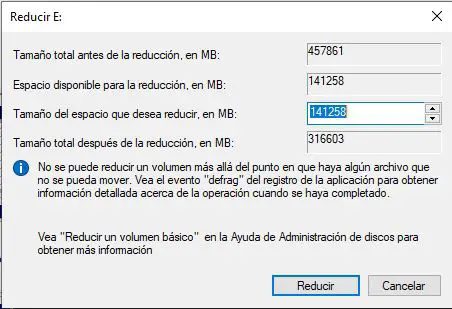
Once the volume has been reduced, we will see that in the lower area it appears on the hard disk that we have selected a blue area with the name that the unit had, and a black area to its right that will say "Not assigned".
Create partitions on the hard drive
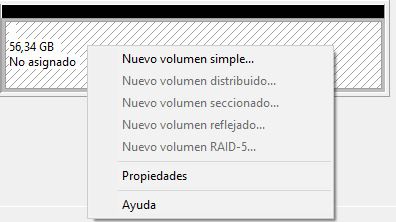
Now we will use that "unallocated" space to create all the partitions that we want. We can also do this with a new hard disk that we have installed in the PC, since all the space will appear as "not assigned". We just right click on that black area and select "New Simple Volume …".
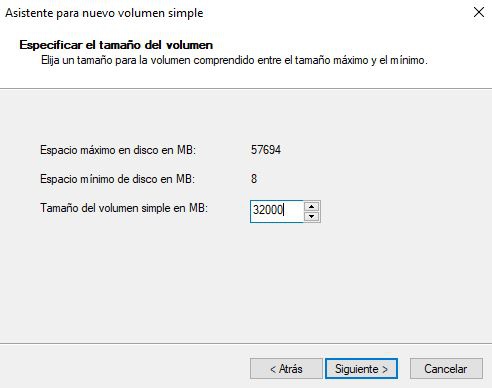
An assistant will appear, which will initially ask us what size we want the volume to be. By default it will be selected to use all the available unallocated space, but we can add less if we want to make several partitions.
In the following steps the wizard will ask us if we want to assign a specific drive letter, what file system to use and what name we want to give it. We recommend that you leave everything as it is except the volume label, where you should write a name specifying what the partition will be used for.
We can repeat this process while there is still unallocated space, and we will be creating a different partition each time.

Once this is done, in This Team we will see each of the partitions that we have created as if they were independent hard drives, each with its name and the size that we have selected when creating the partition.
Related posts:
 7-nanometer Nvidia GPU, TSMC will handle most of the production
  ASRock X299, a new BIOS allows you to install 2 TB of memory
  MSI Prestige X570 Creation Review: Test | Specs | Hashrate
  Radeon RX 5500 XT, PCI Express 3.0 castrates performance?
  An overclocker ran 1TB of RAM on an X299 motherboard limited to 256GB
  Best Review 2021: MSI MPG X570 Gaming Edge WiFi Under $250 ($200)