


How to download and install Discord in Windows 11
Discord is one of the most used digital platforms for communication that was initially launched in 2015. This is communication software that is mainly used by gamers and also by children over 13 years old for general chatting or for project purposes. You must first download and then install it in order to use this software. In this article, we will guide you on how to download and install Discord on your Windows 11 PC.
Steps to download and install Discord on Windows 11
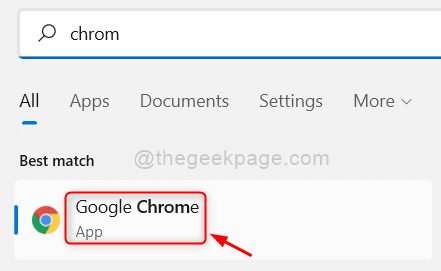
Paso 1: Open any web browser (for example: – Google Chrome)
press to win key on your keyboard and type Google Chrome.
Click Google Chrome application of search results.
Paso 2: In Google Chrome
Click the link below to open the Discord Software download page.
https://discord.com/download
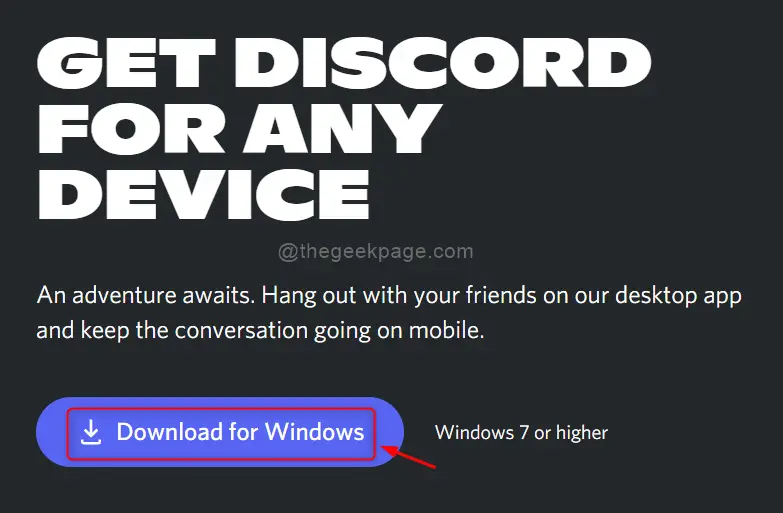
Paso 3: On the Downloads page
Click on Download for Windows button as shown in the following screenshot.
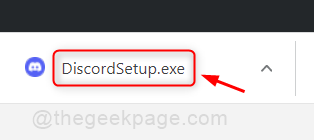
Paso 4: This will start downloading the Discord installation file.
Once the download is complete, click the DiscordSetup.exe file from the browser as shown below.
Paso 5: Then it will start downloading the Discord updates installation.
There will be a Discord icon on the desktop.
By double clicking on it, you will get a login screen as shown below and after entering your credentials you can start using Discord.

This article showed you how to download and install Discord software so easily.
I hope you liked this article and found it useful.
Please leave us your comments below.
Thank you for reading!
Related posts:
 How to access Steam games without an internet connection
  How to view FPS with Xbox Game Bar in Windows 10: Steps Made Easy
  Hacked account? How to check and remedy
  How to make video calls from WhatsApp Web
  How to increase the RAM memory of a desktop or laptop + Tips and Tricks
  How to organize your YouTube subscriptions into categories
+ Tips and Tricks
How to organize your YouTube subscriptions into categories
+ Tips and Tricks


