


How to find and remove duplicate files in Google Drive
Google Drive offers cloud storage for users to store their important files. It’s very useful and has its own downside: you can only allow up to 15GB of space for free, and it costs more for more space. In this situation, if there are duplicate files stored on your Google drive, it will simply be a waste of space. Therefore, it is best to keep checking for duplicate files periodically to make sure there is enough space to store other files. In this post, we have come up with some methods by which you can find and remove the duplicate files on your Google Drive.
How to Find and Remove Duplicate Files in Google Drive Using the Duplicate File Finder Plugin
Step 1 – Open the Duplicate File Finder tool in a new tab by just clicking here.
Step 2 – Once it opens, click the Install button besides Duplicate File Finder as shown below.
Step 3 – Follow the on-screen instructions to install it on your system.
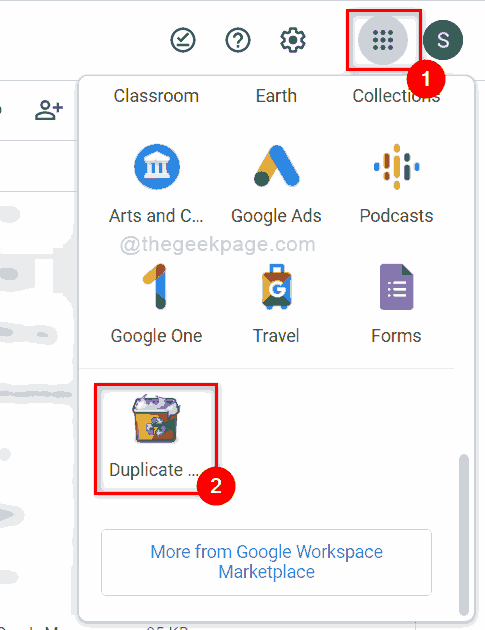
Step 4: Go to the Google Apps icon next to the Profile icon in the upper right corner, as shown below.
Step 5 – Then scroll down the apps and click on Duplicate File Finder in the background.
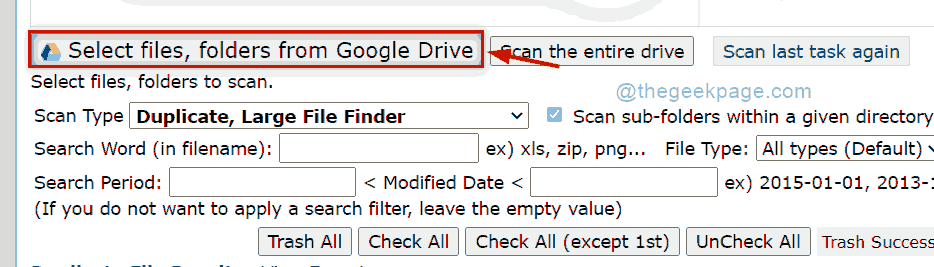
Step 6: Click Select files, folders from Google Drive button as shown below.
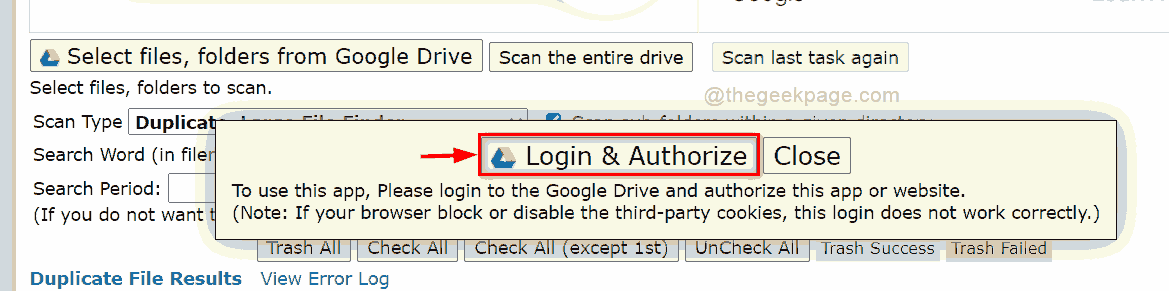
Step 7: Click Sign in and authorize button to sign in with your Google Drive credentials.
NOTE: Please allow your browser to disable third-party cookies for login.
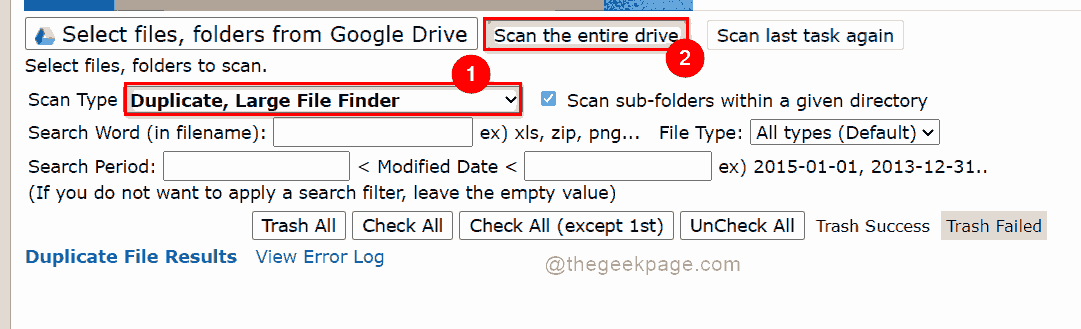
Step 8 – After signing in with your Google Drive credentials, select Duplicate and Large File Finder option of the scan type dropdown.
Step 9: Once done, click Scan the entire drive to scan the entire drive and get the duplicate files.
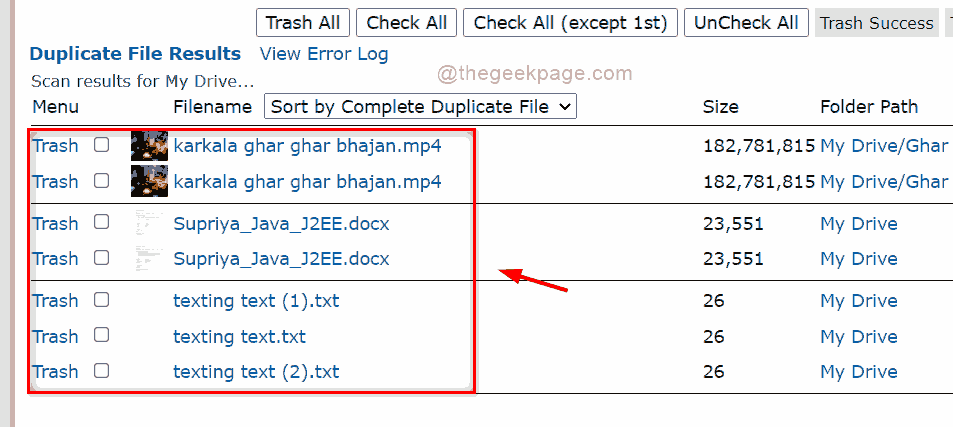
Step 10 – The Duplicate Files Results section will display all the duplicate files present in your Google Drive as shown below.
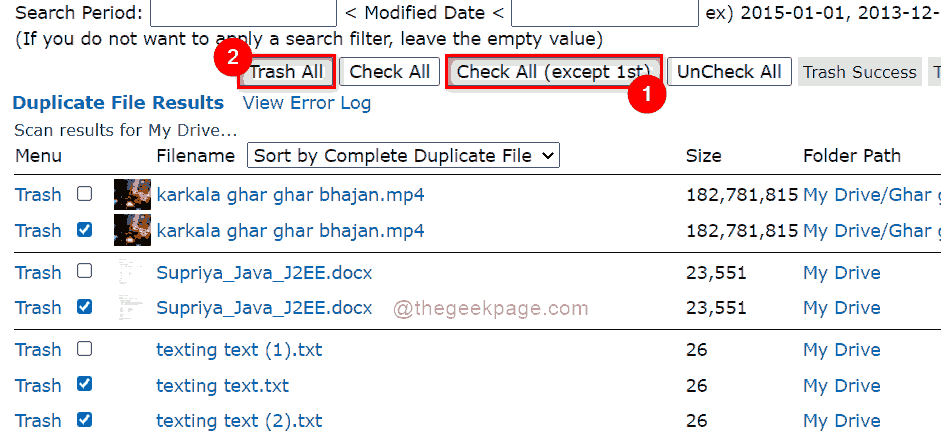
Step 11 – Now Click Check all (except the first) to select all duplicate files except the original files.
Step 12: Then tap trash all button to remove all the duplicate files you had selected.
Step 13: Click OK button to delete all those files.

Step 14 – Now all the duplicate files are removed from your Google drive and you get more space to store any other important files on your system.
How to find and delete duplicate files in Google Drive manually
Step 1: Open Google Drive by clicking here
Step 2: Sign in with your Google Drive account credentials if you are not already signed in.
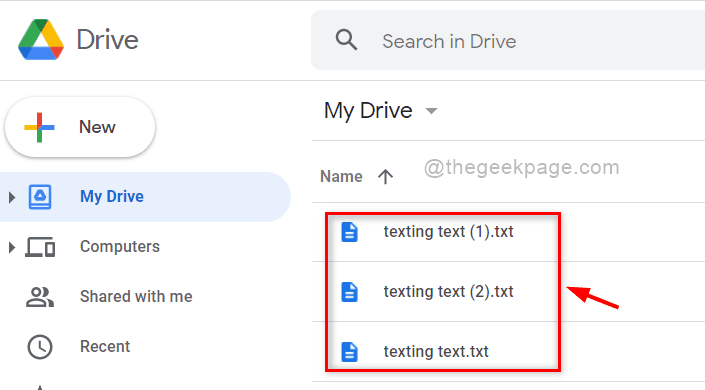
Step 3 – Manually search through the list of stored files by looking at the file name which is the same.
Step 4 – Right click on the duplicate files you want to remove from Google Drive.
Step 5: Then click Remove from the context menu as shown below.

That’s it. The duplicate file is removed from your Google drive manually.
How to find and remove duplicate files in Google Drive using the Google search bar
Step 1: Open Google Drive by clicking here in a new tab.
Step 2: Sign in with your Google Drive account credentials if you are not already signed in.
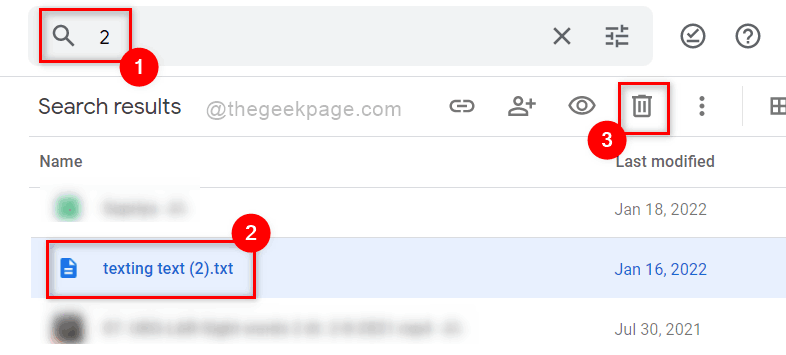
Step 3 – Next, type in the numbers 1 or 2 depending on the duplicate files to be searched for.
NOTE: Duplicate files are stored by adding numbers to the original file name. For example: Filename (1).txt is the first duplicate file of Filename.txt.
Step 4: Once the search results are displayed, select the duplicate file that you want to remove.
Step 5: Click Trash icon located above as shown below THE just press Delete key on your keyboard.
Step 6 – These deleted duplicate files are moved to trash in Google Drive and will be permanently deleted after 30 days automatically.
That’s it.
That’s all guys!
I hope this article has been informative.
Please leave us your comments below.
Thanks!
Related posts:
 How to access Steam games without an internet connection
  How to view FPS with Xbox Game Bar in Windows 10: Steps Made Easy
  Hacked account? How to check and remedy
  How to make video calls from WhatsApp Web
  How to increase the RAM memory of a desktop or laptop + Tips and Tricks
  How to organize your YouTube subscriptions into categories
+ Tips and Tricks
How to organize your YouTube subscriptions into categories
+ Tips and Tricks


