


How to Fix Outlook Error Code 0x8004011D
Most Windows users reported seeing error code 0x8004011D when updating their email in Outlook. The full error message has different variants as shown below
0x8004011d Outlook not found.
Unable to register Outlook 0x8004011d
0x8004011d Outlook Access Violation
0x8004011d Outlook file is missing
This problem is a synchronization problem that is seen in all versions of Outlook. There are many reasons that trigger this problem. Some of the main ones are:
- Slow internet connectivity or connectivity issues.
- Corrupt system files
- Corrupted Outlook Profile
- Virus or malware attack from SD card.
If you run into this problem and wonder how to fix it, stop worrying and read on. In this article, we have selected a list of fixes that can help you fix error code 0x8004011D in Outlook.
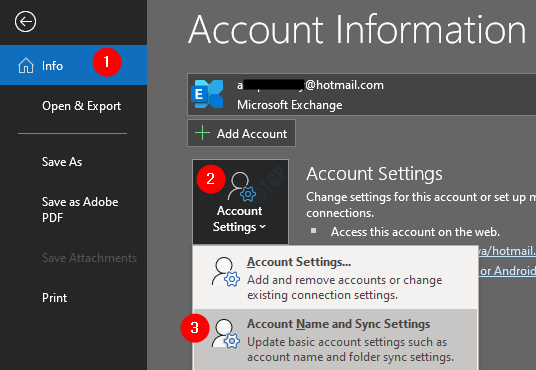
Solution 1: enable cache mode
Step 1: Open the MS Outlook application.
Step 2: click Proceedings from the top menu options.
Step 3: in the window that appears, below the Information tab, click Account settings.
Step 4: click Account settings and sync in the pop-up context menu.
Step 5: In the window, click the More settings button.
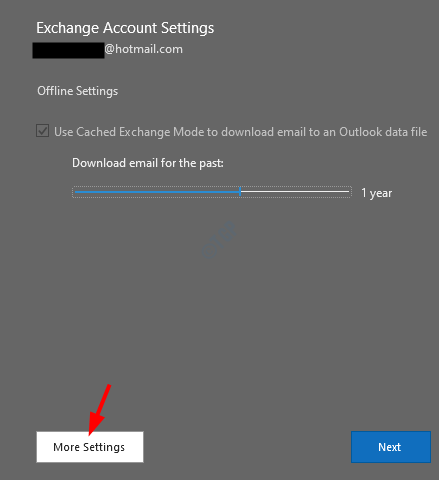
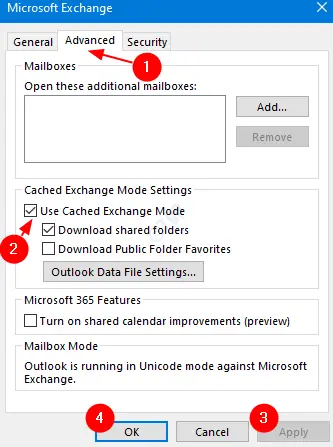
Step 6: In the Microsoft Exchange window that opens, go to Advanced tab.
Paso 7: Tick upon Use Cached Exchange Mode.
Step 8: click Request.
Step 9: click it’s okay.
Step 10: close the MS Outlook application. Open the app again and check if the problem persists. If so, check the next solution.
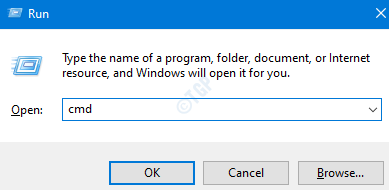
Solution 2: perform an SFC scan
Step 1: open Run Terminal. Use the shortcut Windows + R.
Step 2: Write cmd and keep the keys Ctrl + Shift + Enter to open the command prompt in administrator mode.
Step 3: If you see a User Access window asking for permissions, click And.
Step 4: Type the following command and hit Enter.
sfc /scannow
Please note that the scan may take some time to finish. So please be patient.
Step 4: Once the scan is finished, Reboot the system and see if the problem is resolved.
Solution 3: Create a new Outlook profile.
Step 14: Open the Run dialog box.
Step 15: Write control and press Pay in.
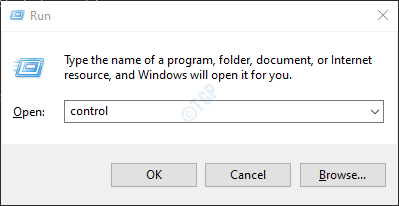
Step 16: In the search bar located in the upper right corner of the Control Panel window, enter Mail. Click the Mail option that appears.
Step 17: In the Mail Settings window that opens, click on the Show Profiles button.
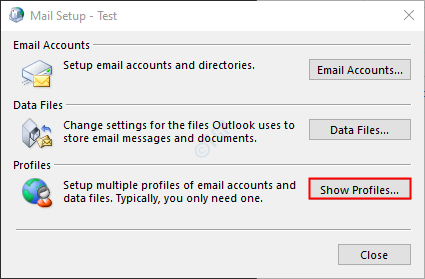
Step 18: click Add.
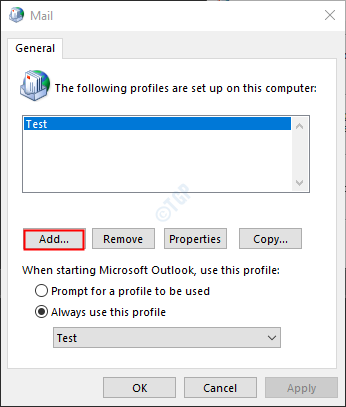
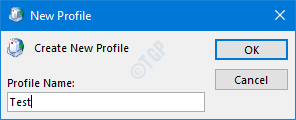
Step 19: A window appears, give the desired one Nameand press Pay in.
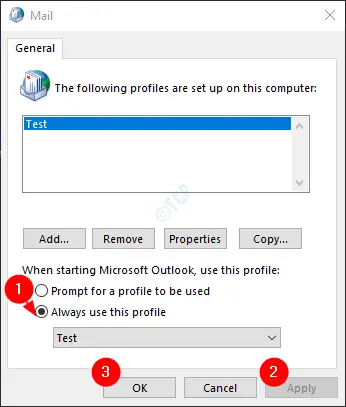
Step 20: Make sure the newly created profile is selected.
Step 21: Now add your account in MS Outlook.
Solution 4: Use registry setting and set up two Exchange accounts in one instance of Outlook.
In older versions of MS Office (Office 2013 or earlier), this problem is noticed when 2 Microsoft user accounts are used through the single instance of Outlook application. If the error in your case is seen due to this problem, you can fix it by using the registry setting below.
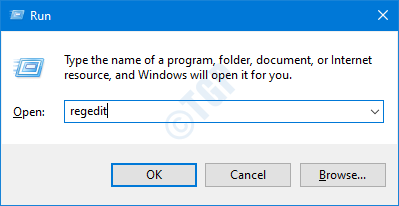
Step 1: Open the Run dialog with the keys Windows + R
Step 2: Write regedit and hit Pay in
Step 3: In the UAC window that opens requesting permissions, click Yes
NOTE:
Editing the registry can damage the system even with the slightest mistake. It is recommended to back up the registry before proceeding. To make a backup, in Registry Editor -> Go to File -> Export -> Save your backup file.
Step 4: In the Registry Editor window, in the search bar at the top, copy and paste the following location
HKEY_LOCAL_MACHINESYSTEMCurrentControlSetServicesMSExchangeISParametersSystem
Step 5: On the right side, right click and choose Nuevo> Valor DWORD (32 bits).
Step 6: Name the newly created value as MaximumAllowedSessionsPerUser.
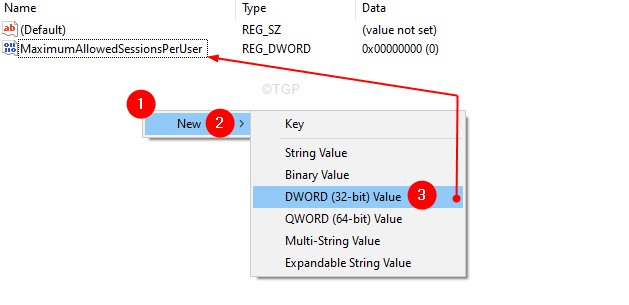
Step 7: Double click on the MaximumAllowedSessionsPerUser to modify its value.
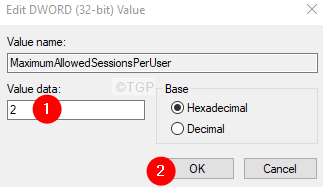
Step 8: set the value to 2 and press it’s okay.
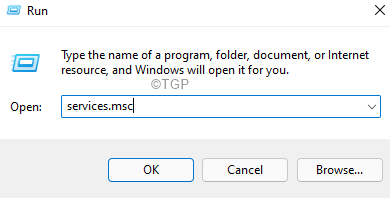
Step 9: Open the Run dialog box.
Step 10: Enter services.msc and hit OK
Step 11: In the services window that opens, scroll down and locate Microsoft Exchange Information Store.
Step 12: click Microsoft Exchange Information Store and then click Rbe the service link on the left side.

That is all. Check if the problem has been solved; otherwise, try the next solution.
Solution 5: scan for viruses in safe mode
Some of the users have reported that this problem is caused by jutched.exe and that this virus resides on their SD cards. If you see this error when you connect your SD card, try this solution.
NOTE: If there is important data on the SD card, please make a backup before proceeding.
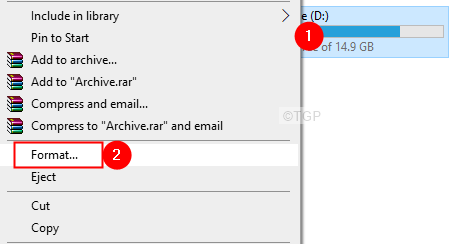
Step 1: connect the problematic SD card.
Paso 2: The right button of the mouse in it and select Format.
Step 3: In the window that appears, click Quick format and click Start.
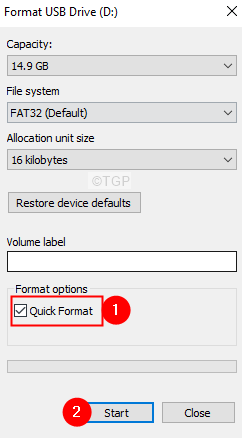
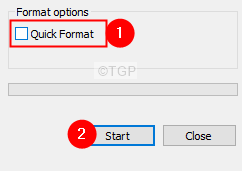
NOTE: If you have time, consider opting for Full format, to do so uncheck the box next to Quick Format as shown below
Step 4: Once the formatting is complete. reboot your system.
Step 5: The moment you see the manufacturer’s logo, start pressing the F8 key. You have to be very fast.
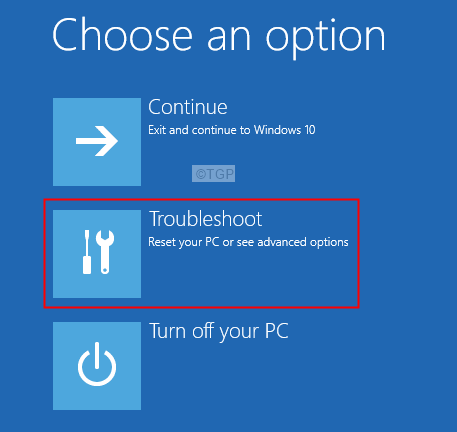
Step 6: This opens, the Advanced boot options window as shown below. Choose Solve problems
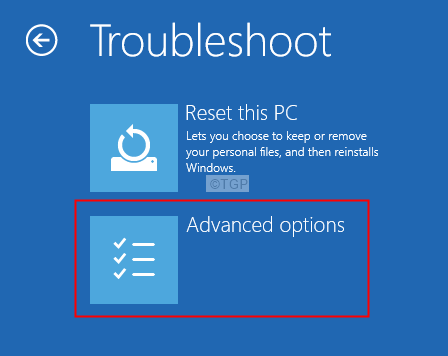
Step 6: Now, click Advanced Options
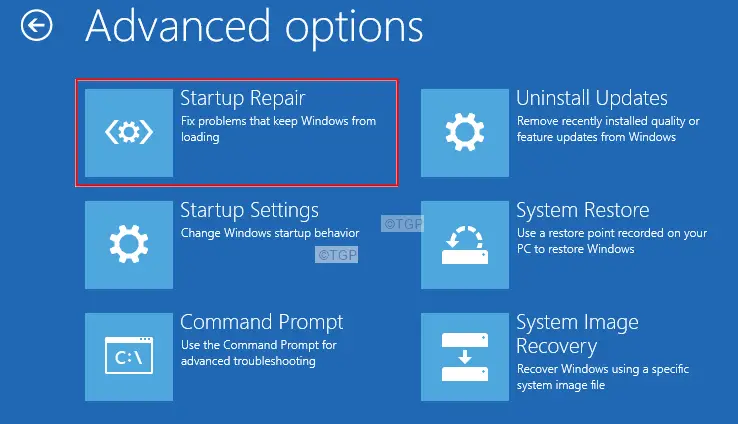
Step 7: click Startup settings.
Step 8: Click the Restart button.
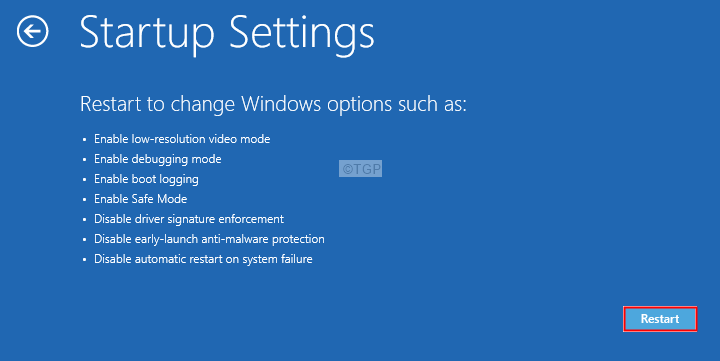
Step 9: Press the 5 key on your keyboard and press Pay in.

Step 10: Once your system boots into Safe Mode, click on the Microsoft Security Scanner Download Link
Step 11: Download the appropriate version.
Step 12: Double click on the .exe file to run the application.
Step 13: Follow the instructions on the screen and complete the scan.
Step 14: It is important to finish the scan. So, wait until you see the success message.
Step 15: reboot the system. Check if the error has been resolved.
That is all.
We hope this article has been informative for you.
Please comment and let us know the solution that helped you solve the problem.
Also, let us know if you have any problems. We will be happy to help you.
Related posts:
 How to access Steam games without an internet connection
  How to view FPS with Xbox Game Bar in Windows 10: Steps Made Easy
  Hacked account? How to check and remedy
  How to make video calls from WhatsApp Web
  How to increase the RAM memory of a desktop or laptop + Tips and Tricks
  How to organize your YouTube subscriptions into categories
+ Tips and Tricks
How to organize your YouTube subscriptions into categories
+ Tips and Tricks


