


How to install and create a bootable USB with Ventoy on Linux
Ventoy is an amazing tool that allows users to upload ISO files without updating them with tools like Etcher. However, Ventoy is not exactly easy to configure. That’s where we come in. Follow this guide as we show you how to set up and use Ventoy on Linux.

Downloading Ventoy on Linux
The Ventoy application must be downloaded to your computer before it can be installed on a removable USB flash drive. Open a terminal window to get your hands on the latest Ventoy for Linux.
Not sure how to start a terminal window on your Linux desktop? It is easy. Just press Ctrl + Alt + T on the keyboard. You can also start it by searching for “Terminal” in the application menu and running it that way.
Once the terminal window is open and ready to use, run the wget download the command below to get the latest version of the tool.
wget https://github.com/ventoy/Ventoy/releases/download/v1.0.63/ventoy-1.0.63-linux.tar.gz -O ~/Downloads/ventoy-1.0.63-linux.tar.gz
Don’t want to use the terminal window to download the latest version of the Ventoy application on Linux? You can also download it directly to your computer via Github.
Extracting Ventoy and running it
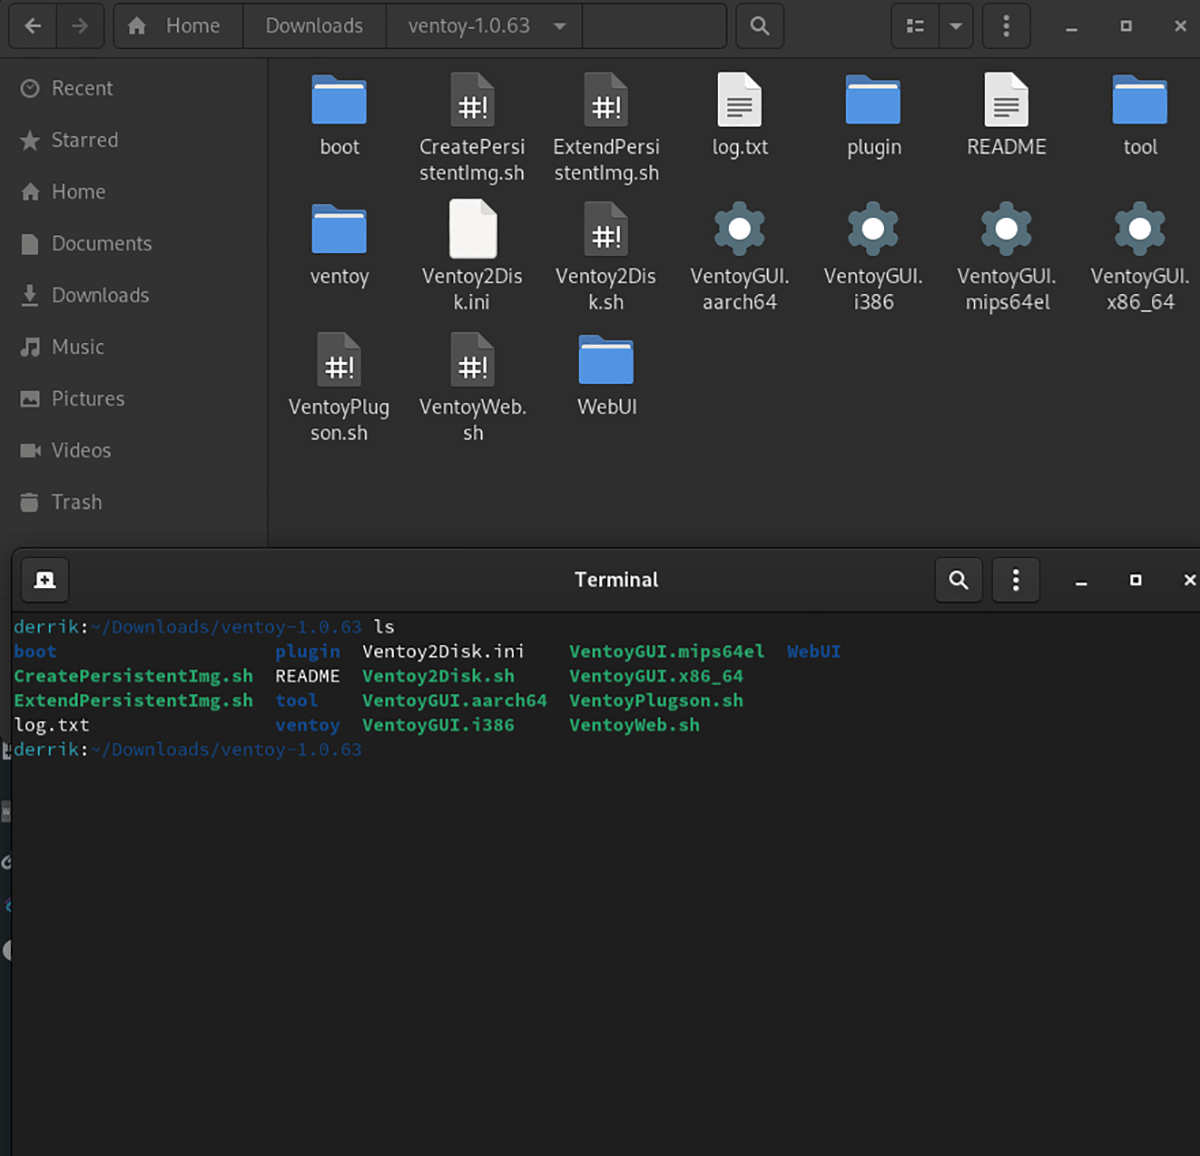
The Ventoy tool must be extracted from the TarGZ archive downloaded via Github. To extract the contents of the archive, start by using the CD terminal window and go to the «Downloads» folder.
cd ~/Downloads/
Inside the “Downloads” folder, you can extract the content of the Ventoy TarGZ archive. To do that, run the tar xvf command below in the file «ventoy-1.0.63-linux.tar.gz».
tar xvf ventoy-1.0.63-linux.tar.gz
Once the file is extracted, you can run the program with the following command.
./VentoyGUI.x86_64
When the Ventoy GUI application is open and ready to use, connect your USB flash drive to the computer. The Ventoy GUI tool should automatically detect your USB flash drive.
Ventoy terminal installation
GUI installation for Ventoy is recommended. However, if you prefer to use the command line, the instructions for setting it up are on the official Ventoy website. For more information, click here.
Creating a Ventoy USB in Linux
Creating a Ventoy USB bootable drive is easy to create. To do this, go to the GUI application that you started earlier. Next, make sure your USB flash drive is connected to the USB port.
With the USB plugged in, find the “Install” button and click on it with your mouse. By selecting the “Install” button, Ventoy will partition your USB flash drive and install it on the hard drive. This process will not take that long.
Secure boot support
If you plan to use Ventoy with secure boot support, you will have to enable it in advance. To enable it, find the “Options” button and check the box next to “Secure Boot Support.” Once this button is checked, click on the “Install” button and Ventoy will install on your USB flash drive with secure boot media.
How to use Ventoy
With Ventoy, you have to download any Linux ISO file and put it on the flash drive with Ventoy installed. Do not play with Etching Author or other USB flashing tools.
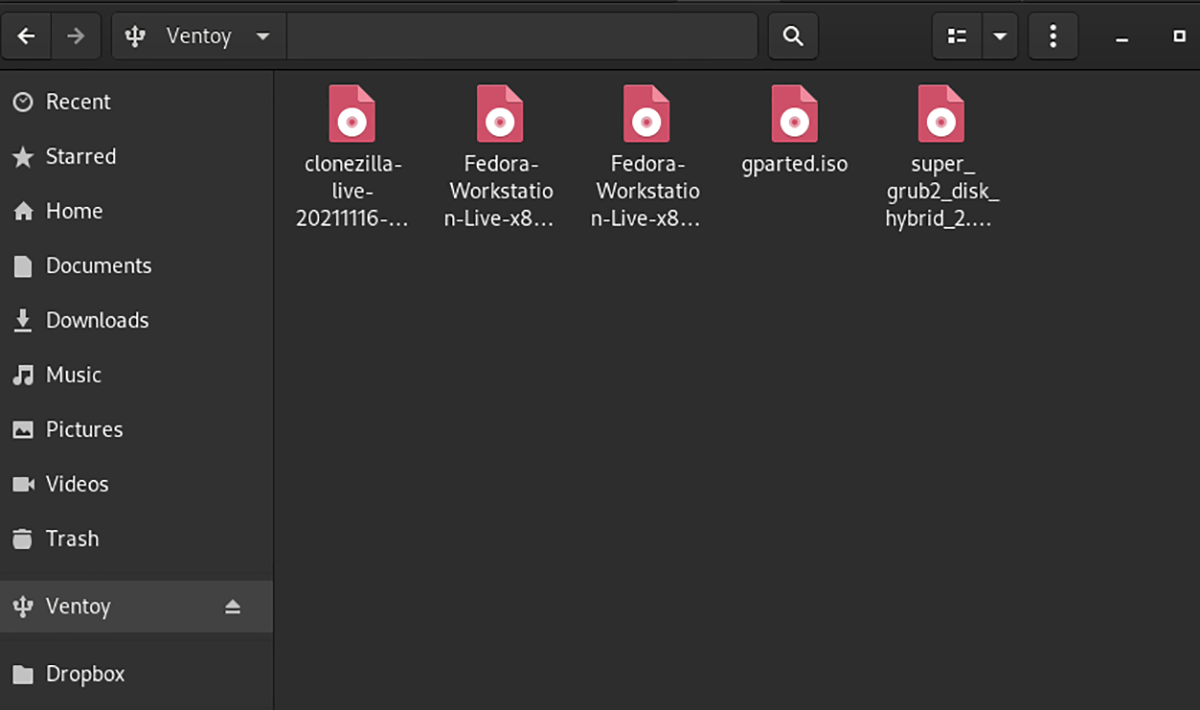
To set up Ventoy on your Linux system, start by connecting the USB flash drive to your PC. Once the flash drive is connected, open the Linux file manager and mount the “Ventoy” USB stick.
When mounting the Ventoy USB stick, download your favorite Linux operating system. Heck, download 2, 3, 4 or 5! Ventoy can start them all at once!
Note: Need help finding where to download Linux ISO files? Check DistroWatch.com. It is a database of Linux operating systems and they provide easily accessible download links.
Once you’ve downloaded your favorite Linux OS ISOs, put them on the Ventoy USB stick and allow them to be copied. The copy should take no more than a few minutes.
When the copy is complete, restart the PC and keep the Ventoy USB connected. Then load the BIOS. Once you’ve loaded your computer’s BIOS, find the boot options and configure the system to boot from USB.
When the Ventoy USB has loaded onto your computer, you will see a “Ventoy” menu. Ventoy will display all the ISO files that you have added to the system in this menu. Select the operating system you want to load using the arrow keys on the keyboard.
Once you have chosen the operating system you want to load, press the Get into key to start it up. By pressing Get into, Ventoy will boot the ISO file directly from the USB, allowing you to install the operating system.
Related posts:
 How to access Steam games without an internet connection
  How to view FPS with Xbox Game Bar in Windows 10: Steps Made Easy
  Hacked account? How to check and remedy
  How to make video calls from WhatsApp Web
  How to increase the RAM memory of a desktop or laptop + Tips and Tricks
  How to organize your YouTube subscriptions into categories
+ Tips and Tricks
How to organize your YouTube subscriptions into categories
+ Tips and Tricks


