


How to install Windows 11 without TPM [Bypass CPU requirements]
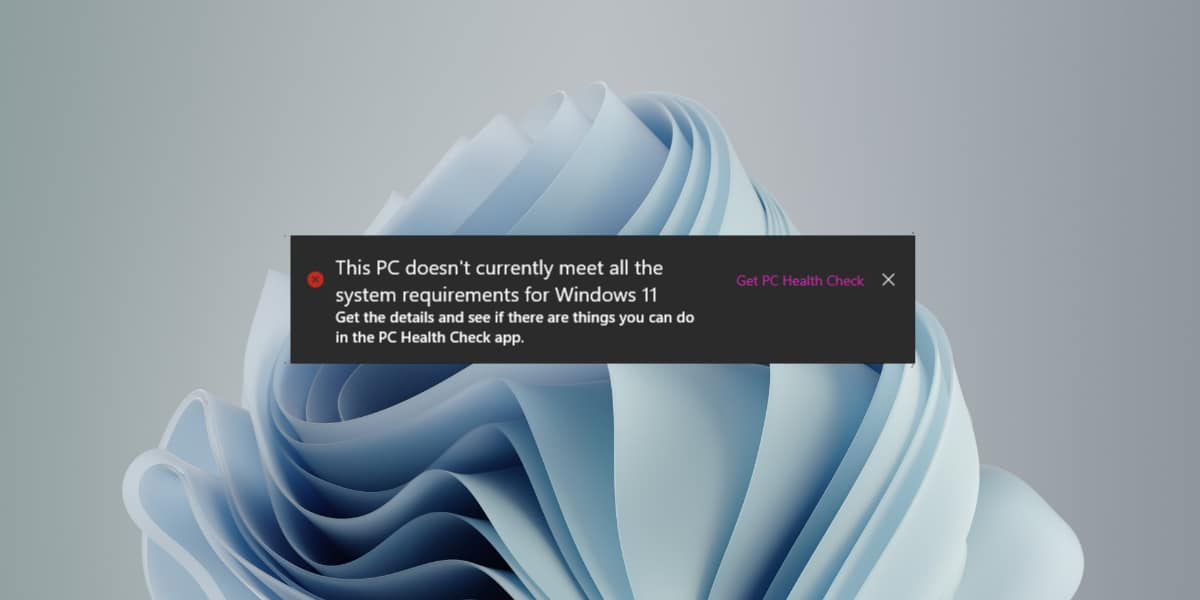
Windows 11 is a 64-bit only operating system. Like macOS, Microsoft has also moved to support only 64-bit systems with its newer operating system. In addition to the 64-bit requirement, Windows 11 also requires a UEFI and TPM 2.0 secure boot on a system in order to run. For many users, the version of the TPM chip is what prevents them from updating to Windows 11.
Install Windows 11 without TPM
The TPM chip is a hardware component. If your system doesn’t have one, you probably need to buy a new one. This chip is not exactly something you can upgrade like RAM. Your motherboard may not support a newer version of the chip. That said, you can skip the Windows 11 requirement for the chip.
To do this, it is better to upgrade to Windows 11 from Windows 10. Before upgrading, you need to edit the registry and tell Windows 10 to bypass the TPM requirement.
It is generally safe to do so, but we highly recommend that you back up any important files on your system before proceeding. If you can, create a restore point. This will work for both supported and unsupported CPU systems.
How to install Windows 11 without TPM
To install Windows 11 on a system that does not have a TPM chip or that does not have TPM 2.0, follow these steps.
- Tap the Win + R keyboard shortcut to open the run box.
- In the run box, enter
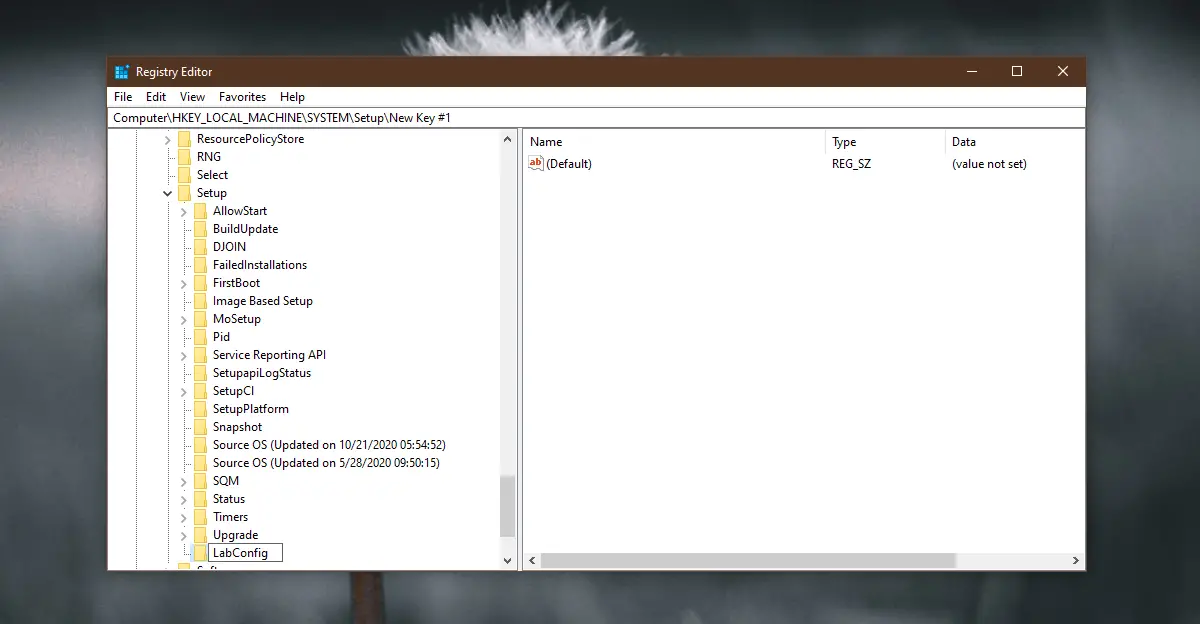
regeditand hit the Enter key. - Go to
HKEY_LOCAL_MACHINESYSTEMSetup - Right-click on the Settings key and select New> Key from the context menu.
- Name this key:
LabConfig.
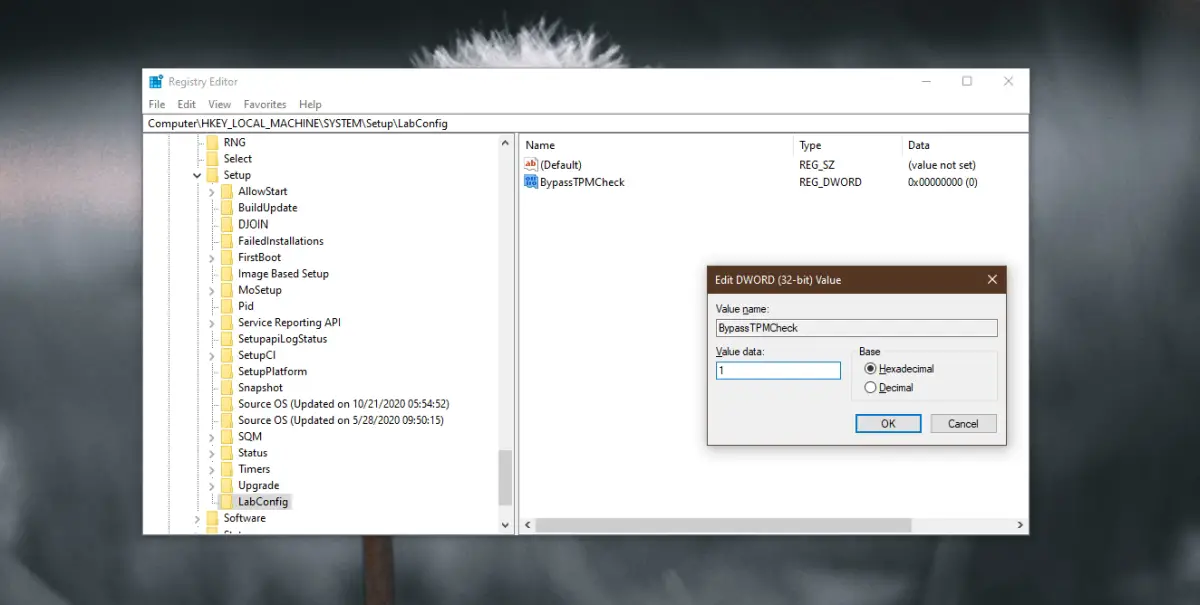
- Right-click on the newly created LabConfig key and select New> DWORD Value (32-bit) from the context menu.
- Name this value DWORD
BypassTPMCheck. - Double click the BypassTPMCheck value and set its value to 1.
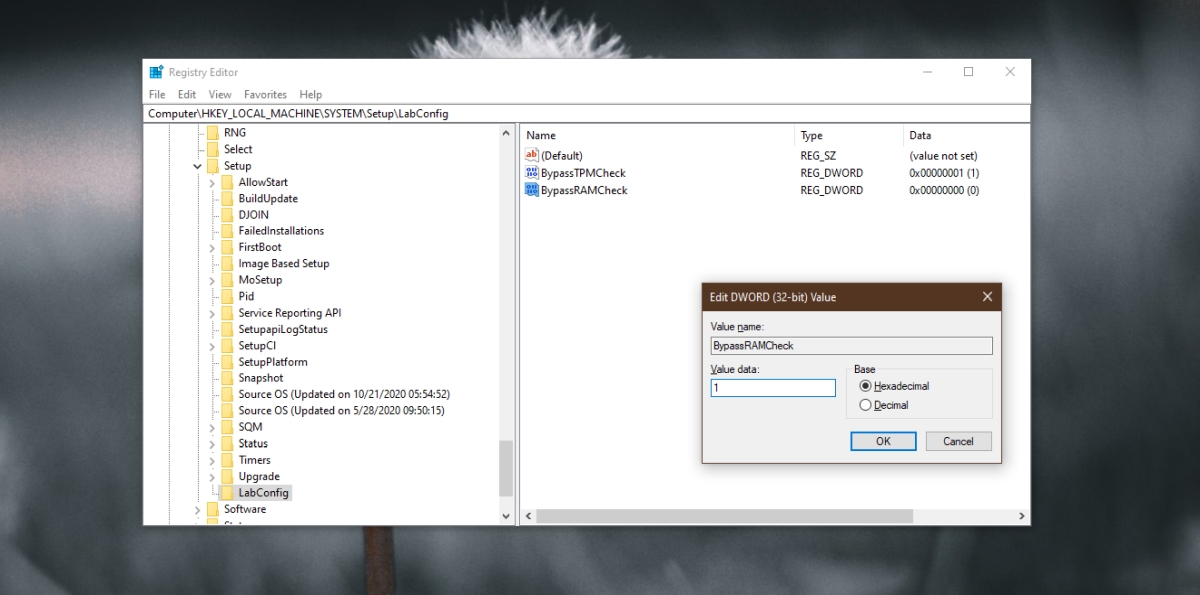
- Right-click the LabConfig key again and select New> DWORD Value (32-bit) from the context menu.
- Name it
BypassRAMCheck. - Double click on it and set its value to 1.
- Right-click LabConfig again and select New> DWORD Value (32-bit).
- Name this value
BypassSecureBootCheck. - Double click on it and set its value to 1.
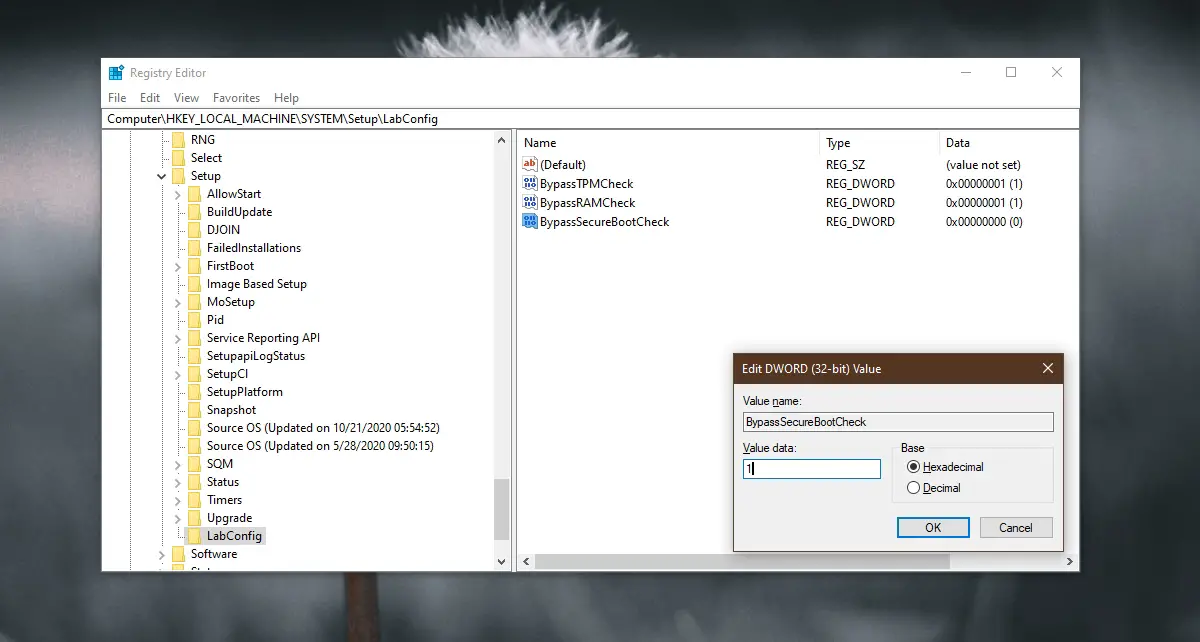
- Click OK and close the registry editor.
- Run the installation file for Windows 11.
Note: You can upgrade to Windows 11 by creating an installation disc, connecting it to your Windows 10 system, and accessing it from File Explorer.
Clean install of Windows 11
If you are not upgrading to Windows 11 from Windows 10 and instead choose to perform a clean install of the new operating system, you still need to edit the registry. The trick is to access the registry before installing Windows 11.
- Turn off your computer.
- Power on the system and go to BIOS.
- Change the first boot device to USB.
- Plug in the Windows 11 installation / USB disk.
- Restart the computer.
- When the Windows 11 installation disc starts, you will see a “This PC cannot run Windows 11” message.
- Press the keyboard shortcut Shift + F10 to open the command prompt.
- At the command prompt, enter
regeditand tap Enter. - The registry editor will open.
- Follow the steps in the previous section and make any modifications to the registry.
- After the edits are complete, enter Exit in the command prompt window.
- Click the Back button on the “This PC cannot run Windows 11” screen.
- Run the installation again and it should be successful.
conclusion
Microsoft generally does not create software that forces users to buy new hardware. If you have a system that is too old to have a TPM 2.0 chip, you should consider purchasing a new system. The TPM chip adds enhanced security to your system and you will need it in the future. It is also possible that Microsoft will repair this job to leave you in a bind.
Related posts:
 How to access Steam games without an internet connection
  How to view FPS with Xbox Game Bar in Windows 10: Steps Made Easy
  Hacked account? How to check and remedy
  How to make video calls from WhatsApp Web
  How to increase the RAM memory of a desktop or laptop + Tips and Tricks
  How to organize your YouTube subscriptions into categories
+ Tips and Tricks
How to organize your YouTube subscriptions into categories
+ Tips and Tricks


