


How to make a helicopter in Minecraft – You have recently started a new world in Minecraft and although you are having fun building everything that comes to mind, you would like to create something more unique. Maybe you could make your world more modern by adding some themed items. You might, for example, think about building a helicopter and making your island more unique than ever.
How do you say? Does the idea excite you a lot but you don’t know how to carry out such a project? Then you are in the right place, because I’m just about to tell you how to make a helicopter in Minecraft ! Just equip yourself with some material and a little patience and you will see that you will be able to build one in no time!
No more chatter, it’s time to get to work! So take a seat and take a few minutes of time to devote to reading this guide. You will see that, in the end, you will be able to build a helicopter of your own. I just have to wish you a good read, but above all, good fun!
How to build a helicopter in Minecraft
Strange as it may sound, building a helicopter in Minecraft with your own hands is easier than you might think. Also, since a helicopter isn’t that big, there’s no need to use a lot of materials.
Ovviamente, tieni conto del fatto che al momento non è possibile creare un elicottero funzionante, se non con l’utilizzo di mod esterne. Per questo motivo, se vuoi costruire un elicottero su Minecraft senza ricorrere all’uso di mod (di cui ti parlerò più avanti), questo potrà avere soltanto una funzione estetica. Sappi, però, che l’uso delle mod è destinato, per la maggior parte, soltanto alla versione Java di Minecraft per PC, per cui non potrai utilizzarle nella versione Bedrock per Windows 10, console e dispositivi mobili.
Risorse necessarie
Prima di spiegarti come costruire un elicottero su Minecraft, ovviamente, è bene che tu sia al corrente dei materiali di cui hai bisogno per poterlo creare.
Ebbene, sappi che per la maggior parte dei componenti del velivolo non ci sono dei materiali specifici da utilizzare: hai quasi carta bianca su questo. Ci sono, però, dei blocchi consigliati per realizzare un elicottero tra i quali puoi scegliere.
Ad esempio, per realizzare i pattini e le eliche del velivolo è consigliato utilizzare le Lastre di andesite levigata.
Per ottenere le Lastre di andesite, hai bisogno di trovare l’Andesite, situata nel sottosuolo. Una volta trovata e raccolta con un Piccone, posiziona tre blocchi nel Banco da lavoro per creare le Lastre di andesite levigata.
As for the body of the helicopter, however, here too you have carte blanche. In any case, I recommend that you use the colored Terracotta blocks of the color you prefer.
For the front of the structure, you will obviously need some glass blocks . Again, it’s up to you to choose the color of the latter.
Finally, there are other additional materials you need to make the details of the helicopter, namely the Polished Andesite Steps and a Andesite Wall .
Making the helicopter
Now that you have all the materials you need, it’s time to build the helicopter .
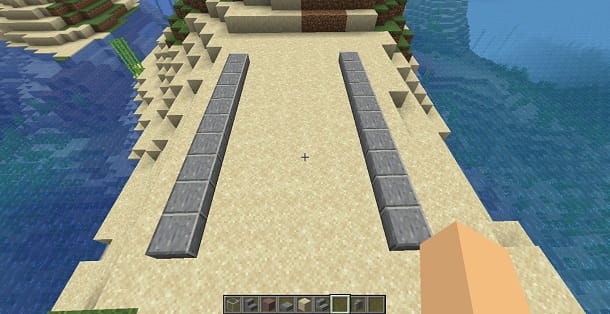
First, I’ll start by showing you how to make the skates . Then take your Polished Andesite Slabs and create two lines of 10 blocks using the same material. These will need to be seven blocks apart, so that you have a five-block gap between the two lines.
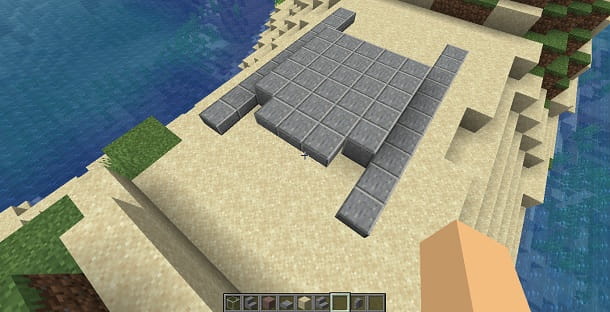
At this point, it’s time to build the base , which will also act as a floor for the helicopter. Then create a 5 × 5 layer of Polished Andesite Slabs , which you have to place between the two previously built lines. Precisely, you have to position them a half block higher than the lines, starting from the third block of the latter.
With that done, you should find yourself with six uncovered blocks on one side and nine more uncovered blocks on the other. Keep in mind that the first mentioned will act as the nose of the helicopter, so decide well how to develop the structure according to the perspective you prefer.
Next, place ten more Smooth Andesite Slabs under the two sides of the blocks you just placed, five on each side. Finally, place three plates in front of the center of the muzzle, making them stick out. By doing so, you will have finished the helicopter base.
After building the skates, it’s time to move on to the central body . As mentioned previously, you can use any color of Terracotta to make it.
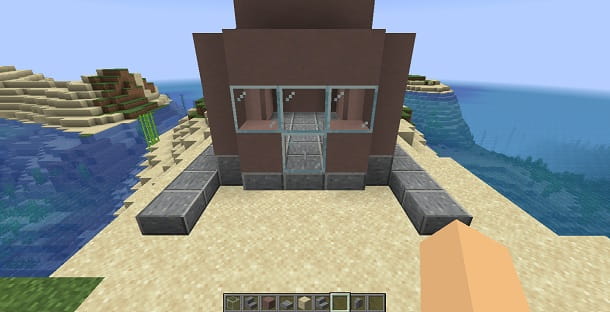
For the front , you need five Terracotta blocks , to be placed on top of the three protruding slabs. You should find yourself with four empty blocks, into which you have to insert four glass blocks .
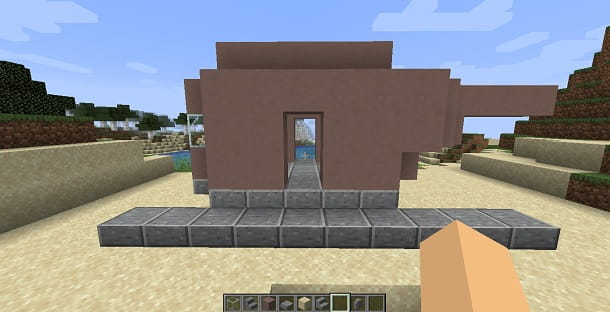
The sides of the helicopter, on the other hand, must be built taking into account the entrance. For each side, then, place thirteen Terracotta blocks on top of the base you built earlier, leaving two blocks in the center empty.
You can decide how to build the entrance as you see fit. You could leave it empty, or you can also place a Door on it . The choice is up to you!
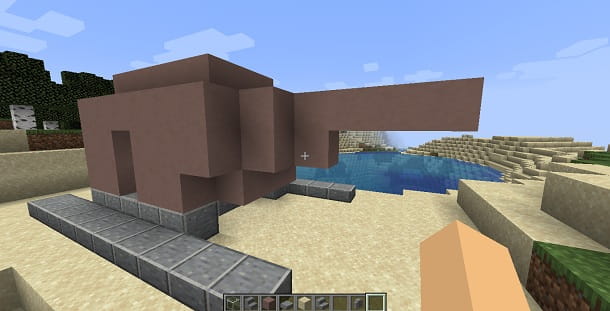
The rear , on the other hand, is slightly more complicated. Start by creating a layer of thirteen terracotta blocks , closing the inside of the helicopter from behind. You should find yourself with two empty blocks at the bottom, one on the right and one on the left.
At this point, create another 3 × 2 layer of Terracotta blocks starting from the top central part. Again, you should find yourself with seven empty blocks on either side.
Next, create a layer of two Terracotta blocks on the central part and finally, starting from the top block, build a line of three Terracotta blocks horizontally.
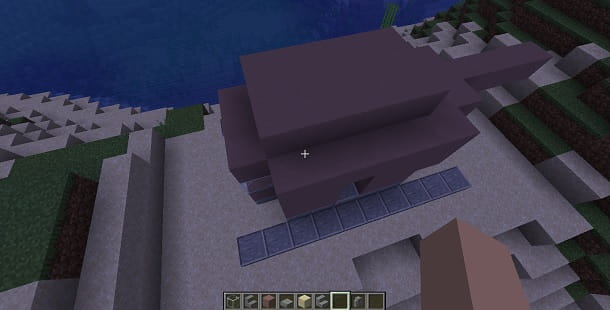
To finish the body, you need to do the roof . Next, build a 5 × 3 layer of Terracotta blocks , starting one block ahead of the front of the helicopter.
Now that the main body is finished, it’s time to add some details .
Then take the smooth andesite steps and place them in the uncovered corners of the helicopter as you see fit. You can, for example, place them around the roof, or under the rear of the structure.
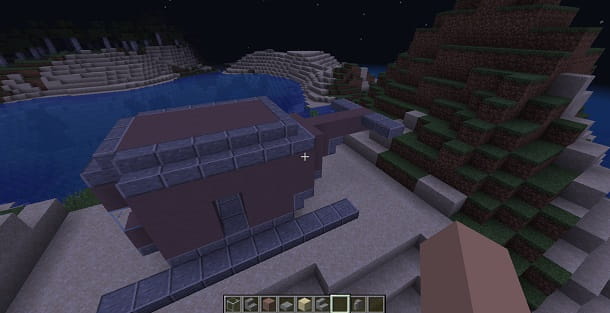
Also, you can build a torque reaction rotor on the back. To do this, simply create two horizontal lines from two blocks of Polished Andesite Slabs and place them to the right and left of the last block of the helicopter’s tail.
Finally, still using the Polished Andesite Steps , you can create one or more chairs inside the helicopter. If you are interested in building some more detailed chairs, however, then I refer you to my guide dedicated to the subject, where I explain how to make a chair in Minecraft.
The helicopter is almost complete! You just have to build the last part of the aircraft, which is the propeller .
Start by placing an Andesite Wall in the center of the helicopter’s roof. This will act as a link between the propeller and the main structure of the aircraft.
At this point, create a symbol in the shape of a + using the Polished Andesite Plates . Each shovel should be five blocks long , including the one in the center.
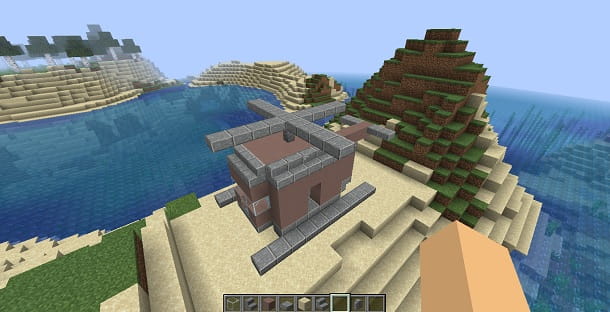
That’s all: the helicopter is done! As I mentioned earlier, this can only serve as a decoration to your world. If, on the other hand, you would like to build a working helicopter on Minecraft, continue reading this guide.
How to make a working helicopter in Minecraft (mod)

To make a working helicopter in Minecraft , you can rely on the use of some mods .
Before continuing, however, I invite you to pay attention to the unofficial files you download, as they could cause damage to your computer. Make sure, therefore, that the download sources are always reliable.
Also, as I mentioned in previous chapters, keep in mind that most mods are only compatible with the Java version of Minecraft, which is only available on PC .
That said, we can start with the explanation. First, you need to download Forge , which is a program that is used to load and read mods created by users. In case you don’t know how, I refer you to my guide, in which I explain how to install Minecraft Forge.
After doing that, it’s time to download the MCHeli mod . This will add a huge variety of aircraft to the game, including helicopters.
To download it, go to the official page of the mod and click on the Download button . When the download is finished, first, you need to extract the content from the .zip file you just downloaded.
You can delete the META-INF folder that was generated by the extraction, as it could give problems to the functioning of the mod, and is therefore superfluous.
At this point, you need to move the folder you just extracted into the main Minecraft files. To do this, call the Run menu by pressing Win + R , type the command % appdata% and press Enter . By doing so, you should open the Roaming folder .
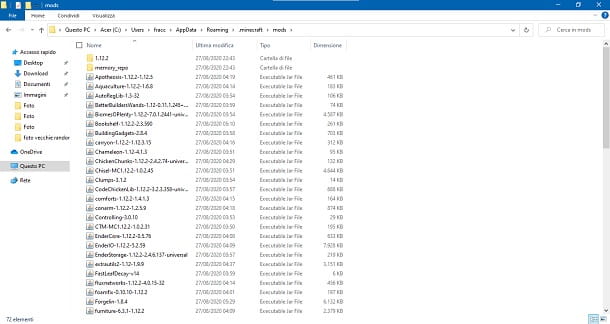
Now, head to the .minecraft> mods folder . Once here, all you have to do is drag the folder you extracted from the .zip file into the mods folder .
If you are using a Mac, the mods folder is ~/Library/Application Support/minecraft/mods. In case you can’t see the paths just mentioned, turn on the display of hidden folders.
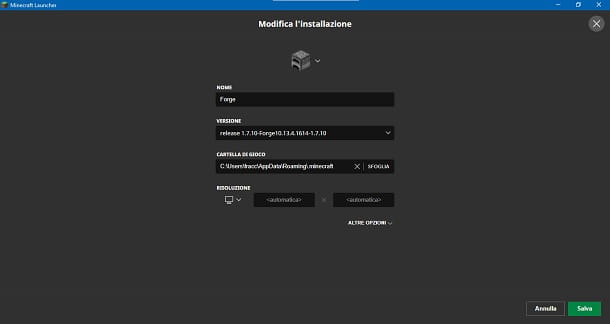
Now that the mod is loaded inside Minecraft, you need to start the game. Before you can actually use it though, you have to choose the suitable version of Forge that is compatible with the MCHeli mod, which is indicated on the official page of the mod. At the time of writing, for example, the version of Forge supported by the mod is 1.7.10 .
To change the Forge version, start Minecraft and hit the Installations tab . At this point, locate the version of the game called Forge , then press on the icon of the three dots and then on the Edit button .
Now, click on the box under VERSION and select the version you need. When you have made the changes, click on the Save button and finally click on the Play button to start Minecraft.
All you have to do is start a Minecraft world to your liking by clicking on the Single Player button and selecting the world you prefer. Alternatively, you could also think about creating a new world by clicking on the Create a new world button .
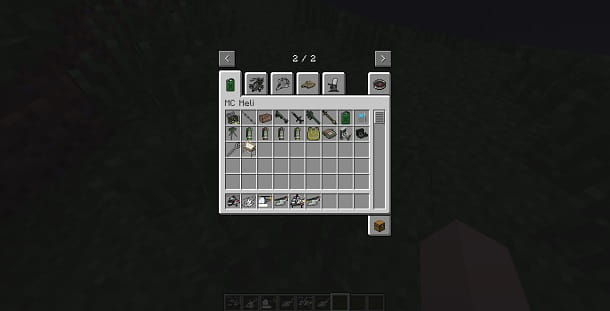
In any case, I recommend that you start a world in Creative mode , as most of the mod content cannot be obtained in Survival mode.
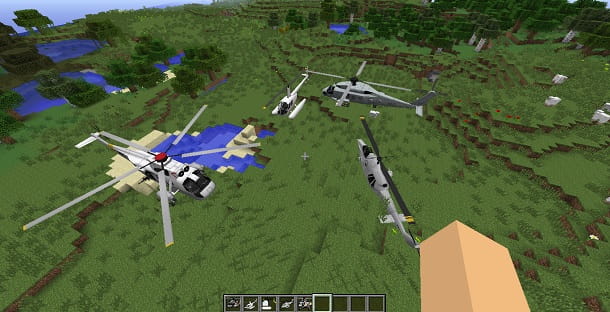
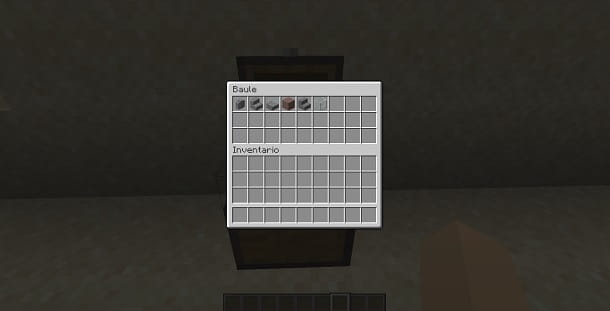
If you have followed my instructions correctly, just open the inventory in Creative mode and then press on the > icon , to view all the contents added by the mod. Specifically, this adds about fifty aircraft including planes, helicopters, airplanes and more.
Then start by placing a helicopter on the ground. To do this, simply select it from the inventory and wield it. At this point, right click on the ground to make the helicopter appear.
To enter the helicopter , instead, just right-click on it, pointing at it with the mouse. At this point, you can start the engines by pressing Space (or W , depending on the aircraft).
Some helicopters are also equipped with firearms . To use them, just press the left mouse button. Also, you can move the latter to adjust your aim.
The mod also includes some objects that make it even more complete, which can be built with the materials already present in the normal version of Minecraft.
For example, aircraft need to be periodically refueled with Fuel , which is created by placing five units of Iron Ingots and one unit of Coal on the workbench. Or, they may need to be fixed with the use of a Wrench , which you can build by placing four units of Iron Ingots on the workbench.
You will have, therefore, got to see with your own eyes that the MCHeli mod adds a huge amount of content to Minecraft, especially designed for users looking for a game mode that also expands to the skies of the game. Thanks to this mod, in fact, it is possible to have a very immersive experience, also thanks to details such as the interface of each aircraft, treated differently for each of them.
Related posts:
 How to access Steam games without an internet connection
  How to view FPS with Xbox Game Bar in Windows 10: Steps Made Easy
  Hacked account? How to check and remedy
  How to make video calls from WhatsApp Web
  How to increase the RAM memory of a desktop or laptop + Tips and Tricks
  How to organize your YouTube subscriptions into categories
+ Tips and Tricks
How to organize your YouTube subscriptions into categories
+ Tips and Tricks


