


How to prevent users from getting Windows Insider Preview builds on Windows 11
Windows Insider Program is an amazing service provided by Windows for its users to try out upcoming versions of Windows before they officially hit the market. Users can sign up for the Windows Insider Program through the Settings app. Once registered, users can access upcoming Windows builds through this service. However, Windows allows you to disable this service from the Settings app.
In this article, we explain through 2 different methods how you can easily prevent users from getting Windows Insider Preview builds on Windows 11 with some simple steps.
Method 1: Through the local group policy editor
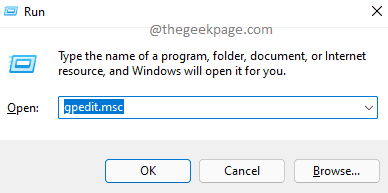
Paso 1: Press the keys Earn + R simultaneously to open the To run window. Write gpedit.msc and hit the Get into wrench.
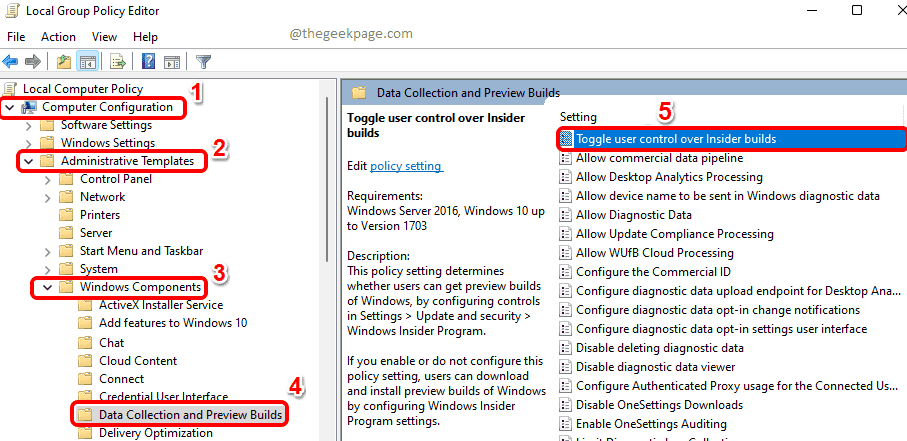
Paso 2: Next, surf to the following folder by Double click in every folder along the way.
Computer Configuration --> Administrative Templates --> Windows Components --> Data Collection and Preview Builds
Once in the folder Data collection and preview builds, about him right window cristal, double click in the setting called Toggle user control over Insider builds to open your Properties window.
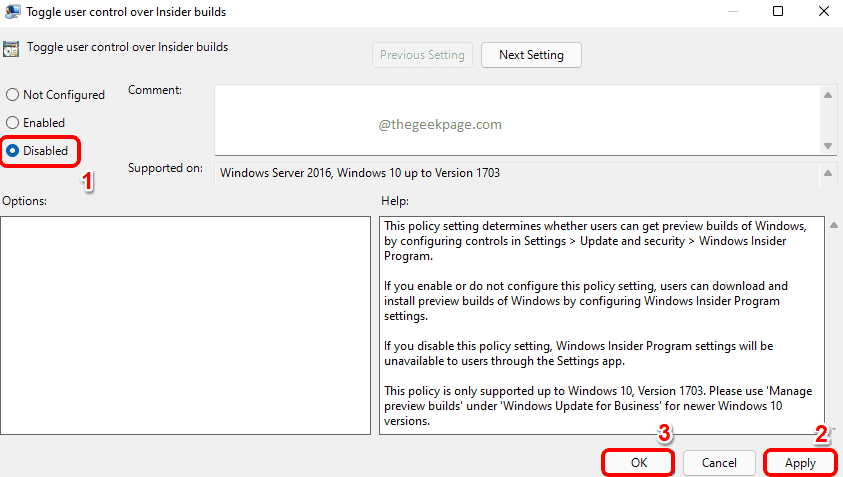
Paso 3: At Toggle user control over Insider builds properties window, choose the radio button Disabled to prevent users from getting preview builds using Insider programs on Windows 11.
Hit the Request button and then the OK button.
After the policy settings have been applied, close the window and perform steps 4 and 5.
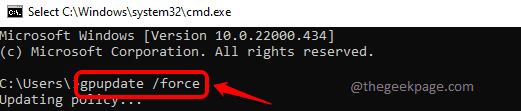
Stage 4: Start the To run window by pressing the button Earn + R keys together. Write cmd and hit the Get into wrench.

Paso 5: Once the command prompt is opened, type the following command and then hit the Get into wrench.
gpupdate /force
Please wait patiently while your policy is updated.
Once you’re done, restart the computer to apply the changes.
Note: If you want let the service again, choose the Activated radio option in Step 3. The rest of the steps are the same.
Method 2 – Via Registry Editor
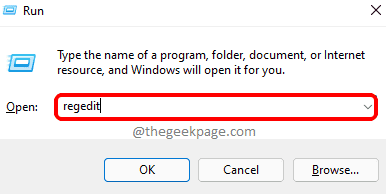
Paso 1: Printing Earn + R together to launch To run window.
Write regeditar and hit the OK button.
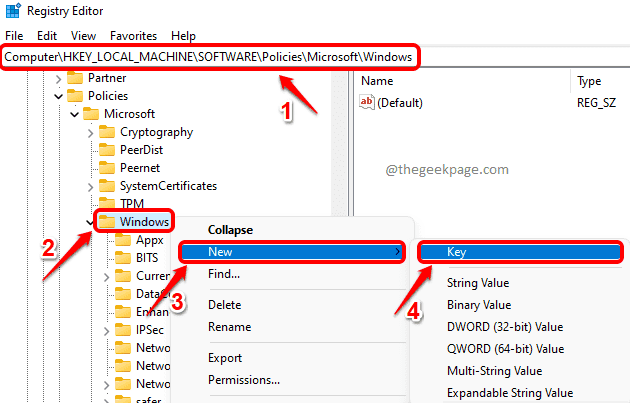
Paso 2: copy take The next Location in the navigation bar and press the button Get into wrench.
HKEY_LOCAL_MACHINESOFTWAREPoliciesMicrosoftWindows
As following, the right button of the mouse about him Windows folder, click the New option and then click the Wrench option.
Paso 3: Now click about him newly created wrench and press the button F2 button to rename it.
Give the name as PreviewBuilds.
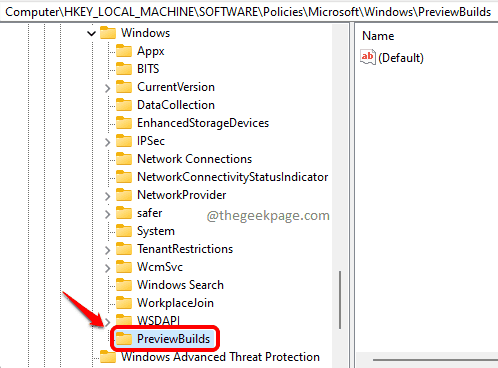
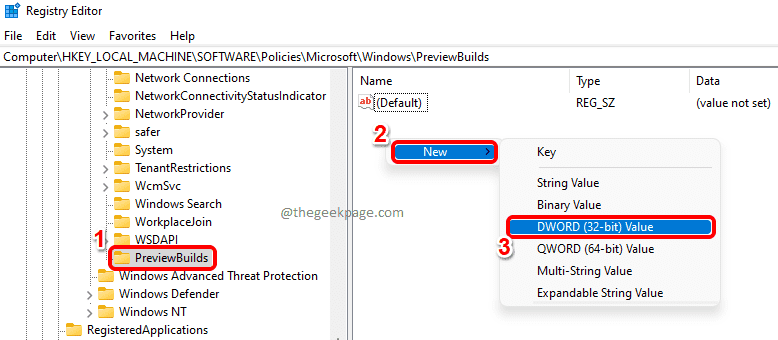
Stage 4: In the next step, click in the newly created PreviewBuilds key to Select that.
At right window panel, in an empty space, just right click, choose the option New and then choose the option Valor DWORD (32 bits).
Paso 5: Again, click on the newly created DWORD (32 bits) value and press the button F2 key to rename that.
Give the name as AllowBuildPreview.
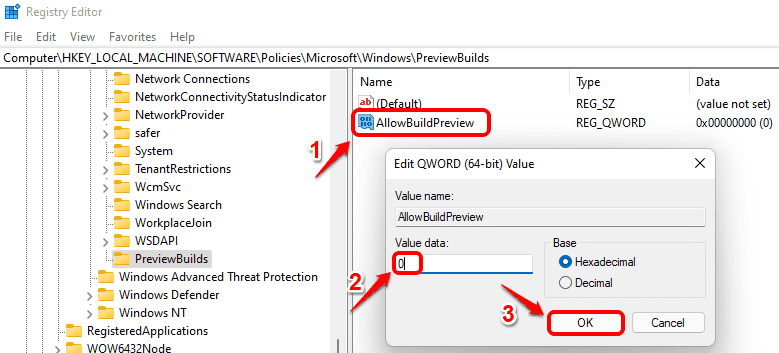
double click about him AllowBuildPreview DWORD value to edit your value data country.
Give the value as 0(Zero) and then press the OK button.
Reboot your PC.
Note: If you want let the service again, simple to give 1 at value data field in the previous step instead of 0.
I hope you found the article useful.
Related posts:
 How to access Steam games without an internet connection
  How to view FPS with Xbox Game Bar in Windows 10: Steps Made Easy
  Hacked account? How to check and remedy
  How to make video calls from WhatsApp Web
  How to increase the RAM memory of a desktop or laptop + Tips and Tricks
  How to organize your YouTube subscriptions into categories
+ Tips and Tricks
How to organize your YouTube subscriptions into categories
+ Tips and Tricks


