


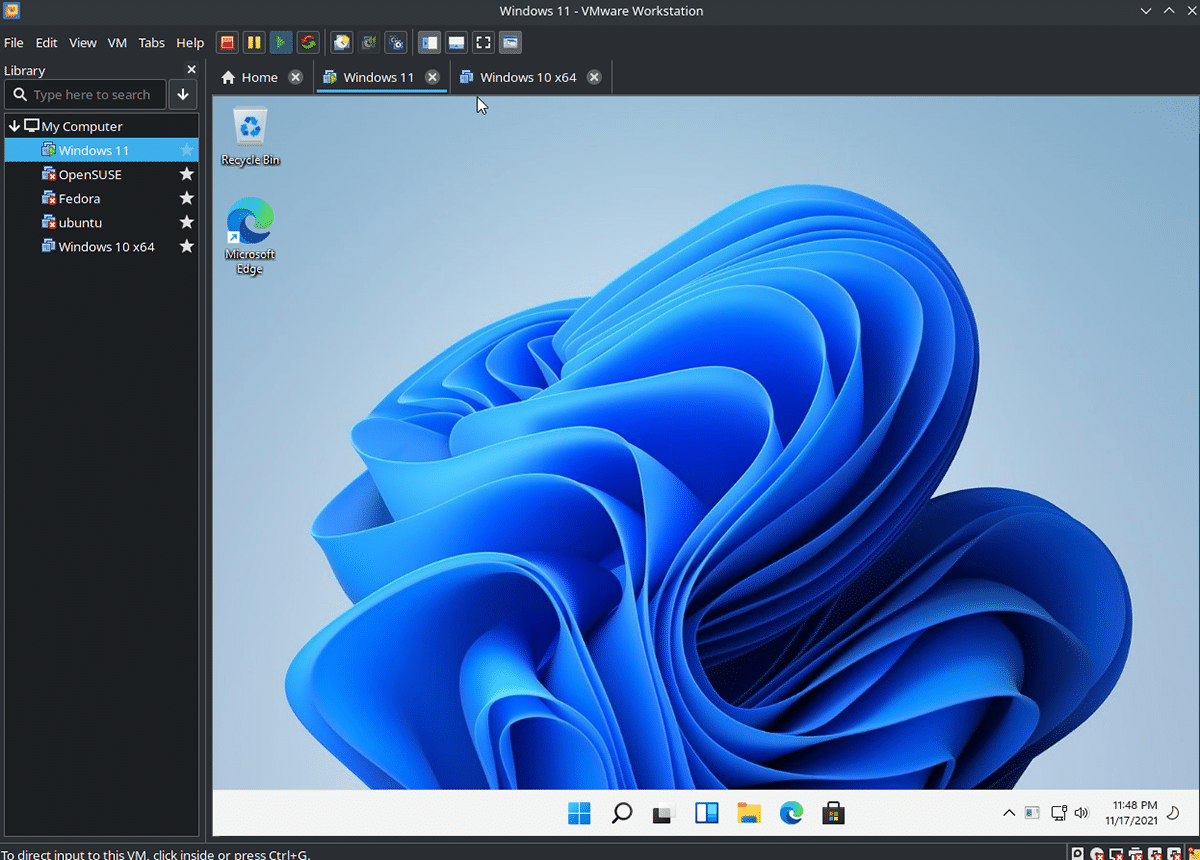
How to run Windows 11 on Linux on VMWare Workstation
VMWare Workstation is an awesome tool for running virtual machines on Linux. If you’ve been itching to try the latest version of Windows 11 on your Linux computer, this guide will show you now.
Note: VMWare Workstation is not free software. You can use one evaluation copy of the software for 30 days. However, if you like the application, buy a license from the official website.
Instalar VMWare Workstation en Linux
To use Windows 11 on your Linux PC in VMWare Workstation, you will need to install the application on your computer. To install the latest version of VMWare, start by opening a terminal window on the Linux desktop.
You can open a terminal window on the desktop by pressing Ctrl + Alt + T on the keyboard. Or search for “Terminal” in the application menu and run it that way. Then with the terminal open, follow the installation instructions below to get VMWare working.
generic linux
If you are using Ubuntu, Debian, OpenSUSE, Fedora, or any other Linux operating system, you can install VMWare Workstation using the downloadable binary. To get your hands on the binary, use the following wget download command.
wget https://download3.vmware.com/software/wkst/file/VMware-Workstation-Full-16.2.1-18811642.x86_64.bundle
After downloading the file, use the sh command to run the package file as a shell script in your terminal. Running this file as a shell script will start the installer.
sudo sh VMware-Workstation-Full-16.2.1-18811642.x86_64.bundle
When you start the VMWare installer, the application will be installed on your computer. From here you need to start the following systemd services.
sudo systemctl enable --now vmware-networks.service

sudo systemctl enable --now vmware-usbarbitrator.service
Once you have started these two services, open VMWare Workstation through the application menu. Then enter your license key. Or select the free trial version if you don’t have a copy.
Arch Linux
If you are using Arch Linux, the standalone VMWare package file will not work. The reason it doesn’t work is that the Arch script location is different than what VMWare expects. The best way to make it work is with AUR.
To install VMWare Workstation on Arch Linux, enter the following commands in succession.
sudo pacman -S git base-devel

git clone https://aur.archlinux.org/trizen.git
cd trizen/
makepkg -sri

trizen -S vmware-workstation

sudo systemctl enable --now vmware-networks.service

sudo systemctl enable --now vmware-usbarbitrator.service
Download Windows 11
With the VMWare Workstation application set up, it’s time to download the latest version of Windows 11. Fortunately, Windows 11 is free to download from Microsoft. To get your hands on it, do the following.
First, head over to the Windows 11 ISO Page. Once there, scroll down to the “Download Windows 11 Disc Image (ISO)” section and click on the “Select Download” menu. Then choose Windows 11.
After selecting “Windows 11”, click the download button. Then choose your product language and select the “Download” button again to start the Windows 11 ISO download.
Windows 11 Configuration on VMware
Windows 11 setup on VMWare is a bit different than VirtualBox on Linux. You don’t need to do any registry tricks, and you will even be able to take advantage of Microsoft’s required TPM feature as well as Secure Boot.
To configure the virtual machine, start VMWare Workstation on the Linux desktop. Then follow the step-by-step instructions below.
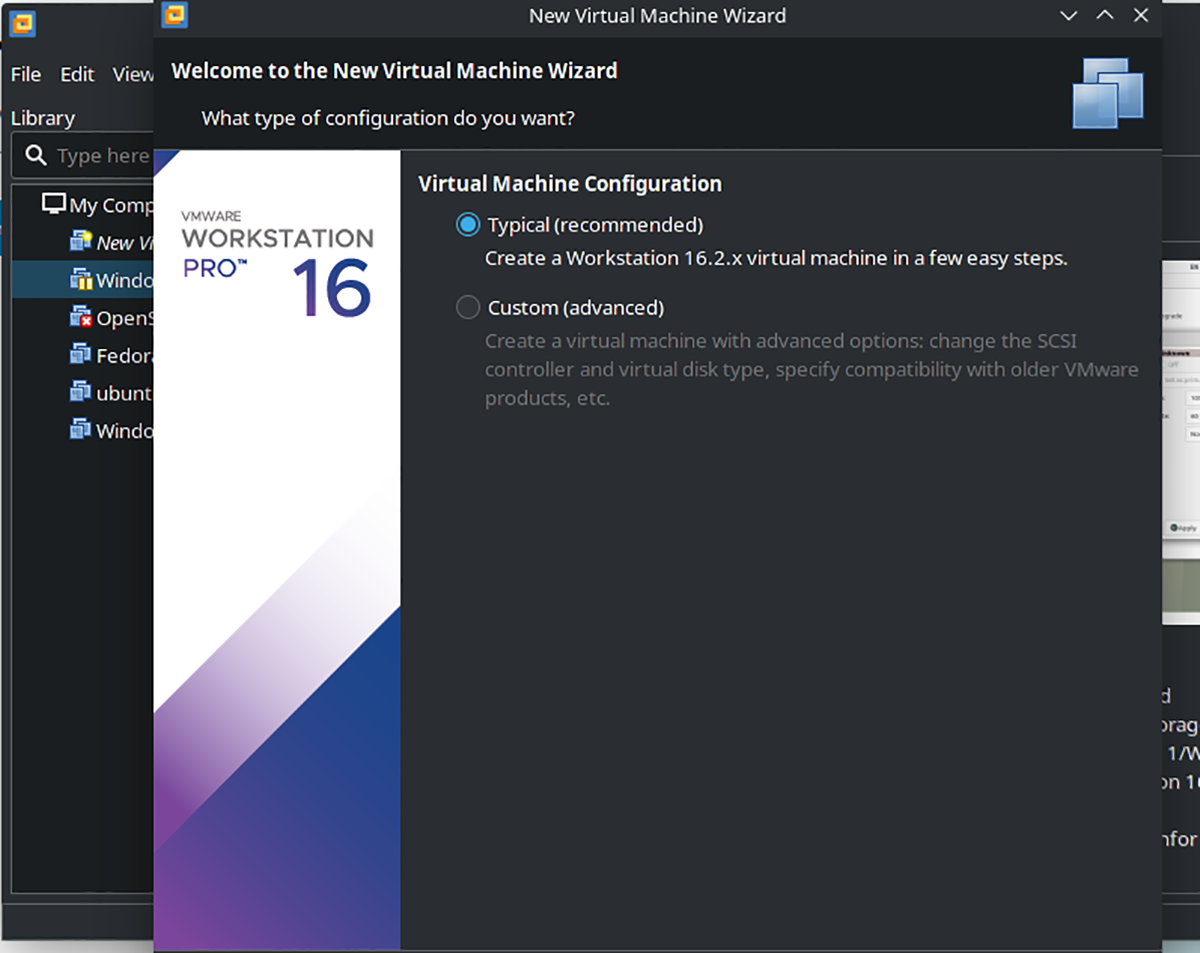
Paso 1: In VMware Workstation, find and click the “File” menu. Then select the “New Virtual Machine” button with the mouse to create a new VM.
Paso 2: After clicking the “New Virtual Machine” button, a pop-up window will appear. Select “Typical” in this pop-up window. Then click the “Next” button to continue.
Paso 3: Find the “Use ISO Image” option and click the “Browse” button. Then find the Windows 11 ISO file downloaded from earlier. Click the “Next” button to continue when you are done.

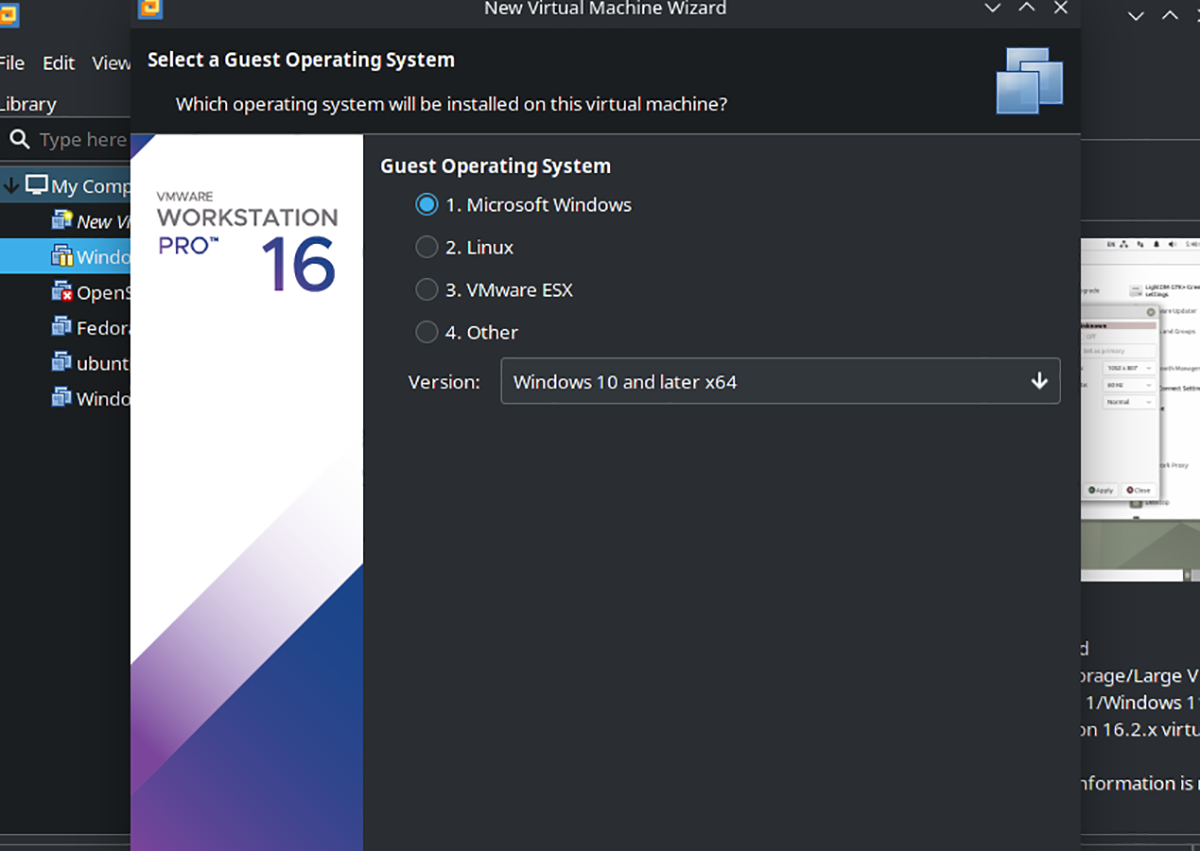
Paso 4: After selecting the Windows 11 ISO, VMware will ask you to specify what type of operating system it is. Choose “Windows 10 and later x64” from the drop-down menu. Then click the “Next” button to continue.
Paso 5: Now you need to choose the name of the virtual machine. In the “Name” box, enter “Windows 11.” Then, in the location, find the place where you would like to save the Windows 11 VMware files. Or leave it blank for the default location.
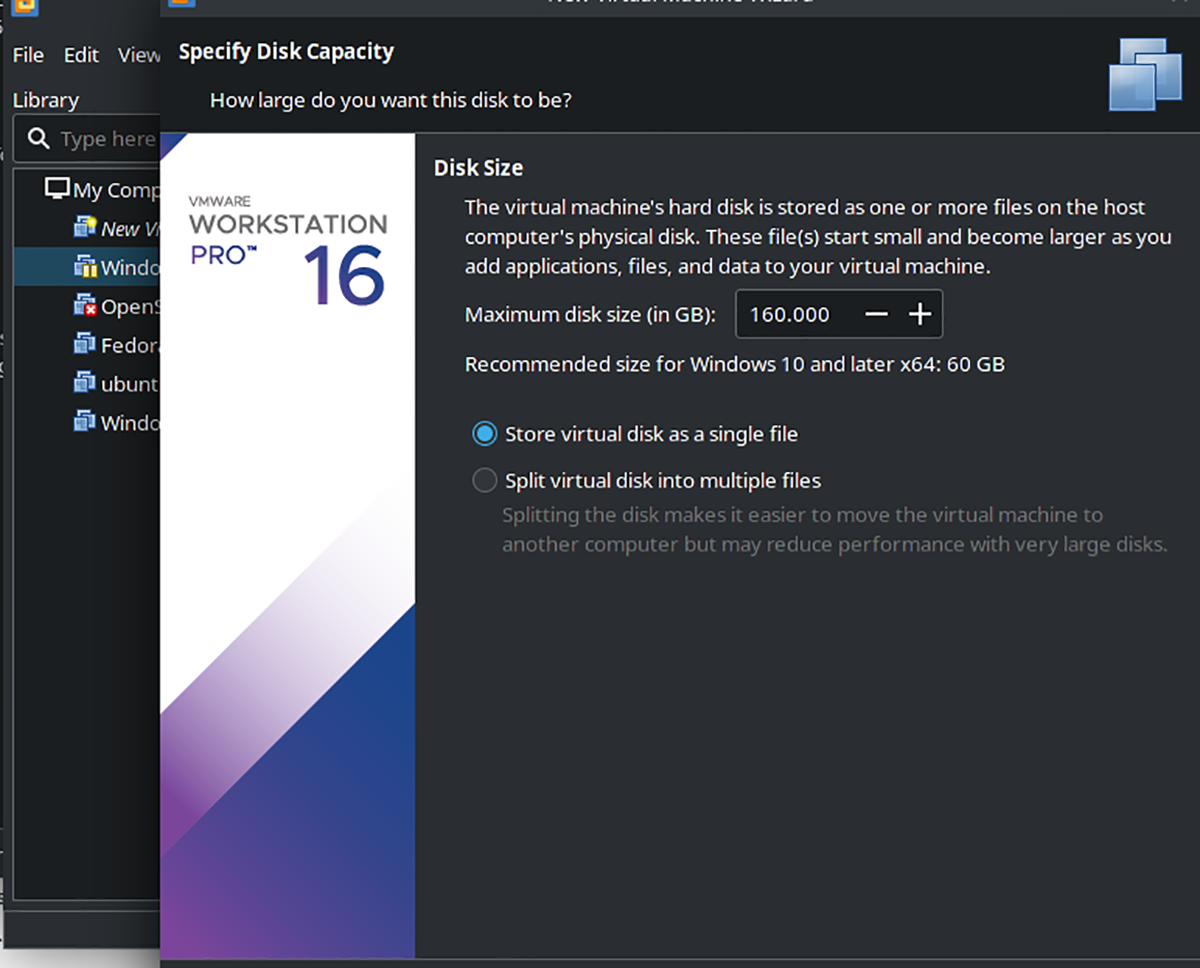
Paso 6: You must specify a virtual disk size. In “Maximum disk size (in GB), enter the desired size. For best results, make a drive of at least 160GB. After setting the size, choose “Store virtual disk as single file”. Then click “Next”.
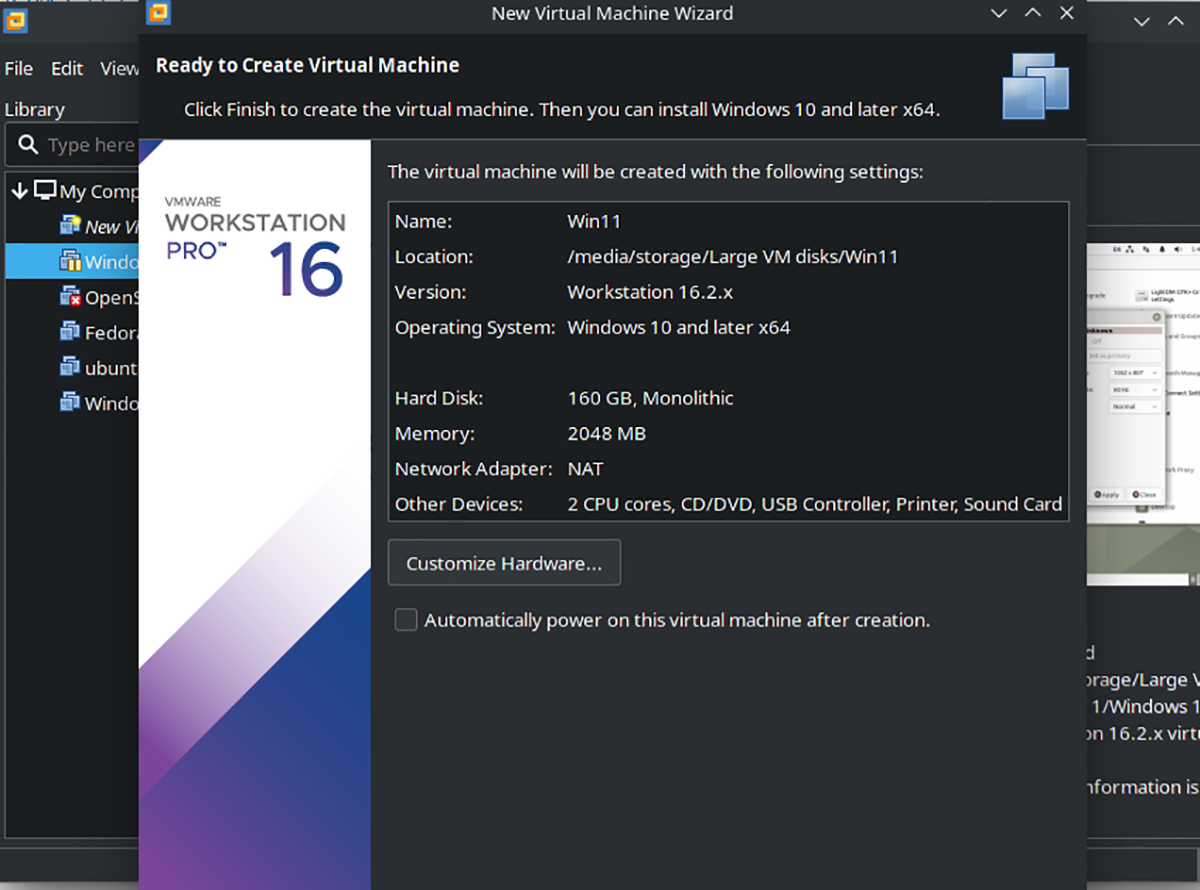
Paso 7: On the last page, you will see “Ready to create virtual machine”, followed by a summary. Uncheck “Automatically power on this virtual machine after creation” as the configuration is not complete yet.
Paso 8: After your virtual machine is created, go back to VMWare Workstation and right-click on the virtual machine. Select the “Settings” option to access the virtual machine settings. Then click on the “Options” tab and select “Advanced”.
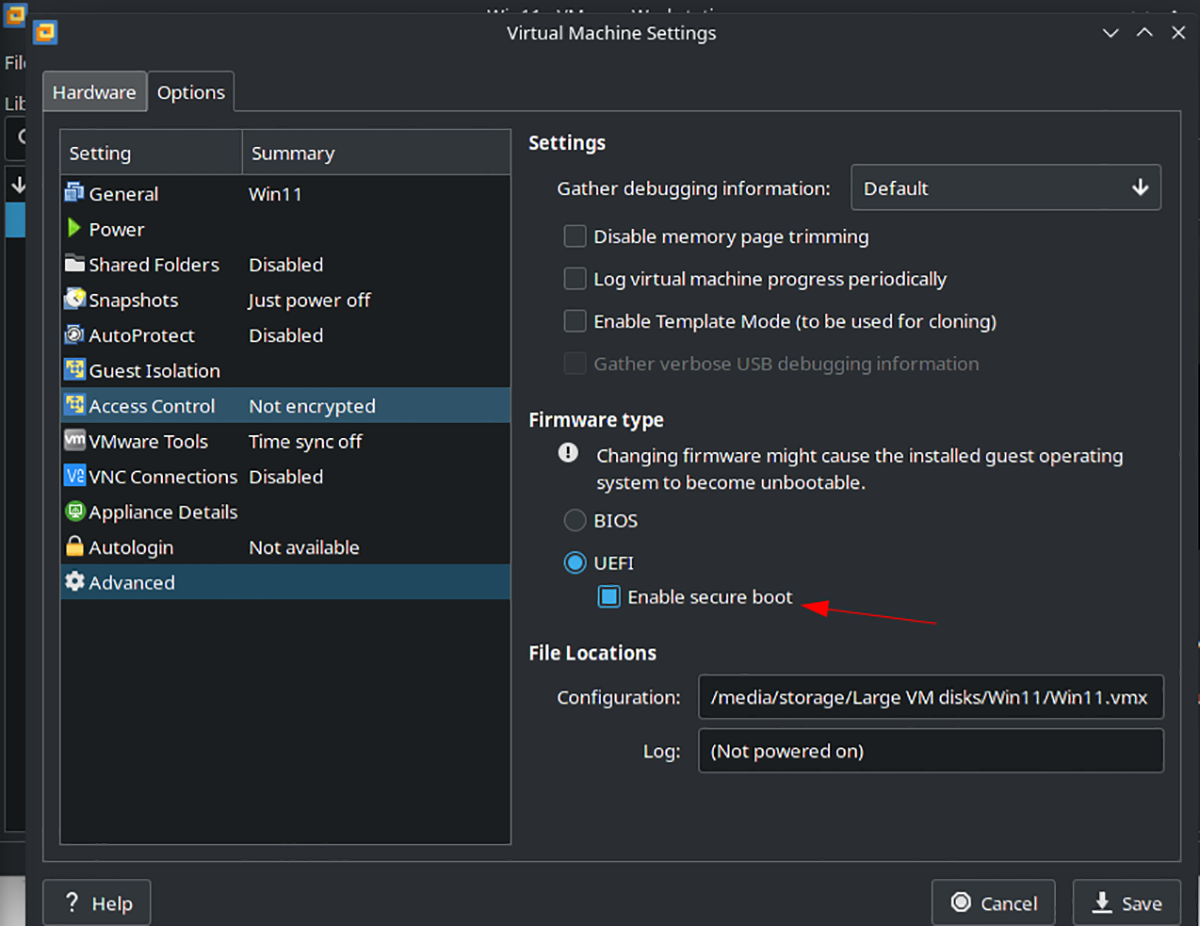
Paso 9: Within the advanced configuration area, select “Enable Secure Boot”. This option is essential, as Windows 11 requires this feature to run correctly.
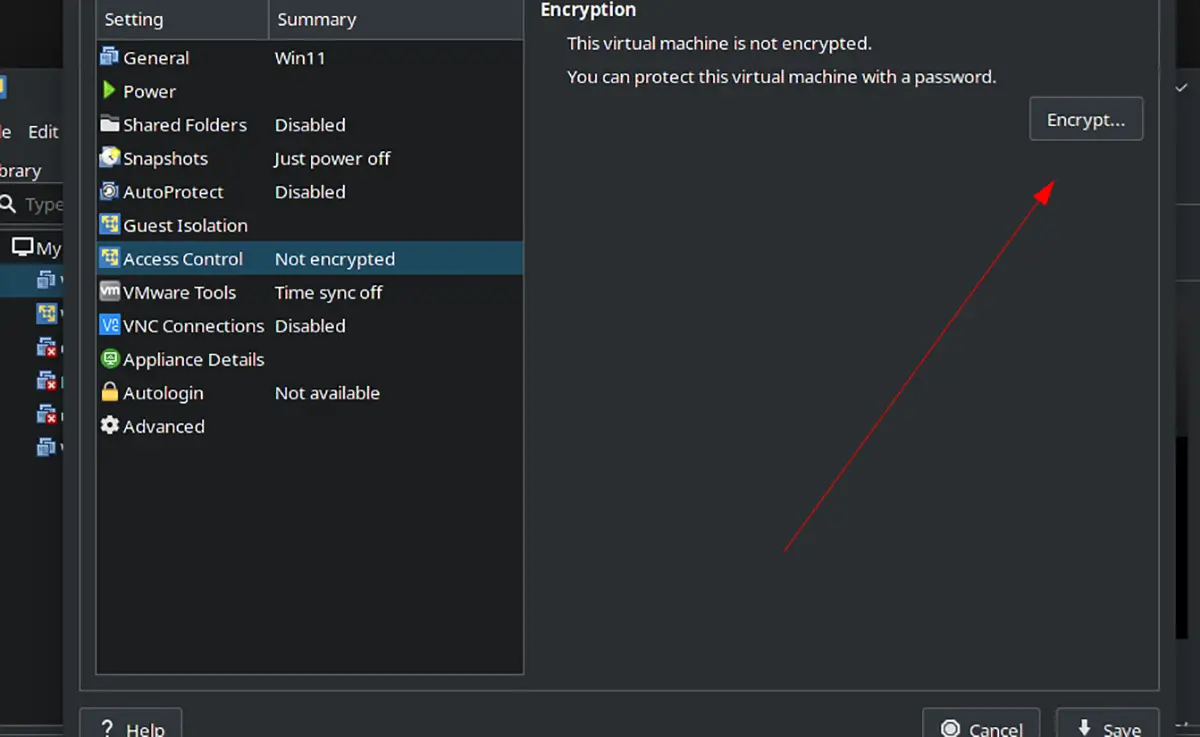
Paso 10: Find the “Access Control” setting in the list of options and select it with the mouse. Then click the “Encrypt” button to encrypt your virtual disk. Your Windows 11 virtual machine must be encrypted to use the virtual TPM module.
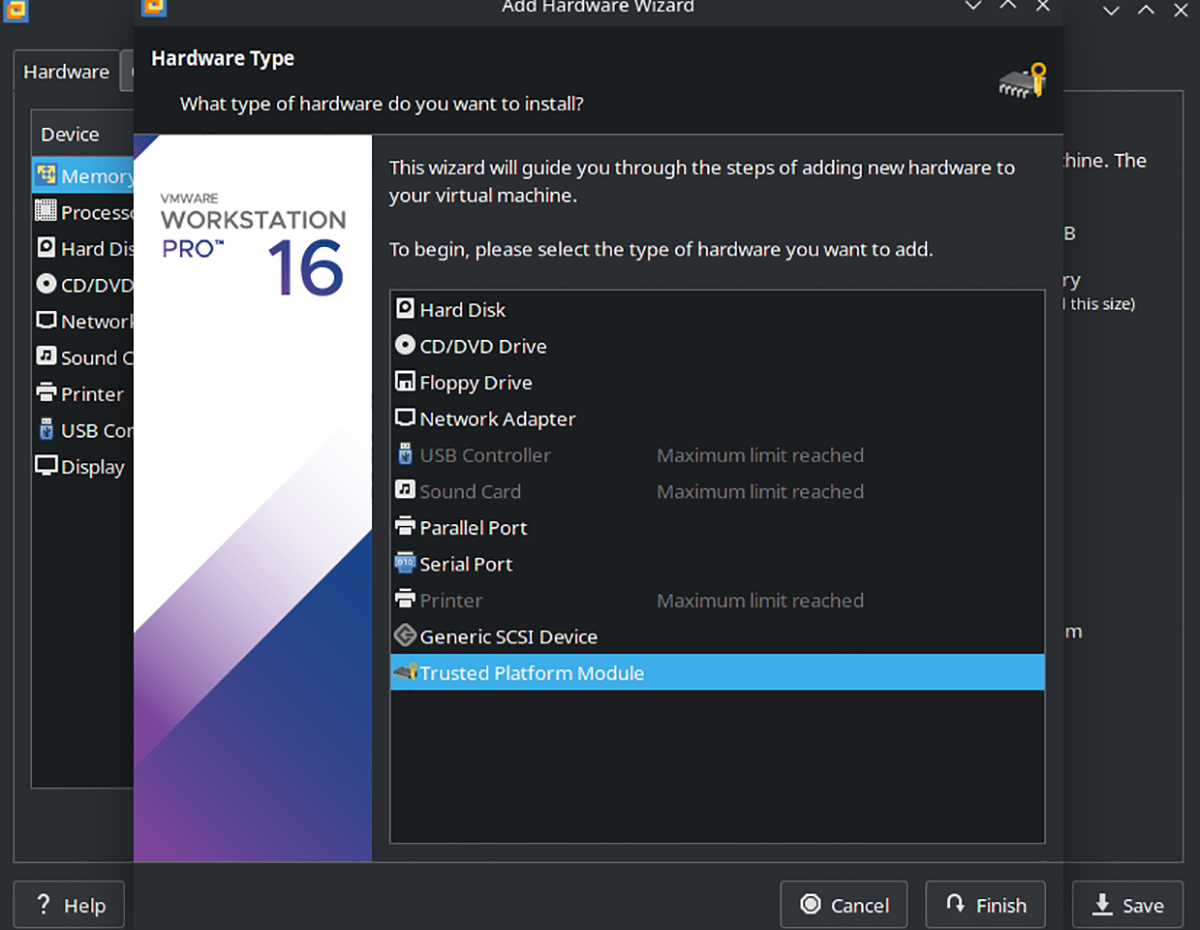
Paso 11: After encrypting your virtual machine, find the “Hardware tab” in the Windows 11 virtual machine settings and click on it. Then choose the “Add” button to add new hardware and select the “Trusted Platform Module” option to add TPM to your VM.
When done, click “Save” to save your settings.
Paso 12: After saving your edits to the virtual machine, select it and turn it on. From here, you can follow the installation process as usual for Windows 11. Enjoy!
Related posts:
 How to access Steam games without an internet connection
  How to view FPS with Xbox Game Bar in Windows 10: Steps Made Easy
  Hacked account? How to check and remedy
  How to make video calls from WhatsApp Web
  How to increase the RAM memory of a desktop or laptop + Tips and Tricks
  How to organize your YouTube subscriptions into categories
+ Tips and Tricks
How to organize your YouTube subscriptions into categories
+ Tips and Tricks


