


Problema de DRIVER_PORTION_MUST_BE_NONPAGED en Windows 11/10
When your system faces a fatal system failure, it stores the cause of the error in a proper log file, displays a full error code on a blue screen, and finally reboots the system. This problem is infamously known as “Blue Screen of Death” or BSOD. One of these BSODs is «DRIVER_PORTION_MUST_BE_NONPAGED“. When a drive marks its own data as pageable, this error message appears. Follow our comprehensive solutions to solve the problem quickly.
Solution 1: uninstall the recent Windows update
The recently installed Windows update can cause this problem on your system.
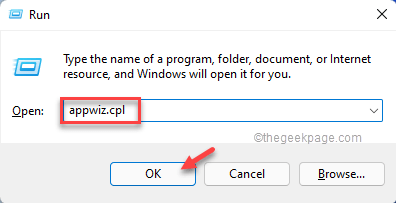
1. At first, press the Tecla de Windows + R keys together.
2. Then tap «appwiz.cpl«And hit Get into.
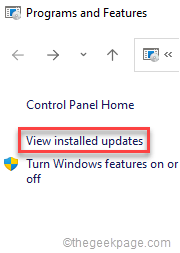
This will open Programs and Features.
3. In the Programs and Features window, tap the «View installed updates“In the section on the left.
4. Here, look for the latest installed update. You can get the idea of the ‘Installed‘parameter in the update list.
5. Simply right-click on the latest update and tap «Uninstall”To uninstall it from your system.
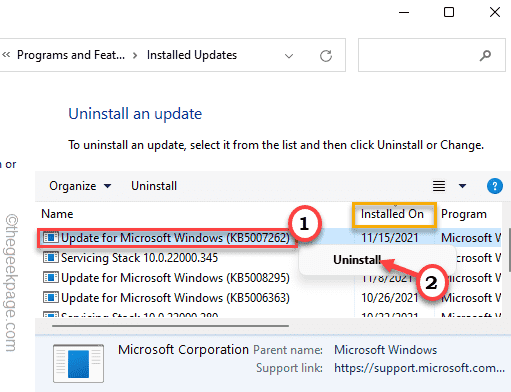
Now, follow the instructions on the screen to uninstall the system update.
After uninstalling the update, reboot the machine once. You will not see the BSOD problem again.
Solution 2: uninstall recently installed app in safe mode
If you recently installed an application that can cause this problem, you must uninstall it in Safe Mode.
Boot into SAFE MODE
You must start this system in safe mode with networking capabilities.
1. First, turn off your system.
2. Then turn it on again.
C. After that, once your system boots, simply press and hold the power button again to force shutdown your system.
D. Simply repeat this task 1 or 2 more times, and for the third time, let your computer start up normally.
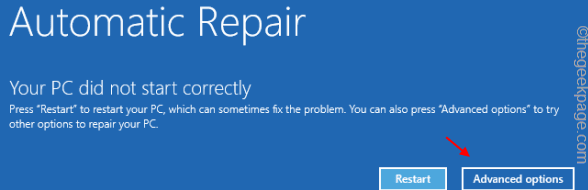
Your system will automatically go into ‘Automatic Repair’ mode.
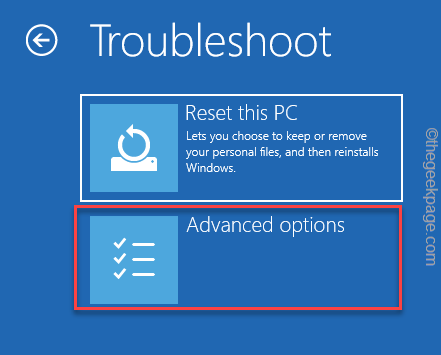
1. Once you reach the Automatic Repair screen, tap the «Advanced Options“.
2. Then tap on the «Solve problems“To solve this problem.
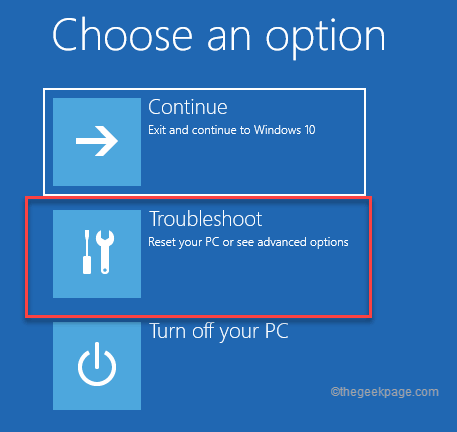
3. Then click on «Advanced Options“To continue.
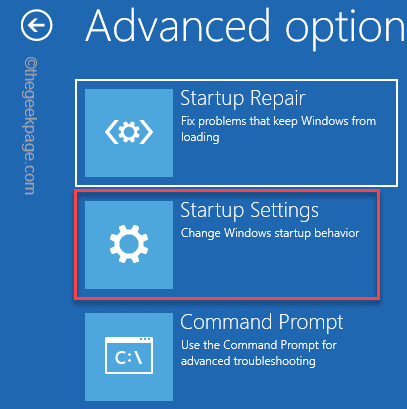
4. After that, tap on the «Startup settings”To see all the startup options available on your screen.
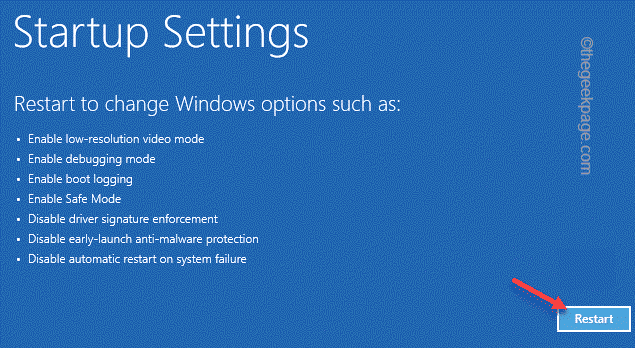
8. Now, touch «Restart”To reboot the system.
9. Here you will see the 9 possibilities of start types.
10. Then press the F5 on the keyboard to select «Enable safe mode with networking»Option.
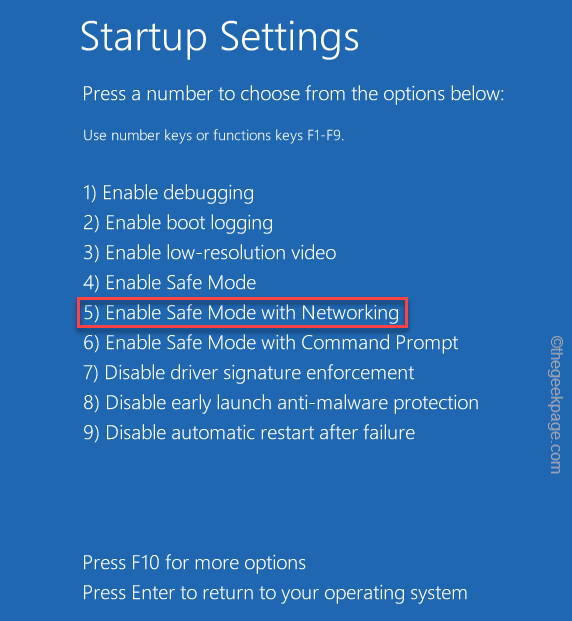
This will start your system in safe mode but with network capabilities.
Uninstall the app
Now that you have started in safe mode, you can uninstall the application from your system.
1. At first, press the Tecla de Windows + R keys together.
2. Then write «appwiz.cpl«And it touches»OK“.
3. When the Program and functions open, you will see the list of installed applications.
4. Now, right-click on the space and tap «Sort by>»And choose«Installed“.
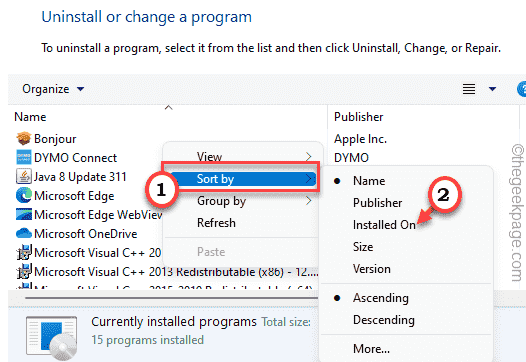
This will sort the apps from newest to oldest.
5. Then, right-click on the first application and tap «Uninstall“.
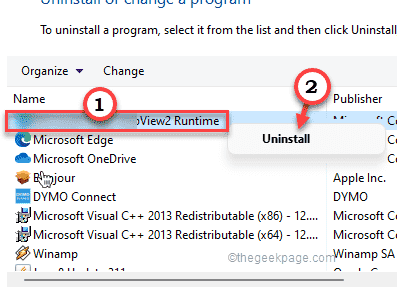
Follow the instructions on the screen to completely uninstall the application from the system.
Solution 3: update your disk drives
You have to update the disk drives from Device Manager.
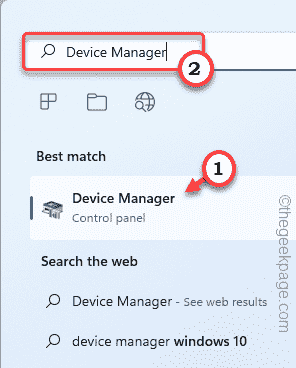
1. At first, press the Windows key and type «device administrator“.
2. Then tap on the «Device administrator»To open it.
3. When Device Manager opens, expand the «Disk drives” section.
4. Here, right-click on the drive and tap «Update driver“.
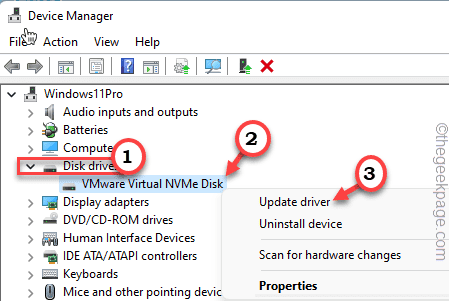
5. Now, tap on the «Search for drivers automatically”For Windows to search for the latest driver and install it.

Once you’re done, close Device Manager.
Also, you can download and install the latest version of the disk drive manually.
Solution 4: run a memory check
Running a memory check should identify any memory failures.
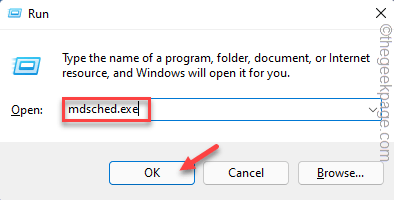
1. At first, press the Tecla de Windows + R keys together.
2. Then write «mdsched.exe“And click”OK“.
3. In the Windows Memory Diagnostic window, tap «Restart now and check for problems (recommended)“.
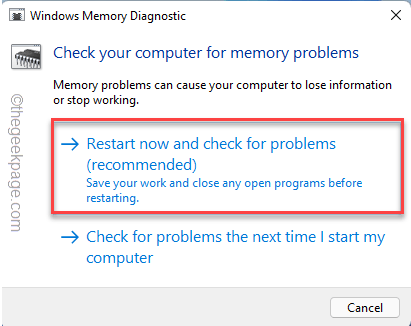
Your system will reboot and Windows will check your RAM.
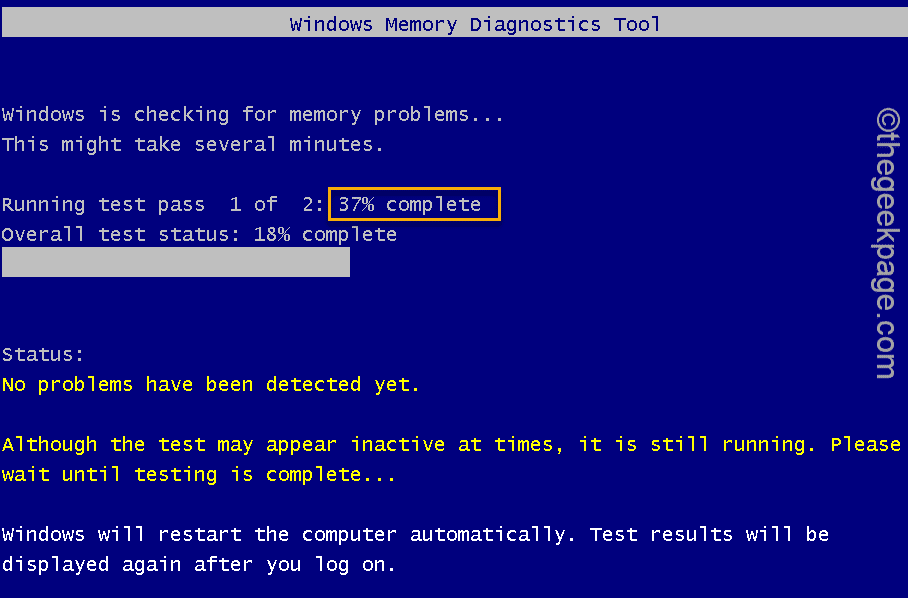
Once the percentage reaches 100%, your system will start normally. You will not see the error message “DRIVER_PORTION_MUST_BE_NONPAGED” on your screen.
Related posts:
 How to access Steam games without an internet connection
  How to view FPS with Xbox Game Bar in Windows 10: Steps Made Easy
  Hacked account? How to check and remedy
  How to make video calls from WhatsApp Web
  How to increase the RAM memory of a desktop or laptop + Tips and Tricks
  How to organize your YouTube subscriptions into categories
+ Tips and Tricks
How to organize your YouTube subscriptions into categories
+ Tips and Tricks


