Test – NZXT HUE + – Config Board
| Specs | Price
Hi all!
Back at NZXT today with an accessory on the program that will illuminate any configuration equipped with a window, I named the HUE +! For a good ten years now, modders and other fans of personalization of their PC have been seeking to highlight their components, the “fashion” began with simple neon lights crudely installed inside boxes lit via switches accessible to outside, now the brands have developed much more elaborate accessories like what I am going to present to you today! LED strip, RGB, customization via CAM software and all that goes with it, all at a recommended price of 59.99 €, this is clearly not cheap for a dispensable accessory but some people will be very interested, let’s see if the build quality and overall customization are worth the price!
| NZXT HUE + | |
|---|---|
| LEDs name | 40 per channel 10 per strip |
| Number of channels | 2 |
| Number of LED strips supplied | 4 |
| Colors | RGB |
| Dimension of an LED strip | 300 x 10 mm |
| Case dimensions | 10 x 7 x 2.35 cm |
| Mode d’illumination | 9 presets Intelligent (CPU, graphics card or FPS temperature) Custom Audio (HUE + reacts according to the sound emitted by the PC) |
| Pilotage | CAM software |
| Price | 59.99 € |
The NZXT is a 2.5 ″ format box which can therefore be installed in any 2.5 ″ slot inside a box, which will allow easy and painless assembly. It is capable of handling 40 LEDs per channel, for a total of 80 LEDs. The LEDs (RGB) are divided into strips of 10 LEDs 30 cm long by 1 cm wide, which connect directly in series. In total it will therefore be possible to connect 4 bands per channel, in the box there are however “only” 4, but it is possible to buy them separately to illuminate very spacious towers. Note that the installation of the LEDs in the box can be done in 2 ways, either via a sticker already installed or via the magnets already installed themselves, this will allow maximum compatibility regardless of the box.
The LEDs are controlled via the NZXT CAM software, it will be possible to adjust the LEDs one by one (each LED can have the desired color), or by complete strip, or even via available presets (breathing effect, pulsed, according to the temperatures of the processor / graphics card, etc.), in short, the customization is total and everyone will find something for them.
The NZXT HUE + is available at a price of 59.99 €, let’s see the beast is worth its price!
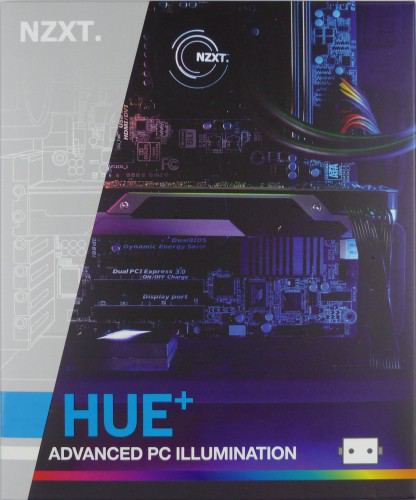
On the front of the box there is a photo of the beast in action as well as the name of the product and of course the logo of the brand, nothing more!
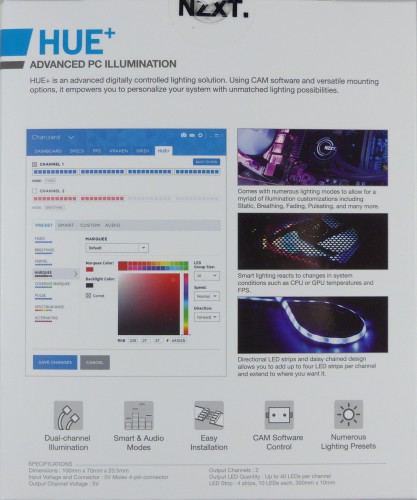
At the back a small note presenting the function of the beast, a screenshot of the software piloting the product as well as a listing of its main strengths.
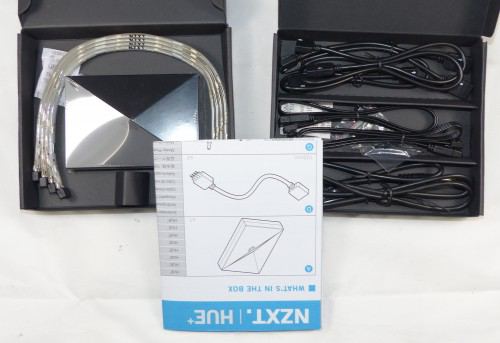
In the box there are 2 boxes containing all the elements, it is well packaged and made upscale.
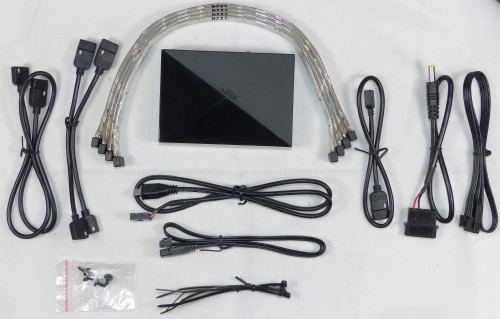
The bundle consists of:
- 1 x HUE + box
- 4 x 30cm LED strips
- 1 x extension for 50 cm LED strips
- 1 x extension for 30cm LED strips
- 2 x extensions for 10 cm LED strips
- 2 x cables to connect the box to the LED strips
- 1 x molex power cable
- 1 x USB cable
- 1 x installation manual
- The necessary screws
- Some plastic cable ties
As we can see the NZXT HUE + bundle is very complete, in addition to the 4 LED strips and the box we find everything you need to interconnect all this, extensions of different lengths to accommodate any what configuration as well as screws and even cable ties, there should be no doubt that everyone will find what they need.
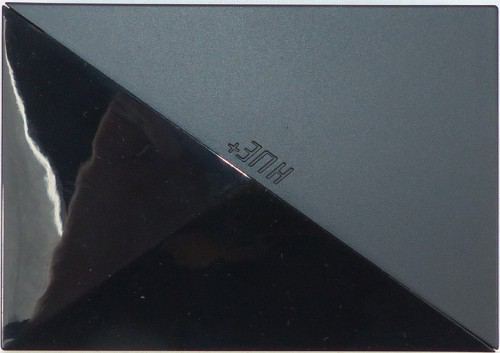
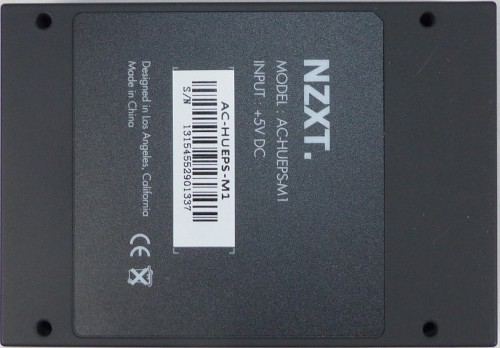
The case is plastic, on the top we find a part in glossy black and the other in matte black, the effect is rather nice and will not spoil the overall look of the machine if a window is present on the case. At the back there is a sticker with the different serial numbers.
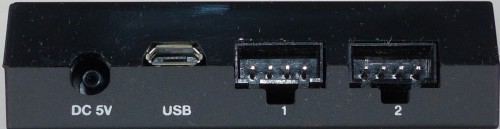
On the side the different connectors are available, 1 for the power supply, 1 for the USB connection as well as 2 for connecting the different LED strips (2 channels).

Here is one of the LED strips, there are 10 LEDs and 4 magnets. The band is white with the NZXT logo in its center. At each end a connector (a male and a female) covered with a cover to avoid twisting it all. Note that when connecting one of the bands to an extension / directly to the cable of the box, you will have to pay attention to the direction of the connector, the black band that we see on the bottom (which results in the + 5V on connector) must be connected to the arrow on the extension.
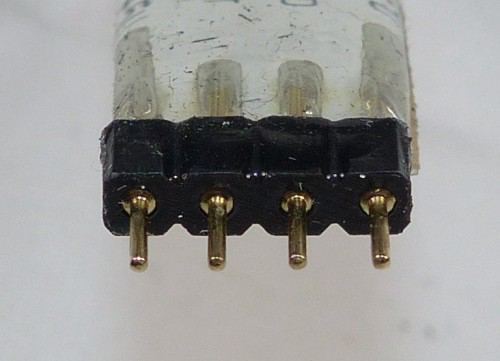
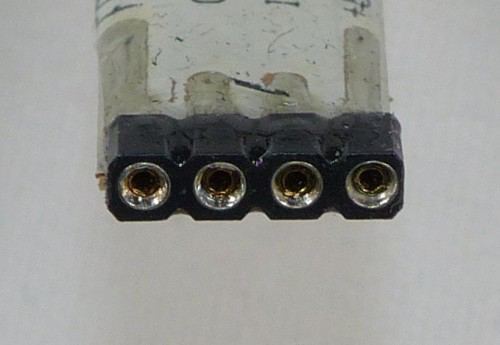
A male and a female plug on each strip, allowing the strips to be connected to each other using the extensions.
The CAM software has had a facelift and changes blue and white colors that I could see on the various products of the brand tested previously. It is free to download here. Here is what it looks like once launched and the HUE + is connected to it:
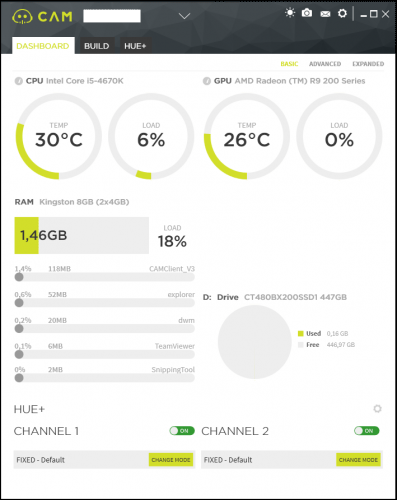
This part is not specific to HUE +, it is possible to see the temperatures of the processor as well as the graphics card, the percentage of load of each of the two is also present. Below is the memory occupation as well as the most demanding software.
At the bottom it is possible to activate and deactivate the 2 channels of HUE + individually as well as to change the lighting modes.
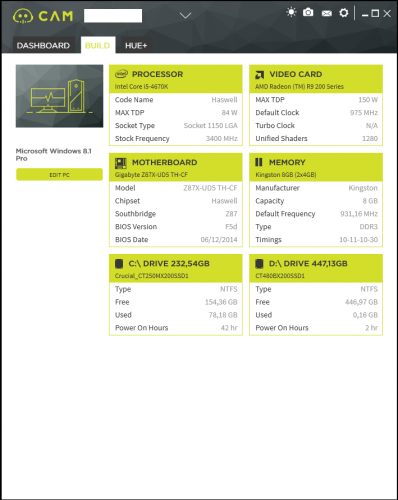
In “BUILD” we find information relating to the configuration, processor, graphics card, motherboard, memory as well as the peripherals installed, everything is there!
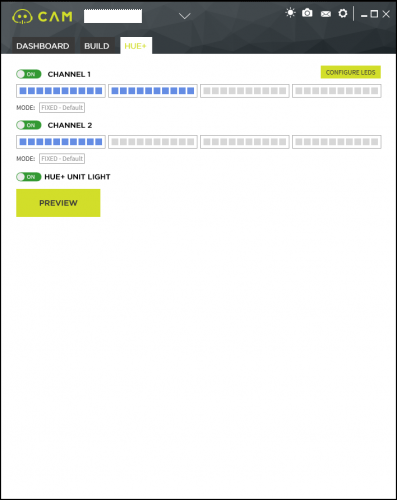
The “HUE +” nail is the one that interests us here, we can see the strips connected on each channel, it is possible to select the LEDs one by one and assign a color to them, the Christmas tree is therefore quite possible!
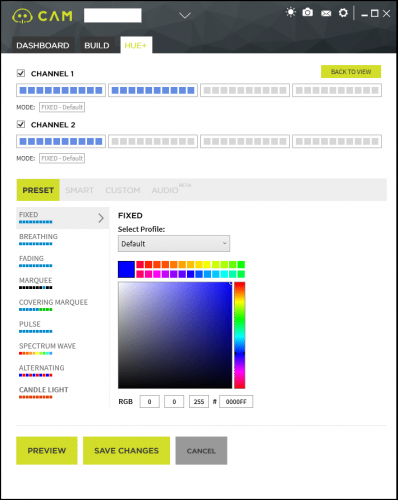
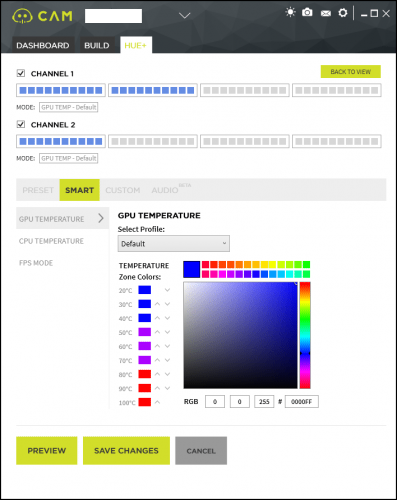
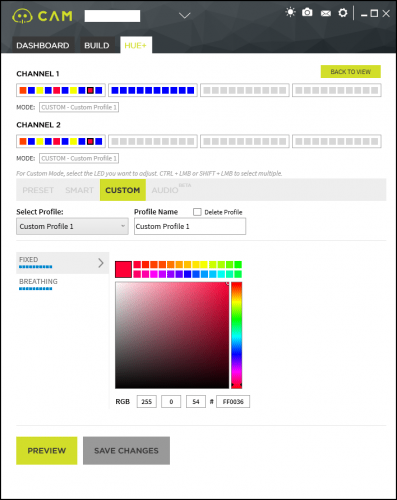
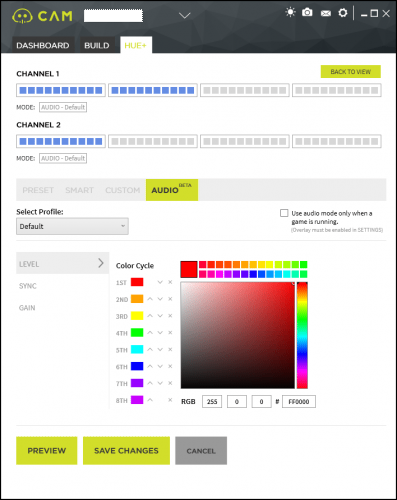
Once the “Configure LEDs” button is clicked it will be possible to change all the settings of the connected strips. Presets are present (fixed color, breathing effect, snake effect, pulse etc.), the color change depending on the temperature of the processor / graphics card / number of FPS is possible, but also and of course a “custom” mode which allows you to change the color of the LEDs individually (which can be seen above), the AUDIO mode which is here again in beta allows you to change the color of the LEDs according to the sound emitted by the PC.
To summarize the customization is most complete, everyone will find what they are looking for and illuminate the interior of their PC the way they want!
Here are some examples of what we can have once the HUE + is installed, in my case on a NZXT H440 of the brand:
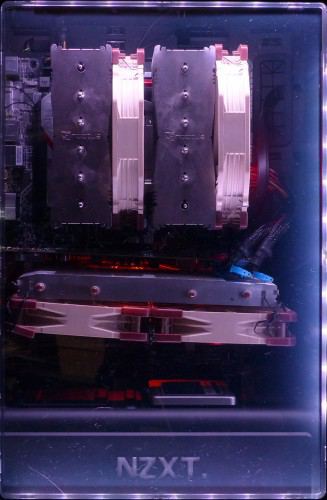

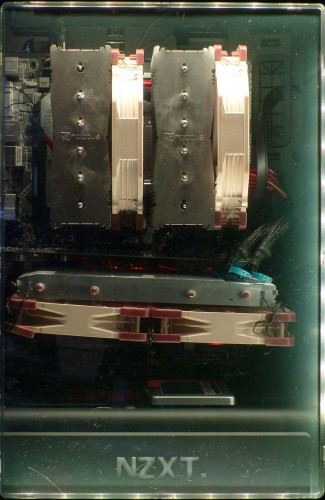
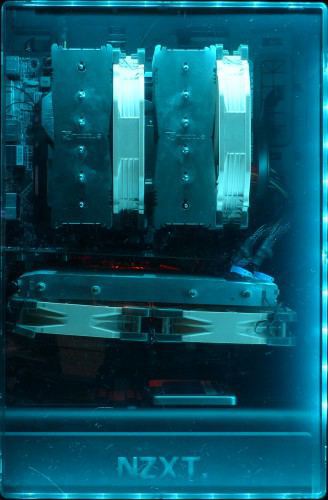
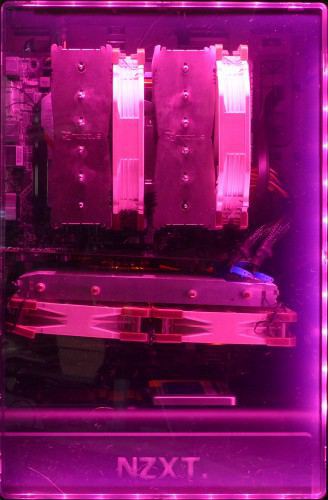
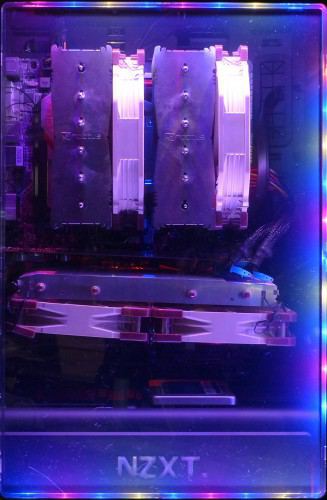
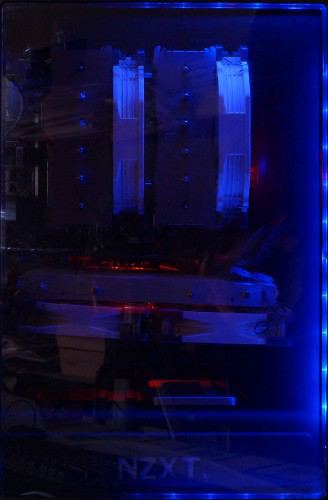
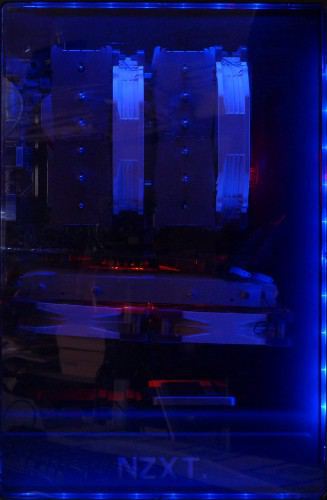
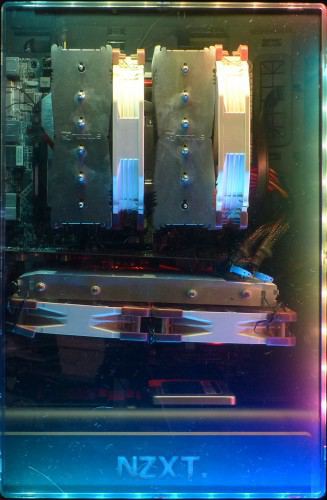
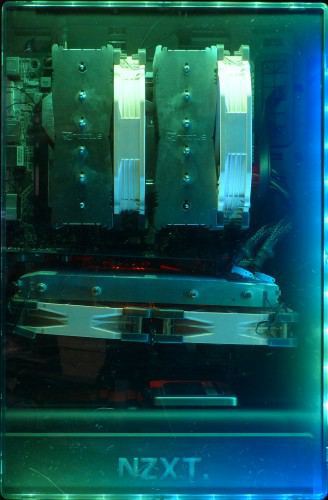
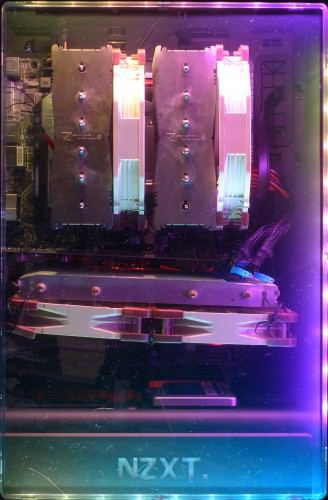
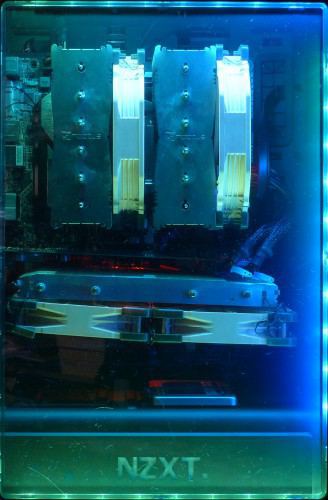
Solid colors, individual LED by LED, different effects … everything is there for everyone’s viewing pleasure! The LEDs are bright and produce a very nice light, the interior of the tower will be illuminated very well.
Here we are at the end of this test, what about the NZXT HUE +?
The market for LEDs and other neon lights has evolved a lot in recent years, however, many products are limited to a single solid color that remain on without the possibility of customization whatsoever. NZXT has changed all this a little by offering a product capable of powering up to 80 LEDs (per channel, in strips of 10 LEDs), all of which can be personalized one by one with the colors of our choice. Presets are available with various effects to accommodate as many people as possible.
In addition to all this the build quality is really excellent, the box is easily installed in a 2.5 ″ slot of the box and everything is present in the bundle to ensure a smooth connection.
Offered at a price of around 60 €, the NZXT is very well placed for this type of product, knowing that the level of customization and the quality of manufacture is much higher than many competing products, it will be a perfect companion for those who want to show the bowels of their configuration to the world!
The +
- Manufacturing quality / finish
- Advanced customization
- Possibility of extension
- CAM software
The –
- Power supply via Molex and not Sata

Many thanks to NZXT for allowing me to do this test.
Where can I find the NZXT HUE +?
[phpzon asin= »B017LOXRAC » country= »FR » trackingid= »conseil-config-21″ merchantid= »Amazon » templatename= »conseil »]
Related posts:
 7-nanometer Nvidia GPU, TSMC will handle most of the production
  ASRock X299, a new BIOS allows you to install 2 TB of memory
  MSI Prestige X570 Creation Review: Test | Specs | Hashrate
  Radeon RX 5500 XT, PCI Express 3.0 castrates performance?
  An overclocker ran 1TB of RAM on an X299 motherboard limited to 256GB
  Best Review 2021: MSI MPG X570 Gaming Edge WiFi Under $250 ($200)