Test – NZXT Kraken G10
: Specs | Price | CPU | Profitability| Hashrate| best Coins | Config | Advantage (Pros) and Disadvantages (Cons) and other important features that will help you make better decision.
Hi all!
Cooling a graphics card can be a real nuisance both in terms of temperature and noise pollution, people looking for the best of both worlds tend to quickly find themselves facing a wall when looking for a graphics card. power. In general, if we have bought a graphics card with the reference design, the temperatures as well as the noise pollution are not really first-rate, which is why the manufacturers offer versions with modified coolers in order to gain on both counts. .
Unfortunately, it happens that the most advanced among us do not find the right shoes for their feet and have to turn to third-party aircooling solutions (the MK26 from Prolimatech and Accelero Xtreme IV from Arctic Cooling tested here and here for example), on the other hand, some want to turn to watercooling without investing in a very expensive custom system, this is where NZXT comes in by offering an adapter that will allow an AIO kit to work (subject to compatibility) on a graphics card, I named the Kraken G10!
Offered at a price of around € 30, this adapter could make a small number of users happy, let’s see what happens!
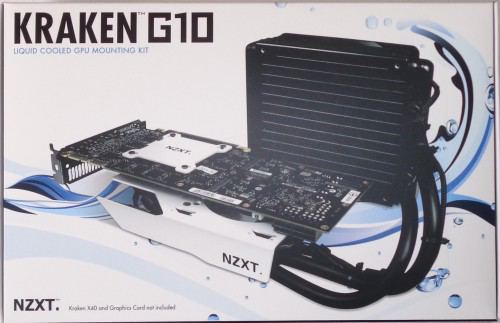
On the front of the box apart from the photo of the beast already installed with a Kraken X40 from NZXT of course.
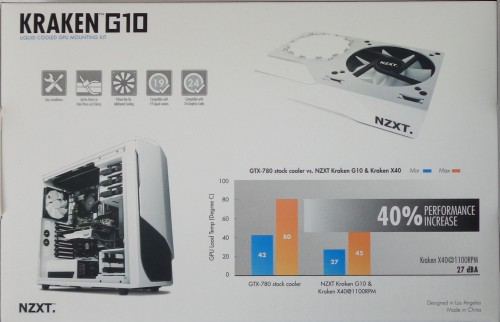
At the back, marketing comes into play with a listing of the main highlights in the form of icons as well as a graphic showing how the temperatures are better with the NZXT Kraken G10 (and a Kraken X40 with the fan set to 1100 RPM) compared to the original cooling system of a GTX 780.
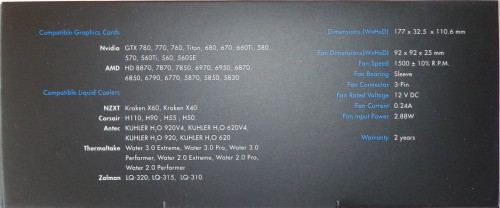
On the edge you can see the list of all the graphics cards as well as the compatible AIO kits, it is unfortunately not up to date and you will have to go to the official site to be sure (here for the most lazy!). Technical information is also available here, dimensions, information of the supplied fan as well as the 2-year warranty.
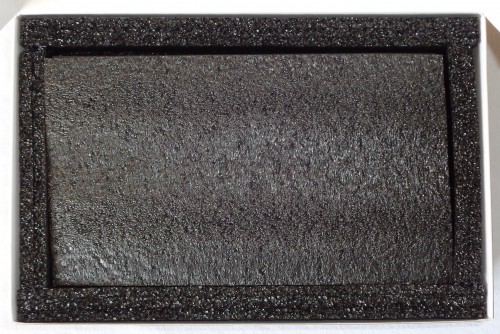
In the box we find a good package of foam, at least everything has been done to protect the accessories, very little chance of having problems with the transport.
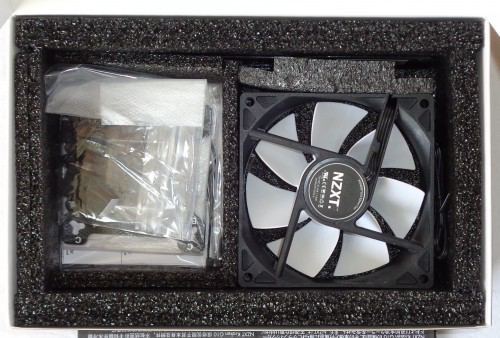
Under a first layer of foam the fan as well as the various accessories of the bundle appear.
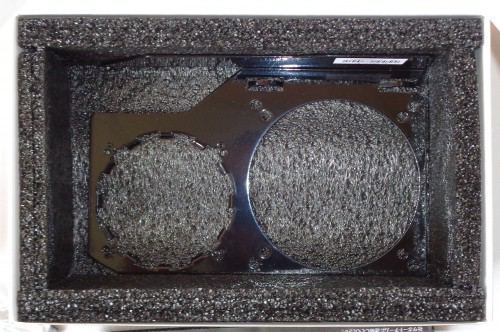
A layer of foam below is the metal plate that will be used to adapt the AIO kit to the graphics card.
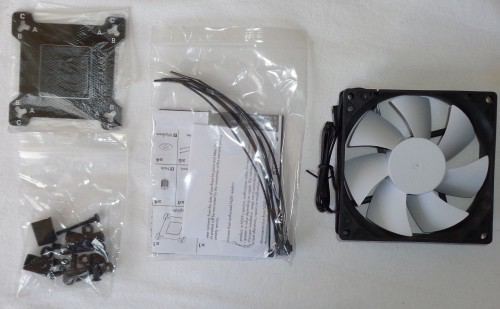
The bundle consists of:
As we can see the bundle offers the necessary to adapt all the AIO kits compatible with the beast, we expected no less anyway!
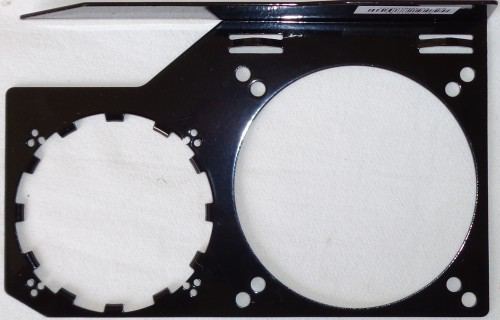
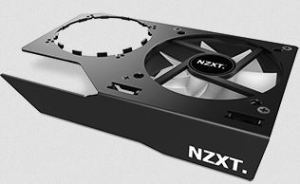
The Kraken G10 itself is a painted metal plate, on the left we drink the fixing system that will hold the waterblock from the AIO kit and on the right the location of the fan which will have the heavy task of keeping the air cooler. power supply stage of the graphics card (the VRMs).

Let’s not forget the little touch that will allow everyone to expose the brand that makes the product for all to see.
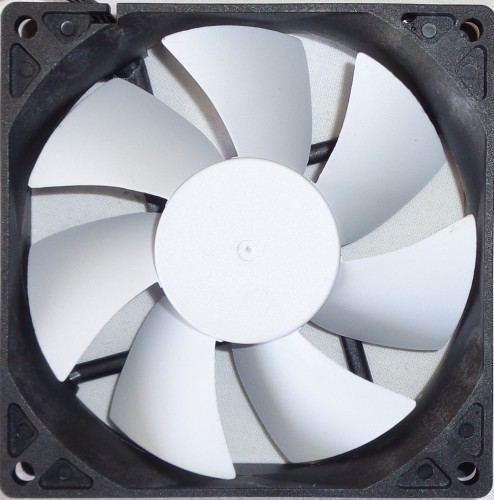
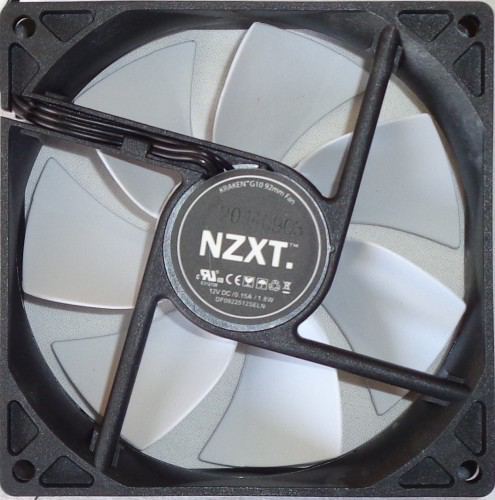
The fan is a 92mm model of the brand running at a maximum speed of 1500 RPM for 2.88W and powered by 3-pin, noise level point announced however. The build quality is very good.
The fateful moment has arrived! Changing the cooling system of a graphics card can be perilous, depending on the product to be installed (I wrote an article here on this subject). Before you start, please note that in most cases the change will end the warranty of your graphics card, and that I accept no responsibility for any damage that may be caused by installing the NZXT Kraken G10 if you follow my installation. !
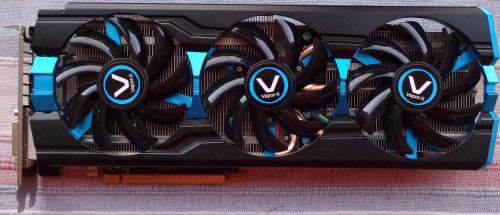
Today’s guinea pig will be the R9 280X VaporX TriX from Sapphire (tested here), a card with a rather high consumption that will be perfect! The original cooler is already very good, we will see how the NZXT Kraken G10 takes care of the small R9 280X! Note that for the purposes of the test I tested the G10 in duo with one of the compatible AIO kits I had on hand, the NZXT Kraken X41 (tested here)
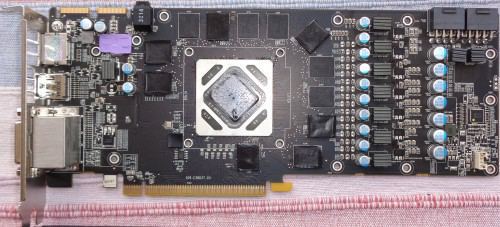
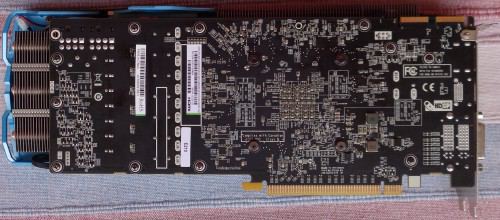
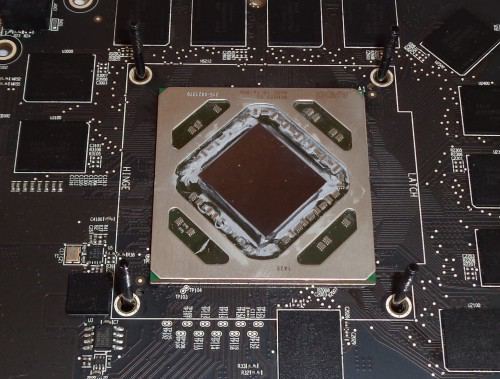
First of all you have to get down to removing the original cooler, nothing complicated, just remove all the screws on the back and gently remove the cooler.
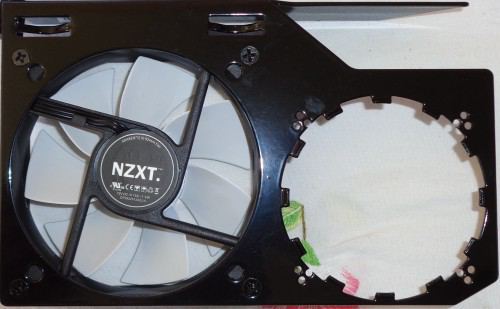
Then attach the supplied fan to the Kraken G10, as above.
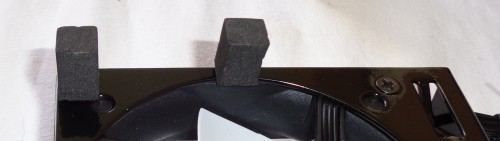
In order to have a minimum of support it is necessary to place the 2 pieces of foam present on the G10, be careful to put them in places that are not likely to bump on components of the graphics card, in the case of the R9 280X VaporX there weren’t a lot of locations.
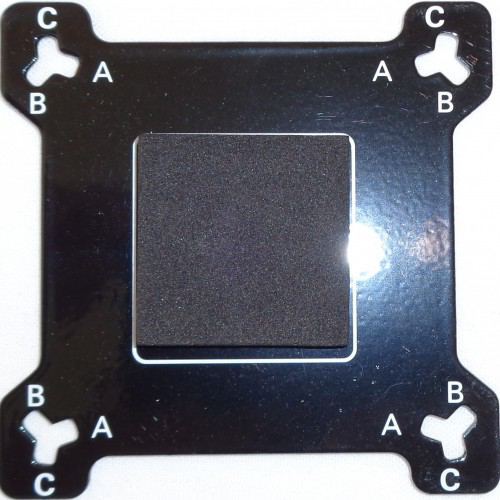
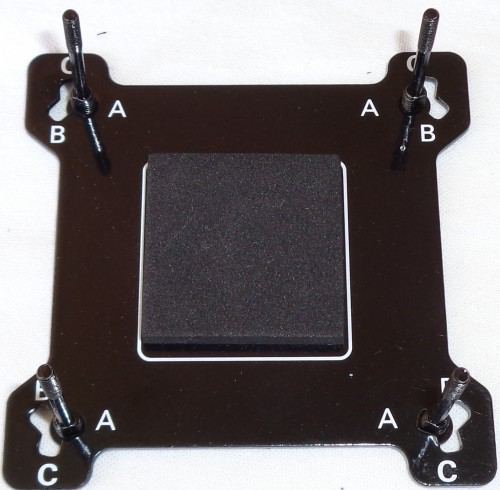
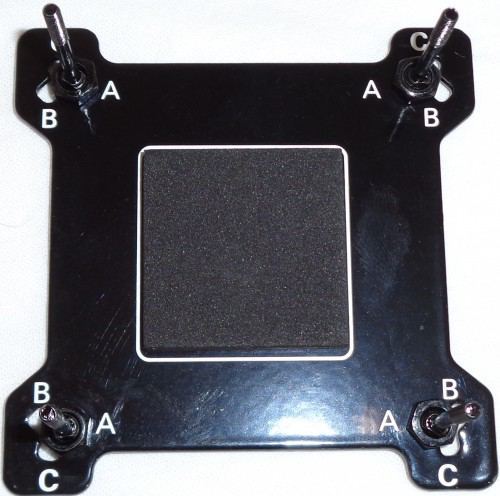
Then you have to take the plate that will be placed at the back of the graphics card and put in place the 4 screws that will be necessary for fixing the AIO kit. Be careful to place the screws in the correct locations, for the R9 280X in the test these are “A” locations, once the screws have been placed, all you have to do is put the bolts in place.
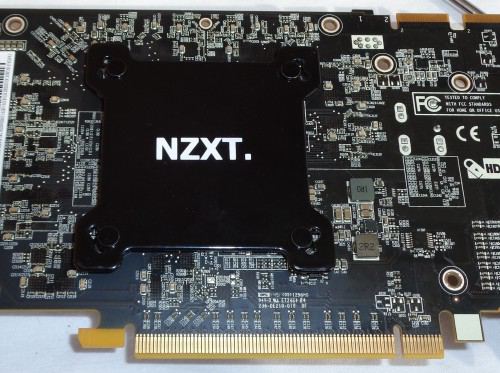
We can then put the plate equipped with the screws, there are no real secrets here, if it works it’s because everything is well placed!
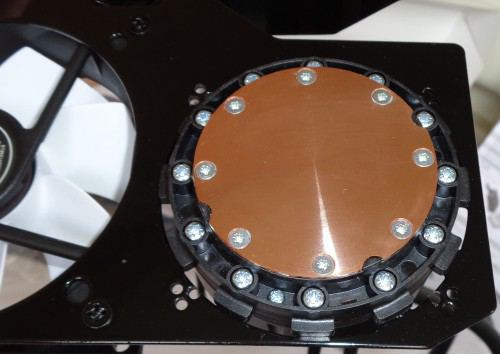
The less intuitive phase of the assembly here, you have to place the waterblock inside the plate and block it with the pins, be careful there is nothing that will hold it in place before placing it on the graphics card. so take your time!
We place everything delicately on the graphics card, be careful to align the holes around the waterblock and the screws coming out of the graphics card. It is also necessary to ensure that the pipes are opposite the PCIe connector so that they can then be passed over the fan.

Then fix the beast to the graphics card using the 4 nuts present, be careful not to fully screw the sides one by one, like a CPU cooler you have to go little by little by alternating the opposite corners.
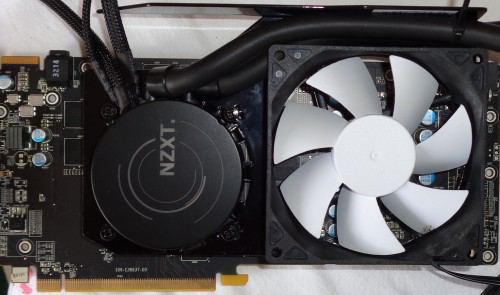
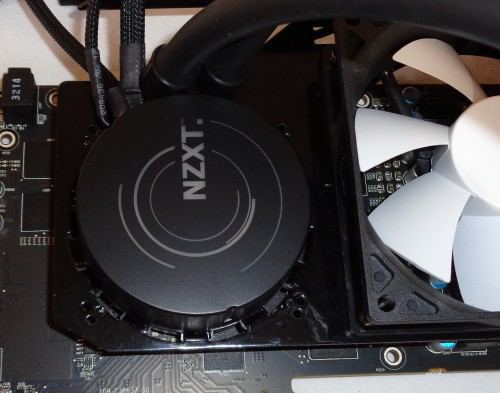
After having attached the pipes to the top of the fan the beast is finally in place!
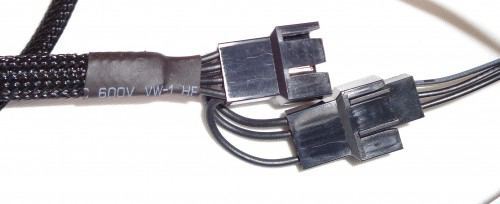
Finally, do not forget to connect the G10 fan to one of the 2 connectors on the Kraken X41 so that the latter can turn it at our convenience.
The test platform
The configuration used during the tests is as follows:
- Processor: Intel Core i4670K @ 4 Ghz
- Graphic card: Sapphire R9 280X VaporX TriX
- Motherboard: Gigabyte Z87-UD5H TH (tested here)
- Memory: Kingston HyperX Fury 2 x 4 Go 1866Mhz (testées ici)
- Hard disk: WD Raptor 150 Go
- Food: be quiet E9 580CM (tested here)
- Operating system: Windows 8.1 64bits
The test protocol
The temperatures will be read after 30mins of FurMark 1.13 which should correspond to the maximum temperature achievable by the graphics card in extreme conditions.
For the purposes of the noise pollution test, the coolers will be tested twice:
- The NZXT Kraken X41 set to minimum
- The NZXT Kraken X41 set to maximum
Small disappointment here in terms of ventilation regulation, with the CAM software it is indeed not possible to make ventilation profiles in relation to the temperature of the GPU, it is possible to do it for the CPU but it is is unfortunately everything. So I decided to see what the beast can offer with minimum and maximum ventilation.
The temperatures
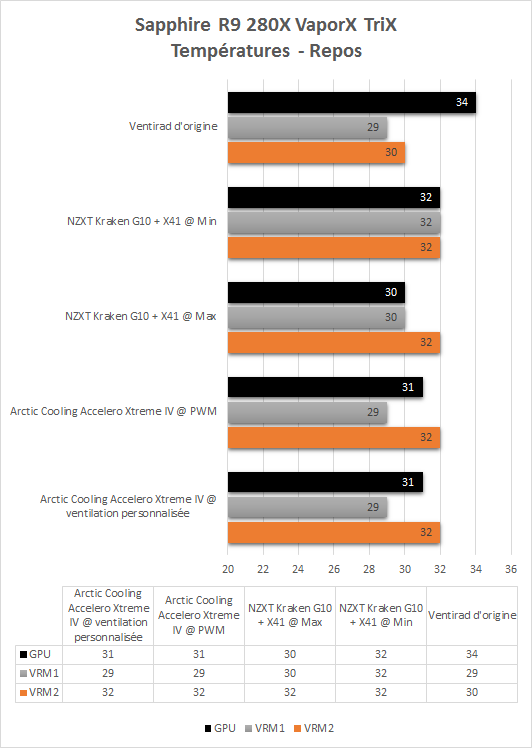
In terms of temperatures at rest there is not much to say, 32 ° for GPU / VRM1 / VRM2 at minimum and 30/30/32 ° for GPU / VRM1 / VRM2 at maximum, nothing that can really decide between cooling systems.
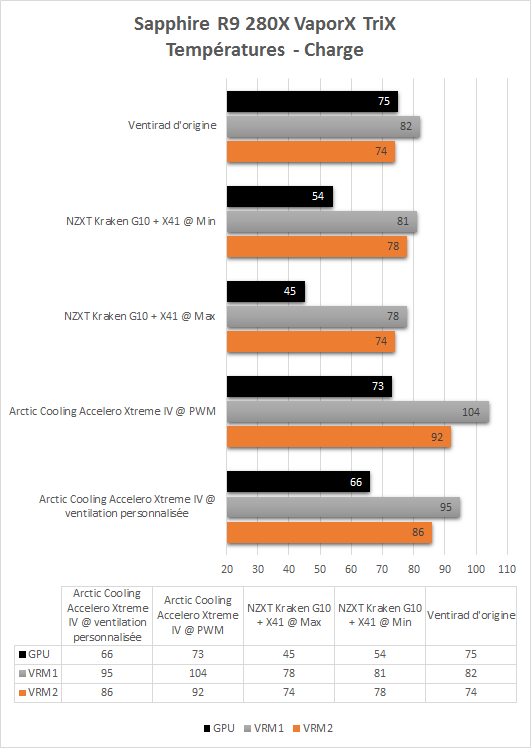
In charge, however, it is clearly not the same story! With the Kraken G10 supported by the Kraken X41 at least the GPU does not exceed 54 ° the VRMs for their part remain at 81 ° and 78 °, at most we still gain 9 ° on the GPU which falls to 45 ° and a few degrees on VRMs that fall to 78 ° and 74 °. Compared to the original cooling system and the Arctic Cooling Acceleron Xtreme IV the GPU is very much cooler with my Kraken brothers, and by far when looking at the results with the fans at maximum.
When it comes to VRMs the infernal brothers do as well as the original VaporX system, which itself is truly one of the best solutions for those who don’t want to get their hands dirty. On the other hand, we must admit that the Accelero Xtreme IV fishes a little at this level even if the temperatures are far from alarming (especially since it is possible to make a personalized ventilation curve with the latter, which does not is not the case as is with the Kraken).
Noise pollution
As we have just seen the temperatures are clearly good with the Kraken duo, but isn’t that too good to be true? There must be a little something behind all of this, like for example a little higher noise pollution than the Accelero Xtreme IV? Let’s see!

Ambient sound level: 31dB
We have the confirmation here, and it’s not really a novelty because they were noted in the Kraken X41 test (here for your viewing pleasure), the small 92 mm fan adds a few dB and we arrive at a 36 dB minimum against 52 dB maximum. Let it be said with 36 dB there is not much chance that it will stand out from the other components in load (and this noise comes mainly from the pump) but at rest and in a configuration designed for silence it will probably be heard. At most no need to draw you a drawing it blows a lot and I advise against using it for the good of your ears, where then you have to use a helmet that cuts from the outside.
Here we are at the end of this test, what about the NZXT Kraken G10?
NZXT brings us a small adapter that will find its place widely among people looking to put their graphics card under watercooling without having to prepare an expensive custom system in addition to not always being easy to install. With the Kraken G10, all you need to do is have an AIO kit (such as the Kraken X41 in the test, or another compatible one) and your graphics card will take advantage of it.
The installation is rather simple, even if it is necessary to take it slowly and the resulting performance is really there, especially at the level of the GPU itself which benefits from a very important drop in temperature. The VRMs are also well cooled even if quite honestly radiators would not have been luxury to ensure optimal cooling.
In terms of noise pollution, everything will depend on the AIO kit installed, it could be excellent or catastrophic, the choice is yours! As for the original fan, it is rather pleasant to the ear, devoid of parasitic noise but is not however inaudible. A small black point, however, concerning the regulation of the ventilation, nothing is proposed to connect the supplied fan (and that of the Kraken X41 at the same time) to the graphics card, a small adapter plugging directly into the graphics card. clearly would not have been too much!
Offered at around € 30, it could be an excellent companion in a gamer config.
The +
- Installation simple
- Excellent GPU cooling
- Watercooling for graphics cards
to everyone
The –
- Regulation of ventilation
- No heaters for VRM

A big thank you to NZXT who allowed me to do this test.
Where to find the NZXT Kraken G10?
[phpzon asin= »B00ITTFO8M » country= »FR » trackingid= »conseil-config-21″ merchantid= »Amazon » templatename= »conseil »] [phpzon asin= »B00GYIHMS0″ country= »FR » trackingid= »conseil-config-21″ merchantid= »Amazon » templatename= »conseil »] [phpzon asin= »B00ITTFNW4″ country= »FR » trackingid= »conseil-config-21″ merchantid= »Amazon » templatename= »conseil »]
Related posts:
 7-nanometer Nvidia GPU, TSMC will handle most of the production
  ASRock X299, a new BIOS allows you to install 2 TB of memory
  MSI Prestige X570 Creation Review: Test | Specs | Hashrate
  Radeon RX 5500 XT, PCI Express 3.0 castrates performance?
  An overclocker ran 1TB of RAM on an X299 motherboard limited to 256GB
  Best Review 2021: MSI MPG X570 Gaming Edge WiFi Under $250 ($200)