


Windows 11 Media Creation Tool Not Working Problem [SOLVED]
Microsoft introduced a better and excellent version/update of Windows 10 operating system called Windows 11 around October 2021. Updating or installing Windows 11 is not really difficult and the media creation tool allows Windows users to update it with ease. But many Windows users reported that while trying to install Windows 11 using the Media Creation Tool, they received an error saying There was a problem running this tool and also could not continue with the installation. If you’re also experiencing this same issue and you can’t install Windows 11 using the Media Creation Tool, don’t panic. We have collected some possibilities and got some solutions that can help you to install Windows 11 on your system.
Solution 1 – Open Media Creation Tool as Run as administrator
Step 1 – To download the media creation tool directly, just click the link below.
https://go.microsoft.com/fwlink/?linkid=2156295
Step 2 – After downloading the media creation tool on your system, put it on the desktop for your convenience.
Step 3: Then right click on the media creation tool and select Execute as an administrator from the context menu as shown below.
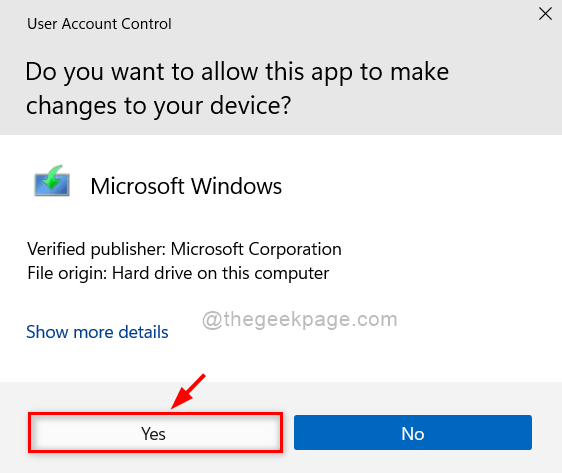
Step 4: Click Yes at the UAC prompt to continue as shown below.
Step 5 – Then follow the on-screen instructions and install Windows 11 on your system without any problem.
I hope this has solved your problem.
Solution 2 – Delete the Media Creation Tool file and download it again
Sometimes, because there is no stable internet connection, the media creation tool file may not be downloaded successfully. Therefore, this tool fails to run properly and throws the error and you are unable to install Windows 11 on your system. So just follow few steps given below.
Step 1 – Make sure you have a stable internet connection by checking the wi-fi router once by restarting it or checking the wired connection if you are using ethernet.
Step 2 – Delete the Media Creation Tool file on your system.
Step 3 – Then download the new media creation tool by simply clicking on this link below.
Click here to download the media creation tool
Step 4: After downloading the tool, try to install Windows 11 on your system by following the on-screen instructions.
Hope this should solve your problem.
Solution 3: Clear storage space on C: Drive on your system
- Since operating systems are installed on C: drive in your system and if there is not much space which is actually needed to install and Windows operating system, then there are high chances that you will face this kind of problem while installing Windows 11.
- Therefore, it is always better to free up storage space on C drive by deleting unwanted junk files and also by moving other large files to another drive.
- Create at least 20 GB of space to install Windows 11 on your system.
- After clearing the space on C: drive, try and install Windows 11 with Media Creation Tool on your system.
I hope this has solved your problem.
Solution 4 – Make changes to the registry file using Registry Editor
NOTE : Before proceeding with this solution, make sure to keep a backup copy of the registry file on your system. Because even a minor change can damage the entire system, and if you have a backup, you can roll back at any time.
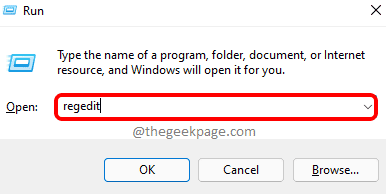
Step 1: Press Windows + R keys together to open the To run dialog box.
Step 2: Write regeditar in the run box and press Get into key to open registry editor on your system.
Step 3: Click Yes at the UAC prompt to continue.
Step 4 – Copy and paste the below path into the clear and empty address bar of Registry Editor.
Step 5: Then press the button Get into key on your keyboard to reach OS update Register key.
HKEY_LOCAL_MACHINESOFTWAREMicrosoftWindowsCurrentVersionWindowsUpdateOSUpgrade
Step 6: Once done, right click on the OS update registry key and hover over New option.
Step 7: Select Valor DWORD (32 bits) from the context menu as shown below.
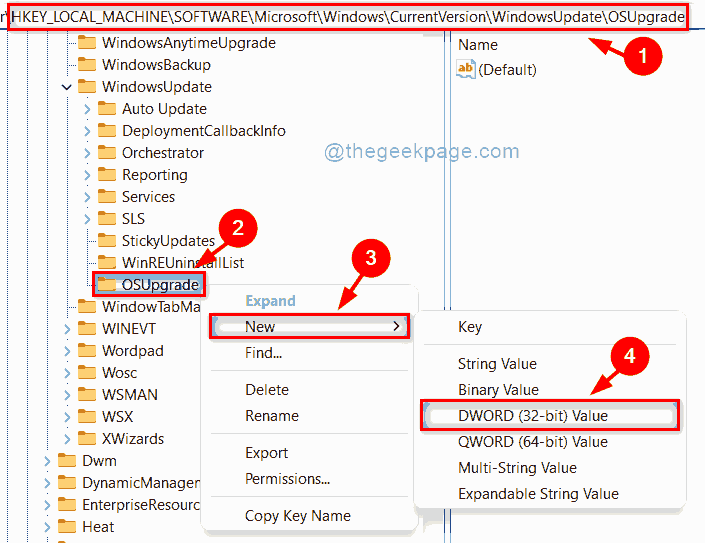
Step 8 – Rename it to AllowOSUpgrade and open it by double clicking on it.
Step 9: Enter the value 1 at value data field and click OK button to make changes.
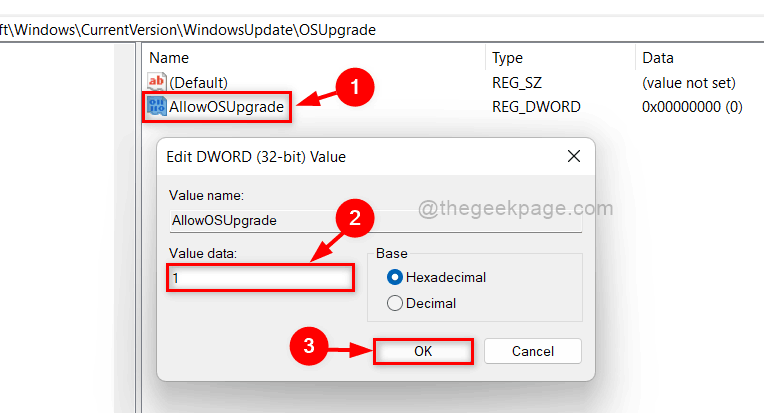
Step 10: Next, close the registry editor and reboot your system.
Step 11 – Now check if the issue is resolved and if you are able to install Windows 11 using the media creation tool on your system.
I hope this has solved your problem.
Solution 5: Create a Windows 11 boot disk using RUFUS
Step 1: Go to the Microsoft Windows 11 download page by clicking the link given below.
Click here go to the download page
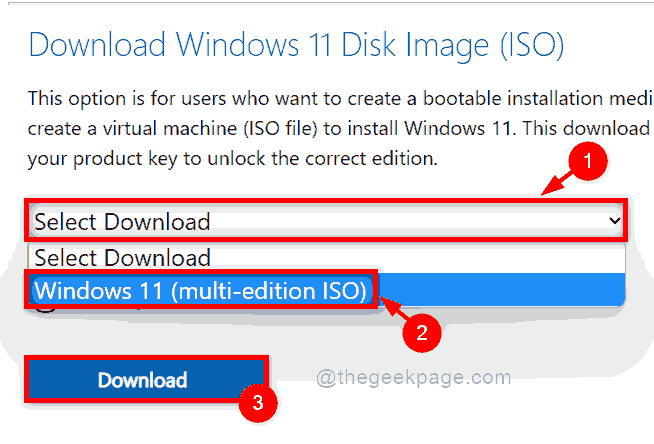
Step 2: Scroll down the download page and click select download drop down button below Download Windows 11 Disc Image (ISO) As shown below.
Step 3: Then select Windows 11 (multi-edition ISO) of the list.
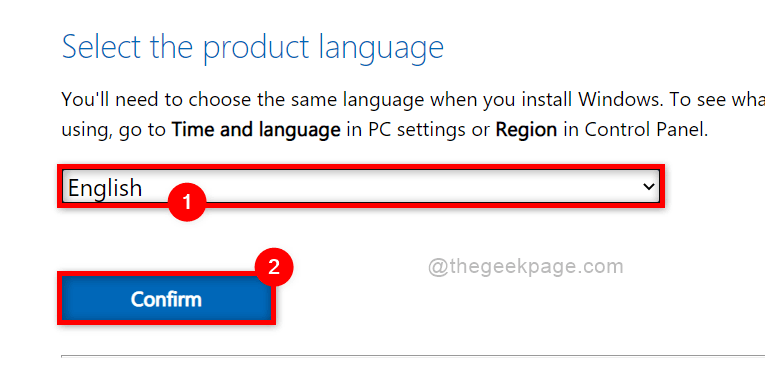
Step 4: Next, select your product language from the list (for example: English) and click Confirm as shown in the following screenshot.
Step 5: After selecting the language, click 64 bit download to start downloading the Windows 11 ISO file.
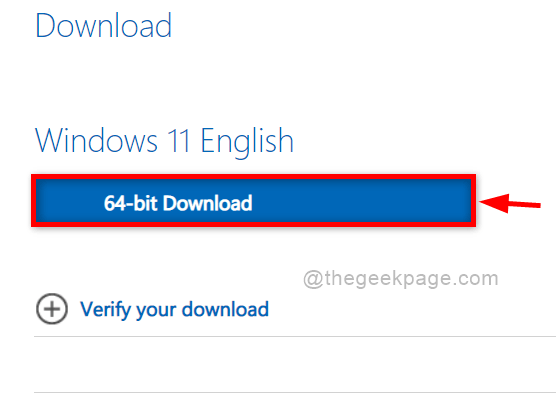
Step 6: This will start downloading the ISO file and it will take a long time as it is about 5.2 GB of file.
Step 7 – In the meantime, download the Rufus tool by clicking here.
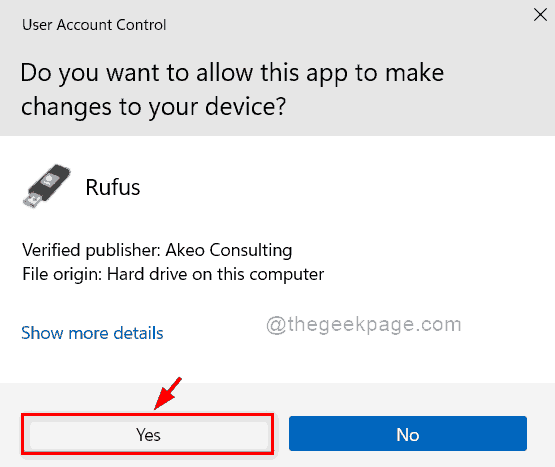
Step 8 – After downloading both files, open the Rufus executable file directly and click Yes at the UAC prompt to open.
NOTE: Make sure Pen drive The DVD it is inserted into the system port to create a bootable media.
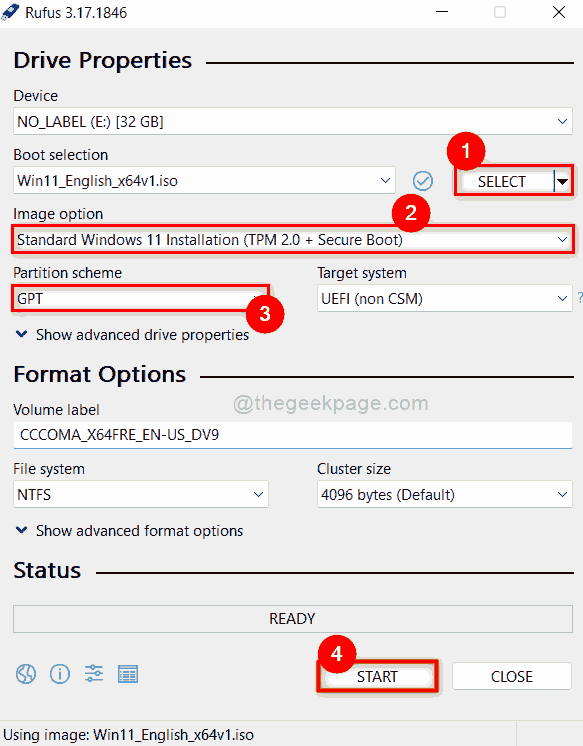
Step 9: Click SELECT to browse the system and select the Windows 11 disk image file you downloaded earlier.
Step 10: Then select Windows 11 Standard Install (TPM 2.0 + Secure Boot) from the image option the dropdown list.
Step 11: Make Sure GPT is selected as partition scheme and click START at the bottom of the Rufus tool as shown in the image below.
Step 12 – Once done, the bootable media is ready for installation.
Step 13 – Try to install Windows 11 using this bootable media on your system.
I hope this fixes the problem.
That’s all guys.
I hope this article was informative and interesting. Let us know in the comments section which solution worked for you.
Thank you.
Related posts:
 How to access Steam games without an internet connection
  How to view FPS with Xbox Game Bar in Windows 10: Steps Made Easy
  Hacked account? How to check and remedy
  How to make video calls from WhatsApp Web
  How to increase the RAM memory of a desktop or laptop + Tips and Tricks
  How to organize your YouTube subscriptions into categories
+ Tips and Tricks
How to organize your YouTube subscriptions into categories
+ Tips and Tricks


