


Your mailbox has been temporarily moved due to Microsoft Exchange server problem in Office 365
When you open a new session to Office 365 on your office system, you may see this error message ‘Your mailbox has been temporarily moved to the Microsoft Exchange server.‘. Microsoft alters the Outlook server in case there are some problems with the existing one. But, in this case, you may lose some valuable user data. Therefore, you should manually readjust the settings as soon as possible. Just follow these simple instructions to quickly fix this problem.
Solution 1: delete additional Outlook profiles
Additional mail clients connected to your Outlook profile can interfere and cause this problem. You have to delete all profiles except the main one.
[
NOTE –
You will be removing the Outlook profiles from your system. This means all the data, offline cached contents of the profiles will be gone. So, you can create an offline backup of those profiles.
]
1. First, close Outlook if you have opened it.
2. Then press the Tecla de Windows + R keys together.
3. Then type «control“And click”OK“.
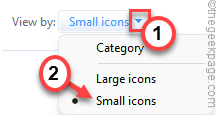
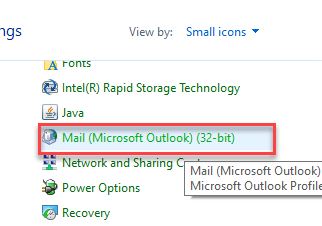
4. When the Control Panel opens, click the drop-down icon «View by:«And set it to»Small icons“.
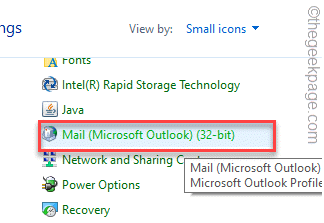
5. Now, tap on the «Correo (Microsoft Outlook) (32 bits)“.
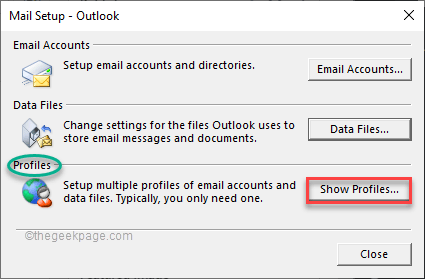
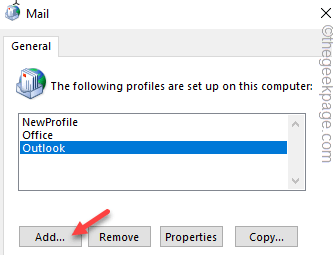
6. After that, click on «Show profiles …”To view the list of Outlook profiles associated with your system.
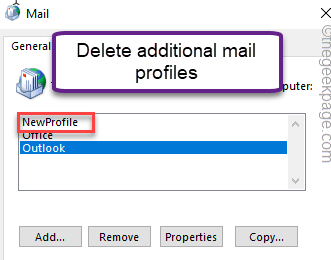
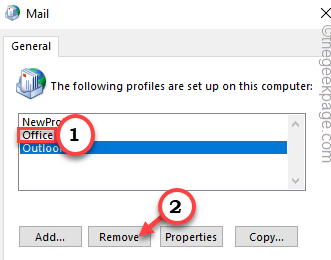
7. Here you will find your main email account and all other additional accounts.
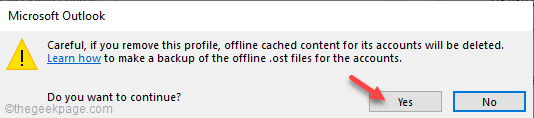
8. Now select any non-essential account and tap «Remove“.
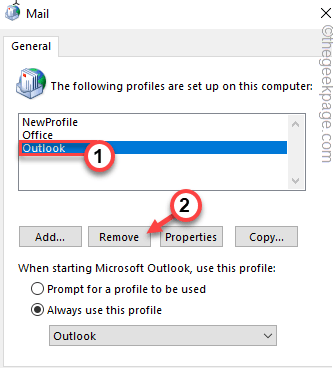
9. You will receive a warning message. After reading it, tap «Yes“To confirm your action.
10. Then repeat paso 8 and paso 9 to remove all additional profiles except The main one.
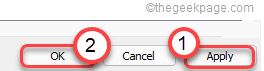
11. Once you have removed the additional profiles, tap «Request” and “OK”To save the changes.
Now, close the Control Panel window. Then start Outlook on your system.
Check if you keep seeing the error message or not.
Solution 2: create a new profile and delete the old one
If the problem persists, you can create a new profile instead of the existing one and delete the old one from Outlook.
1. Close Outlook on your system if it is already open.
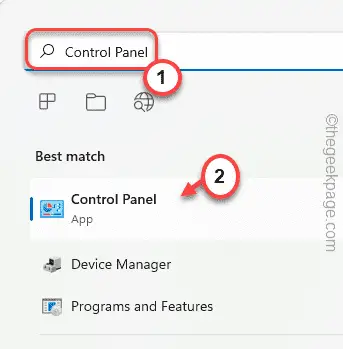
2. At first, press the Windows key and type “Control Panel“.
3. Then, tap on the «Control Panel” to access it.
4. Now, click on the drop-down icon «View by:“.
5. Then select the «Small icons”From the drop-down list.
6. Now click on «Correo (Microsoft Outlook) (32 bits)“.
7. Now click on «Show profiles …“.
8. Then tap «Add“.
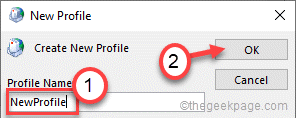
9. Now name the new profile whatever you want.
10. Then tap «OK”To continue with the email setup step.
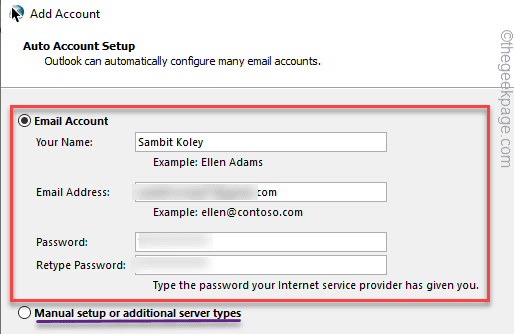
11. Now fill in the email setup details as appropriate.
If you want to set up an IMAP or Microsoft 365 account, select the «Manual configuration or additional server typesAnd follow the instructions on the screen.
12. Once you are done, tap «End up”To complete the process.
13. Now all you have to do is delete the old one from your system.
14. Once you have returned to the Mail window, touch the Previous account where you are facing this problem.
15. Then click on «Remove“To remove it from your system.
16. After deleting the old account, Please select the “Always use this profile“.
17. Then, tap on the drop-down menu and select the new account you just set up (en ‘New profile‘in our case) to set it as the default.

18. Then click on «Request” and “OK”To save these changes.
After that, close the Control Panel. Then open Outlook on your system and check the status of the problem.
Solution 3: run the inbox repair tool for Outlook
You must run the Inbox Repair Tool or SCANPST for Outlook to fix the problem.
1. Close Outlook on your system.
2. After that, go to this location:
C:Program Files (x86)Microsoft OfficerootOffice16
NOTE – The location of the SCANPST The file may differ depending on the type of installation on your system.
- Outlook 2016: C: Archivos de programa (x86) Microsoft Office root Office16
- Outlook 2013: C: Archivos de programa (x86) Microsoft Office Office15
- Outlook 2010: C: Archivos de programa (x86) Microsoft Office Office14
- Outlook 2007: C: Archivos de programa (x86) Microsoft Office Office12
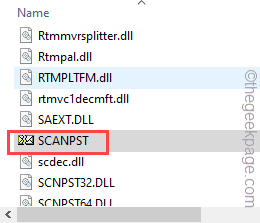
3. Now scroll down to «SCANPST”Executable file in directory.
4. Then, double click on it to run it.
5. When the Microsoft Outlook Inbox Repair Tool opens, tap «Browse“.

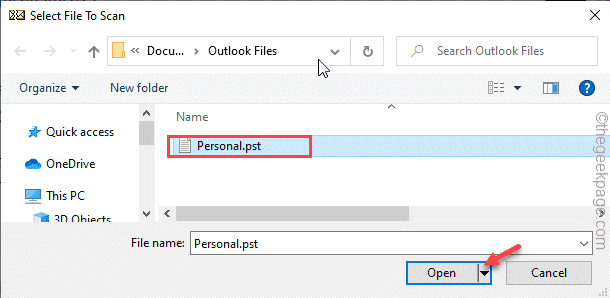
6. Now open the «Outlook files”Folder to access it.
7. Here you will find the «* .pst” proceedings. Select it and touch «Opened“.
8. Finally, touch «Start”To start the scanning process.
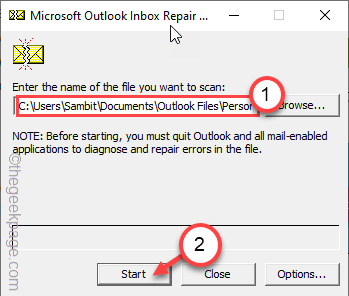
Wait for your system to repair the Outlook inbox file.
This will solve the problem you are currently facing.
Related posts:
 How to access Steam games without an internet connection
  How to view FPS with Xbox Game Bar in Windows 10: Steps Made Easy
  Hacked account? How to check and remedy
  How to make video calls from WhatsApp Web
  How to increase the RAM memory of a desktop or laptop + Tips and Tricks
  How to organize your YouTube subscriptions into categories
+ Tips and Tricks
How to organize your YouTube subscriptions into categories
+ Tips and Tricks


