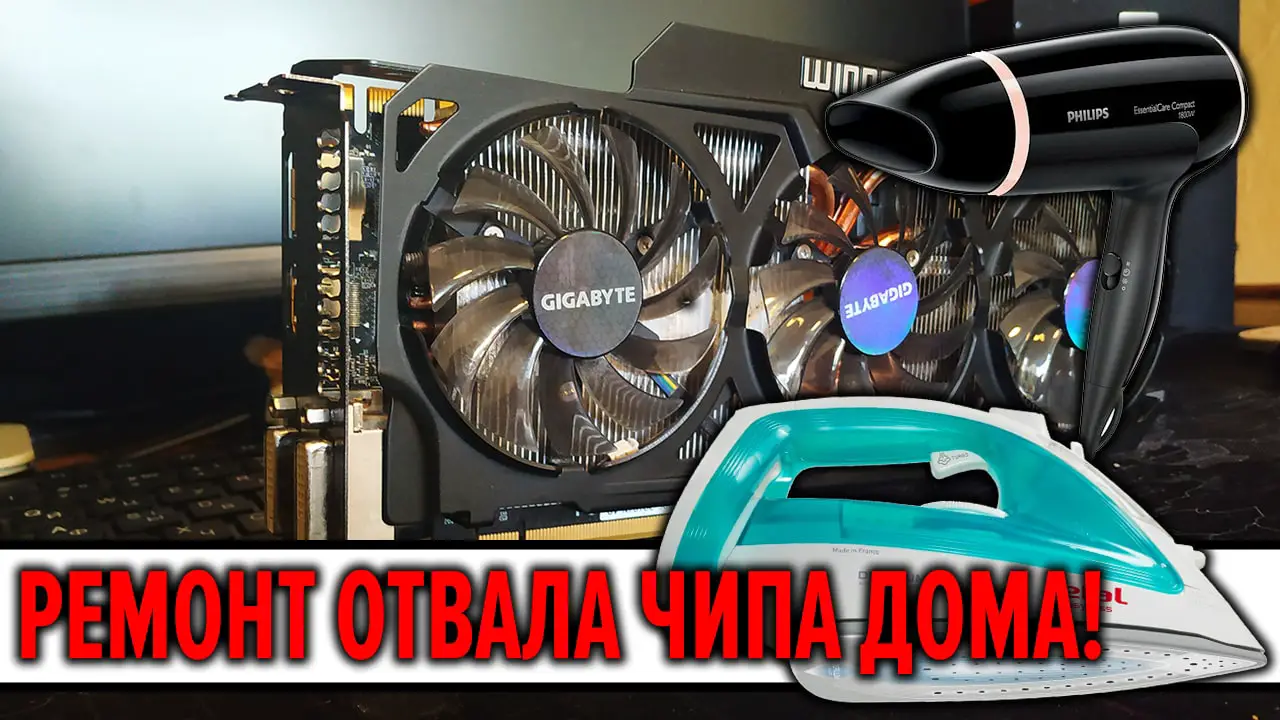
Blade of the video card chip. Home repair using the example of GTX 780 TI
– If you are interested in finding more on how this Graphic card will perform then this article will provide all such information and more.
Blade of the video card chip is becoming a common problem. The dump of the gpu chip is found in older cards up to 2013. Newer video cards do not have this problem. Most often this occurs from overheating, but let’s talk about this in more detail …
Today we will resurrect the video card after the chip is dumped. I will show you a simple and effective way to repair a video card after a chip dump at home. In my case, this is a GTX 780 TI graphics card.
It is very important that if you buy a used video card, be sure to check it for blade and warm-up. How to check a used video card is described in detail on our website.
Let’s take a look at what is a chip blade, signs of a graphics chip blade, and a blade in which video cards is most common?
Repair of a blade of a video card chip on video
What is a graphics card chip blade?
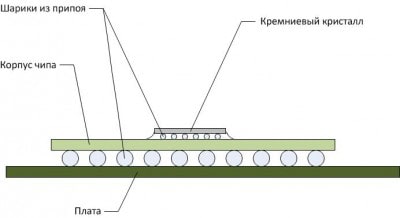
A dump of a video card chip is a severance of a graphic crystal from the chip case, or the chip case from the board. The diagram shows two levels of solder. A dump is literally the dump of a ball of solder from one level from another.
It is very difficult to say exactly at what level of solder the dump occurred. It is practically impossible at home, for this you need professional equipment and a microscope.
Graphics chip dump symptoms
How to determine the blade of a video card chip? Symptoms of a video card chip dump appear in different ways. But in most cases it is:
- No picture
- Various kinds of artifacts in the system and bios (the most frequent and sure sign)
- Crashes and problems loading applications or games that actively use the video card (this is usually an early stage of the problem)
- PC crash into blue screen
- PC freeze
- Sometimes a complex of these symptoms appears together. But the result is always the same, it is no longer possible to use the card.
In my case, the PC was booted with artifacts, after which it hung and the image disappeared. Sometimes the computer turned on immediately with a black screen without an image, or it disappeared even before the system was booted. You can watch the artifacts in the video.
Chip blade repair
Repairing a chip blade in a workshop is not much cheaper than the cost of a used video card itself. market, and sometimes more expensive. Because we’re talking about cards up to 2013-14. And you will not receive guarantees for further long-term work.
In repair shops, they make the so-called “reball”, this is the replacement of solder balls.
But there are ways to self-repair the blade of a video card.
All attempts to repair such a video card are to extend the life of a used product. So don’t rely on your graphics card to last long. Usually, after such a procedure, the cards work for up to six months. But there are exceptions when the cards worked for 2 years after warming up. How lucky you are.
To restore our video card, we will use one effective method.
To repair a graphics chip at home, we need a regular iron. A hairdryer is also used for these purposes. And if you have a special hair dryer from the soldering station, then you’re in luck, use it.
The essence of the method is to warm up the chip and PCB, which in most cases will help restore the solder. This does not always work, but the card is already by and large subject to disposal, and you practically do not lose anything, if, of course, you have correctly identified the cause of the problem.
Let’s get down to repairing the blade of the video card chip …
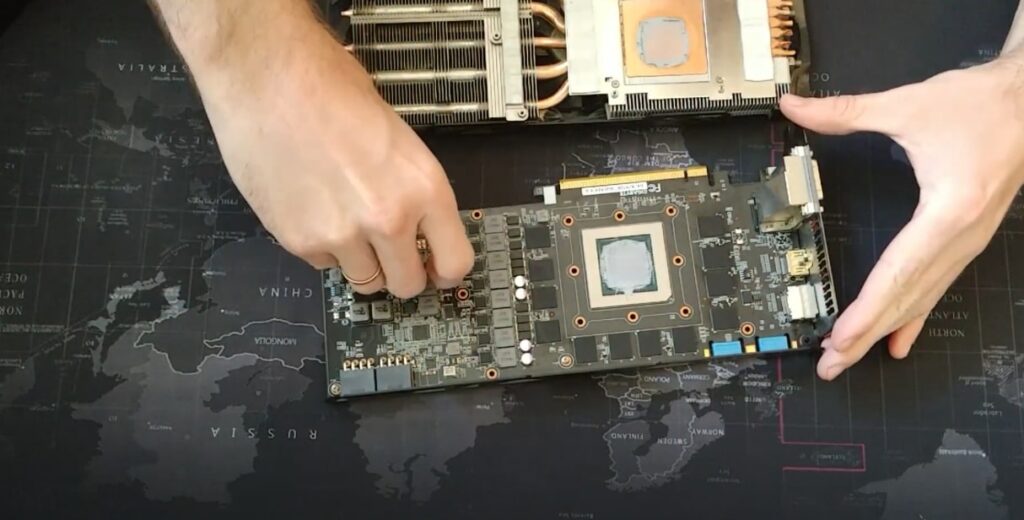
First of all, we disassemble the video card. We need to completely remove the heatsink and leave one board. Pay attention to thermal grease and thermal spacers. If the thermal paste is dry, then the card’s cooling was no longer at the proper level.
Thermal pads should not be torn, dry, or cracked. If they are, then they will need to be replaced if warmed up successfully. In one step, degrease the thermal pads with alcohol and clean the entire cooling system.
Before disassembling, make sure you have a thermal paste to replace the old one, we will need to clean the graphics chip.
And one more thing, you can have a chip without a heat-distribution cap, as in my case, maybe with it, it doesn’t matter, the procedure is identical.
Repairing a video card blade with an iron
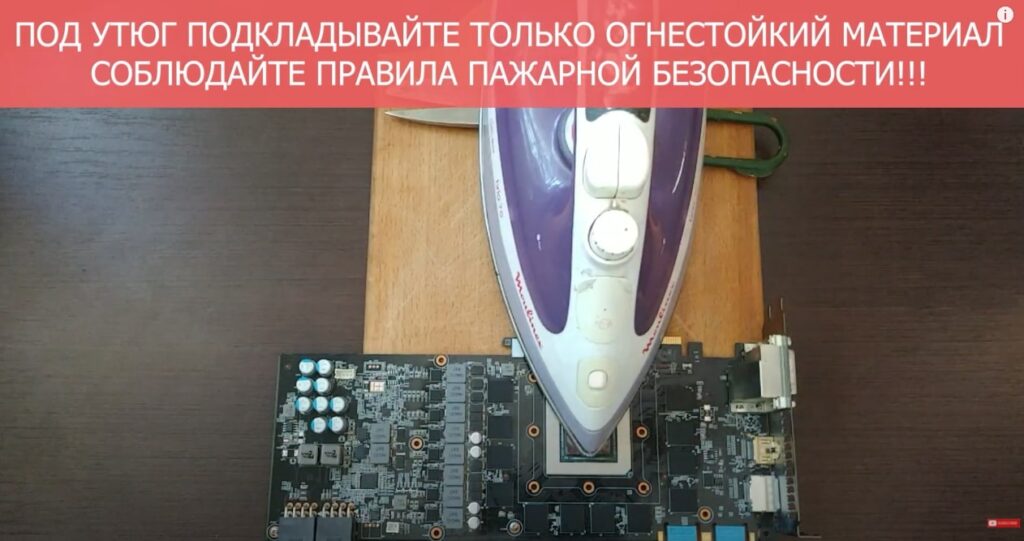
We need to position the iron so that its tip rests on the graphics chip, the rest of the iron does not touch the card and its elements. To do this, you can put something fire-resistant. I put the metal scissors and the map on the kitchen board.

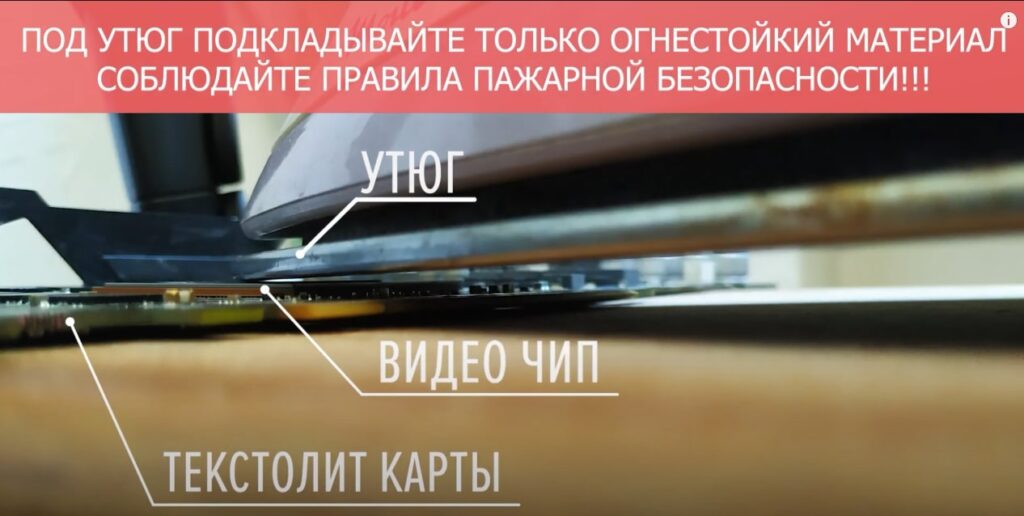
The photo clearly shows how I did it.
ATTENTION: Use only fire-resistant items. No wood, paper, plastic, etc.
The algorithm is as follows: start with the minimum temperature and heat it for two minutes, then every 40-50 seconds increase the temperature by one division. It should take you about 10 minutes to complete the entire temperature rise cycle.
When you reach the maximum temperature, let the iron heat the card for 7-8 minutes.
After that, in the same way, one division at a time, we descend from the maximum temperature to the minimum.
Such a sequence will save you from sudden temperature changes, which can cause the PCB to crack or the chip is sealed off.
And an important point, make sure the card is on a hard, flat surface and doesn’t sag. Otherwise, the textolite may bend under strong heat, and most likely it will be the end of the card.
After the end of the procedure, let the card cool down, collect it, first you need to blow it well, clean it and replace the thermal paste. Then start testing.
Repairing the blade of a video card with a hairdryer
If you do not have an iron at home, or for some reason do not want to use it, warm up the chip with a regular hairdryer for 15-20 minutes in circular motions. This is not as effective as an iron, especially if there is a thermal distribution plate above the chip, which takes most of the heat onto itself.
How to use a video card after a successful warm-up
Two very good life hacks. After warming up, it is advisable for the card to do an undervolting and reduce its voltage and frequency as much as possible. This will save the card from unnecessary heating and prolong life for many months, and also do not do tests in furmark. If you do undervolting, test it right away in games.
Also, after the undervolting, I recommend raising the cooler speed higher than the factory settings. To bring to minimum temperatures.
This is guaranteed to extend the life of the warmed-up card.
You can watch the detailed underolting procedure on the RX 580 undervolting video. You will learn the essence of this process, and you can already do it with NVIDIA carats, using their proprietary software.
Make sure the enclosure is well ventilated.
This procedure can be repeated while your video card is running. Those. after the next manifestation of symptoms, repeat the whole procedure again until it helps.
That’s all, in my case the card worked and passed dozens of game tests. Tests of a heated GTX 780 TI with an FX 8350 can be found on the website, as well as on the link in the description.
How to find out a warmed-up card if you buy a used one?
Look carefully at the stickers on the PCB in the area of the graphical chip on the back side. If the stickers are yellowed, either with curled edges, or the sticker has moved out altogether, then most likely the textolite has undergone strong heating.
There may also be yellowed solder on the back of the PCB. This is a sign that the card has been in critical heating mode for a long time.
Don’t take risks with such a purchase.
Warmed GTX 780 TI test:
Related posts:
 What is the electricity cost for bitcoin mining?
  What is a bitcoin mining pool – Best Beginner’s Guide
  Equihash Mining – Algorithm for Home Computers (Token and Equihash protocol)
  Top 5 + 2 Best most profitable Asiki for Mining 2019
  List of the most powerful video cards for mining in 2019
  What is PoS mining- How it works | Pros and Cons| Key Features