Review of multifunctional panels Scythe KamaMeter and Sharkoon BayMaster: design or functionality?
–
In recent years, the fight against PC noise has intensified. Processor and GPU manufacturers offer energy-efficient technologies, while cooling system manufacturers offer passive solutions. But, nevertheless, in the average system unit, you can count four or five fans, or even more.
To pacify the disposition of especially noisy representatives of the rotorcraft family, the bright minds of mankind have come up with reobases – devices that allow you to regulate the rotation speed of the fans connected to them by changing the voltage applied to them. The first devices of this type, according to legend, were made by folk craftsmen in a handicraft way. Often, a variable resistor was simply inserted into the power circuit and the handle was brought out to a plug in the front 5.25 “panel. But manufacturers happily picked up the idea and for several years filled the market with reobases of all colors and stripes. The first serial models differed little in their circuitry from handicrafts, except that they only looked decent and carried the manufacturer’s logo and several LEDs for indication.But progress did not stand still, and after a while the lurid crafts with LEDs were replaced by rather “serious” devices, with an LCD display, the possibility tachometer readings, temperature measurements by means of thermal diodes and using digital power control instead of resistors.Today we will consider two representatives of the modern generation of rheobases, which are rightfully called multifunctional panels.
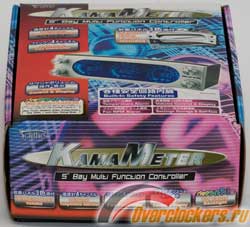
The first device we will look at is made by the Japanese firm Scythe, known for their premium air-cooling systems. The box in which the KamaMeter multifunctional panel is supplied is replete with photographs and captions that describe the advantages of the device and the package contents.

Inside the box are found:
- the panel itself is KamaMeter;
- 3 interchangeable faceplates (black and silver are separately, white is already mounted on the device);
- plank with “Audio In” and “Audio Out” sockets and a cable 85 cm long;
- cable with 3.5mm jack connectors at the ends, 30 cm long;
- power adapter from 5.25 “molex to 3.5” molex;
- 4 extension cords for fans with 3-pin connector, 70 cm long;
- 4 thermal diodes on a 70cm cable;
- 4 pieces of adhesive tape for attaching thermal diodes;
- 4 screws for fixing the device in the 5.25 ”compartment;
- instructions in Japanese, English, Danish and French on A4 paper.

announcements and advertisements
3060 cheapest in Citylink
First-hand Z590 motherboards at very good prices
RTX 3070 cheapest at Compeo.ru
3060 Gigabyte Vision in Citylink
RTX 3060 12Gb in XPERT.RU – be in time 🙂
-20% on an almost gaming computer – nowadays it also happens
30% discount on 75 “4K Samsung – cheap drain in Citylink
RTX 3070 at XPERT.RU at the lowest prices
75 “LG IPS for 4,736,000 rubles – see specifications
Lots of RTX 3090 in XPERT.RU
In general, the equipment is of the “necessary and sufficient” category. The only caveat is the interchangeable faceplates. This is a big plus – the buyer does not have to look for a device of the desired color or change it when buying a case of a different color. Panel replacement is carried out within a minute. It is enough to remove the four handles and unscrew the two screws to remove the old panel, and do these operations in reverse order to install the new one.
So, let’s move on to examining the panel itself. It is designed as a “short” 5.25 ”device and has the following set of features:
- 4 independent channels for connecting thermal diodes. Ability to display temperature in both Celsius and Fahrenheit
- 4 independent channels for connecting fans through a three-pin connector
- audible and visual notification in case of overheating, hypothermia or fan stop
- manual change of the rotation speed of any of the four fans
- volume control
- 7 display backlight colors (blue, magenta, cyan, green, orange, red, violet and the mode of iterating through all colors in turn at intervals of half a second)
- saving settings when power off


On the back of the device there are connectors for connecting fans, thermal diodes, brackets with sound ports and a power connector – molex for 3.5 ”devices. The connection process itself does not cause any problems. All thermal diodes and fan extension cords are glued with labels with the recommended channel number and installation location (1 – CPU, 2 – HDD, 3 – VGA, 4 – Case).
When you turn on the KamaMeter, a kind of POST (Power On Self Test) passes, turning on all the display elements and going through the backlight colors in turn. At the same time, all fans run at maximum speed. Upon completion of the self-test, the fans return to the speed set by the user before the power was turned off. The display will also use the last set backlight color. By the way about the display. It has an interesting feature – viewing angles. If you look at the display from the bottom up, it is almost impossible to read the readings. When it is right in front of your eyes, the readings can already be read, but ideal “readability” is achieved in the range from 5 to 55 degrees from the horizon. The display itself contains three information blocks. All three have a scale stylized as an analog speedometer, in the form of an arc, inside which data is displayed, already in numerical terms.

The left information block displays the temperature, the selected channel number and the scale – Celsius or Fahrenheit. The scale is labeled from 0 to 100, in 10-unit increments. The range of the measured temperature, which is displayed on the “digital” display, also lies between zero and one hundred degrees. The measurement accuracy is 0.1 degrees. If the temperature drops below 0 degrees or exceeds 90 degrees Celsius, the KamaMeter signals hypothermia or overheating, respectively. The display starts flashing red and an audible “alarm” sounds for 20 seconds. After 20 seconds, the “alarm” is turned off, and the display continues to flash until the temperature returns to the specified range. If a thermal diode is not connected to any channel, then when it is selected, three horizontal lines will light up on the “digital” display.
The information block located in the center of the display is responsible for displaying the fan speed on the selected channel. The pseudo-analogue scale is marked from 5 to 55 hundred revolutions, in increments of 5 units. The “digital” display is designed for a range from 0 to 9990 rpm. Unfortunately, the measurement step is 30 revolutions, i.e. all displayed values will be multiples of 30. If the number of revolutions of the connected fan falls below 600 rpm, a visual and audible alert similar to the one described above will be triggered, with the only difference that the display will blink orange instead of red. When selecting a channel to which no fan is connected, four zeros are shown on the “digital” display.
The last, third, information block is located on the right side of the display. It is a pseudo-analogue VU meter that measures the current volume level of the sound that “passes” through the KamaMeter. The scale is marked from -30 to +3 dBa.

In addition to the display, there are four controls on the Scythe KamaMeter’s front panel. All four are made in the form of ribbed steel handles and are symmetrically located at the corners of the device.
The control, located in the lower left corner, performs several functions at once. The first and main one is to regulate the fan speed on the selected channel by changing the voltage supplied to it. To decrease it is necessary to turn the knob counterclockwise, to increase it – clockwise. The rotation takes place in steps, a full rotation of 360 degrees – 20 steps. The voltage ranges between 7.8 and 11.85 volts.

The X-axis shows the number of steps, the Y-axis shows the voltage output.
The second function is to switch the display backlight color. To do this, you just need to press the handle like a button. The third function is to switch the temperature scale from Celsius to Fahrenheit and vice versa. Switching is carried out by holding the knob pressed for more than 5 seconds.
The two knobs located at the top are four-position switches and are used to select the fan channel – left, and the thermal diode – right. The fourth knob, in the lower right corner, is a variable resistor and is responsible for adjusting the volume level.
Related posts:
 Aqua Computer Kryographics Next for the GeForce RTX 3080 and RTX 3090 in the reference design – Solid GPU water block in the test
  G.Skill ENKI 360 All-in-One compact water cooling in the test – first attempt successful, but with weaknesses
  Office and gaming in one? We are building a work
 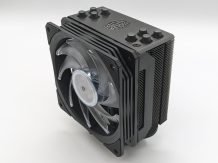 Cooler Master Hyper 212 RGB Black Edition – Tried and tested in a new look
 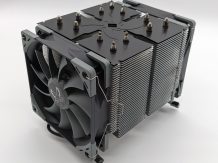 Scythe Ninja 5 in the test – cooling colossus with space problems
  Corsair Hydro Series XG7 RGB water block for the reference design of the NVIDIA GeForce RTX 3080 and RTX 3090 in the test