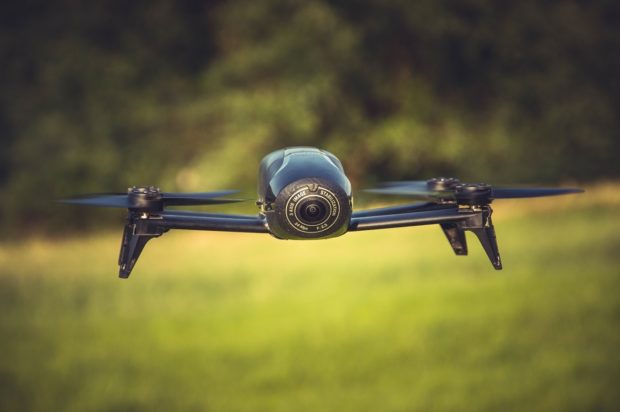
Oho, now for something completely higher flight. Another Parrot drone has just landed on my table. This time it is Bebop 2 Power, a model to which the entire airspace is subjected … at least within our sight.
Box and accessories included
Again, the richest set offered by Parrot fell into my hands. The Bebop 2 Power FPV Pack arrives in a large box with a handle on top. Seemingly trivial addition, very useful in practice. Inside, the first polystyrene cover with a cutout for a drone with a battery, an additional battery and a power supply for the socket await us. Below, in a similar “case” we find the Skycontroller 2 controller, Cockpitglasses 2 goggles, four propellers, a key for their assembly, a USB cable, a battery charging cable, a set of interchangeable plugs for electrical sockets, a user manual and a smartphone or tablet holder. So it is really rich.
Read also: DJI Tello drone test, a competitor of the Mambo model
Technical specifications Bebop 2 Power
- General
- Drone weight: 525 grams
- Range: up to 2000 meters
- Four engines
- 8 GB of built-in memory
- Dual core processor
- Camera
- 14 Mpx
- Pictures saved in JPEG or DNG RAW
- Full HD video recording
- Digital image stabilization
- Sensors and modules
- Ultrasonic
- VPS
- Altimeter
- 3-axis accelerometer
- 3-axis gyroscope
- 3-axis magnetometer
- GPS
- Power
- Two 3350 mAh batteries
- Endurance: up to 30 minutes of flight
- Communication
- 1100 mAh Li-Polymer battery
- Flight time: 13 minutes
- Charging time: ~ 30 minutes
- Software for Android and iOS
Technical specification of the controller Skycontroller 2
- Weight: 500 grams
- Sizes: 200 x 180 x 110 mm
- WIFI antenna
- Port USB
- 2 scoops
- 8 buttons
Parrot Bebop 2 Power
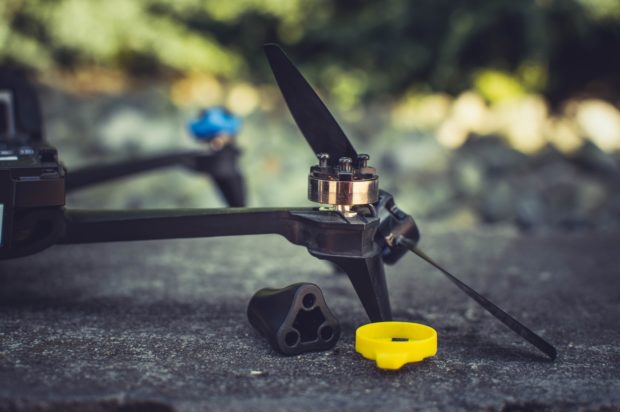
At the beginning, let’s start with the very (as I call it) “core” of the drone. In fact, it contains what is most important, i.e. fancy electronics with sensors and modules in the front. The whole thing has been really well thought out, because on the bottom the “booms” for up to four propellers can be removed and replaced in case of breakage. However, this is difficult to admit. It just so happens that the materials here seem fragile, but in fact, they will survive a lot. We will not find here only rigid covers (except for the battery and base), and the polystyrene surrounding the camera lens and a flexible cover that bends when lightly touched. However, it is purposeful, because such a solution is better able to withstand possible bumps. Additional resistance to them is provided by the structure reinforced with glass fiber and grilamid.
However, the most important elements of Bebop 2 Power can only be found in two places. We are talking here about the front, where the camera module has heated its place, and so much where there is room for rails that allow for a good mounting of the battery, a switch-on button and a microUSB connector. However, do not think that you will use this for charging. It is used only for the transmission of saved materials, because the recharging of the battery is done by a separate power supply connected to the mains.
Of course, the aforementioned core has four traditional extensions, which at their end have brushless motors and a place for mounting propellers. In their case, you have to be careful, because the casings on them are of different colors for a reason. For advanced drones, this is certainly obvious. It just so happens that before starting Bebop 2 Power, we need to attach a pair of different propellers and secure them with the included key. However, their marking is not very good and beginners can get nervous.
Skycontroller 2
It is also worth taking a look at the equipment we are going to use. A controller with considerable weight and dimensions may not be a work of art, but its durability and operation do not raise any objections. Traditionally, at the front we have a start button, two knobs, menu button, “return home”, take a photo, start / stop recording. In turn, under the ring fingers there is a knob to set the brightness, a lever for rotating the camera vertically and a 180-degree rotation button. In the middle there is a charging connector (with the same power supply from the set, but with a different cable). In the center of the Skycontroller 2, there is a thread, to which we screw the tripod included in the set with an extendable and rotating base. This is crucial when flying … unless you don’t want to enjoy the views straight from the drone. For this you need to additionally connect the smartphone / tablet via the USB port on the side.
The unique element of the controller, however, is located at the very front in the extended element. Contrary to appearances, this is not a stand, but an antenna, thanks to which you can fly the Bebop 2 Power up to 2 kilometers horizontally.
Software
I have not dealt with such advanced designs for so long, but I already know that the proprietary FreeFlight Pro Parrot application can be a model for other manufacturers. We will find there all the most necessary settings, the ability to control from the application level, map preview (thanks to the GPS module), possible view of the last position of the drone in the event of a crash, transfer of materials taken, speed and limit adjustments. Overall, everything you need to play… but not only that. The application also has a built-in “follow me” mode (works well with a single character) and a “flight plan”, within which we set the route that the drone is to take automatically.
In addition, the possibility of calibrating, checking the technical condition, previewing the battery, starting from the hand, adjusting the quality of recordings and finally communication.
apparatus
In terms of the quality of photos and recordings, it’s just fine. You will shoot some amateur shots, but you cannot count on the quality of Hollywood production. You save the recordings in MP4 format and Full HD resolution at 30 FPS, while the photos can be captured in DNG format – the view of the entire lens with the fisheye effect and JPG in the traditional, rectangular version. Somehow this 14 Mpx camera can be compared to the quality of a typical smartphone from the upper middle shelf. Traditionally, we get the best quality with good lighting. Accordingly, after dusk, with artificial lighting and at night, the quality of photos and recordings drops.
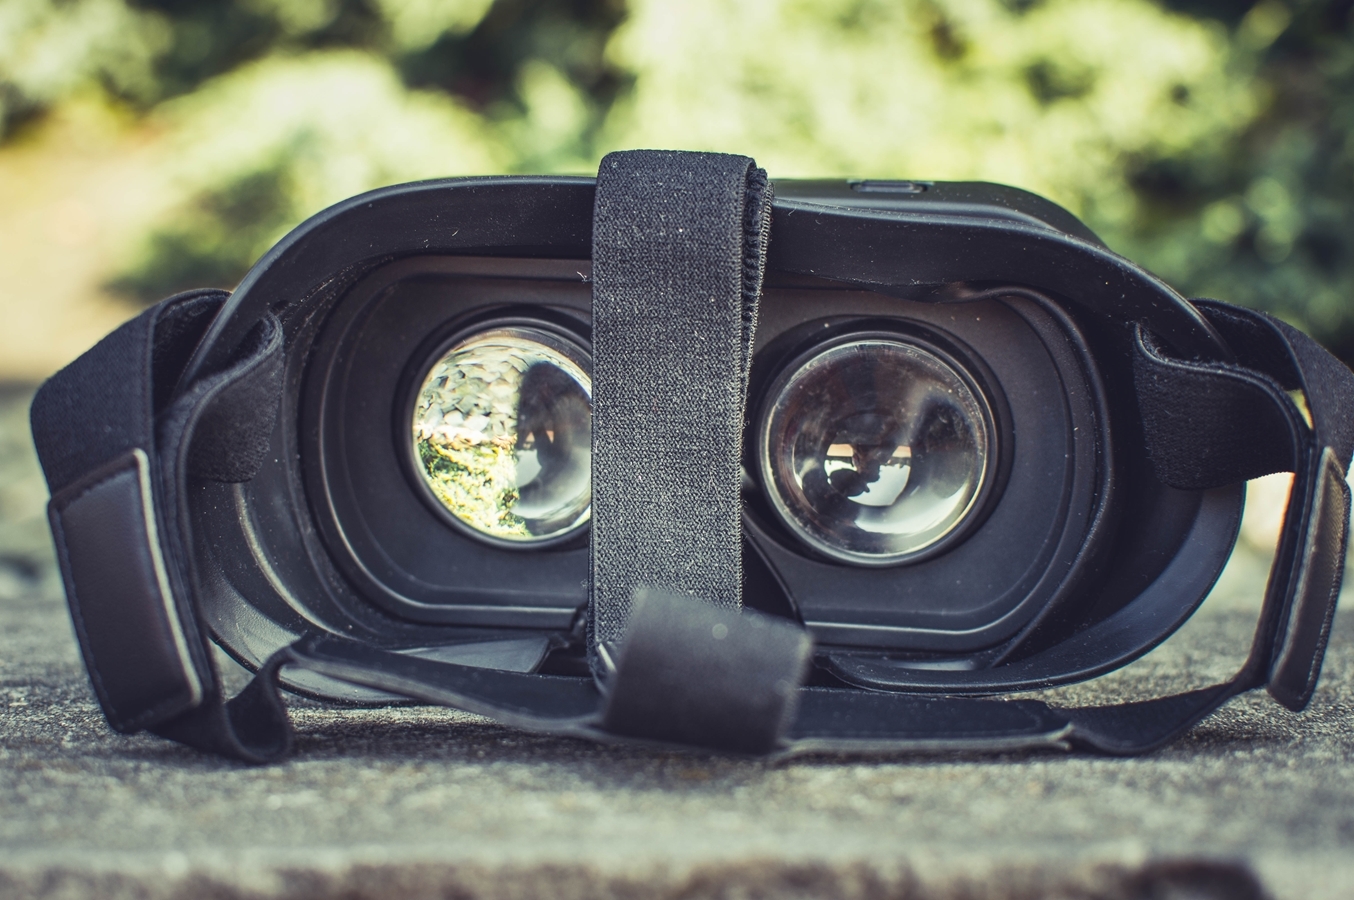
It is worth mentioning the presence of a three-axis digital stabilization and the ability to rotate the camera in flight around the vertical axis. It’s not 360 degrees, but around 160, but it still works great. Especially when we decide to play with FPV goggles, because it so happens that manipulating the camera settings is possible from the level of the controller. On it we will also adjust the brightness. In them, the adventure reaches a whole new level. I couldn’t help but pay attention to the really worthwhile moment when we look at our surroundings from a bird’s eye view. The quality may not be overwhelming, but the view itself is simply priceless. Just like free flying in the open space, which in goggles takes on a completely different character and precision of movements. I wrote about identical goggles during the test of the Mambo model, so I am sending you there as well.

Impressions
I admit right away – I did not think that even free flying without a goal gives so much fun. The first hours of flights over a relatively short distance and even lower altitude already attracted my attention enough, on the day of take-off I charged the batteries three times for the first time. And these allow for almost 60 minutes of flight. You can’t imagine the moment when I discovered the quick mode and the possibility of lifting the limits. We are talking about a height of (attention) 150 meters, which allows you to easily see the entire area. Not to mention the speed of turning, hovering and the usual speed of flight in the horizontal plane. Bebop 2 Power is fast after lifting all the limits… very much. The most important thing, however, is that it does not lose flight stability, but I must admit that lowering the flight altitude from several dozen meters may not raise any doubts regarding the risk of a sudden fall, but the time needed for this can be counted in tens of seconds.
Ask yourself what you really expect from a drone in the set for PLN 1700 (price from Amazon). Control precision? Smooth traffic? High speed? High quality of recordings and photos? Ease of Learning? Long-lasting batteries? Solid construction? Refined software? Okay, yes I could go on and on. Overall, therefore, you will be disappointed only in one of these features, and it seems to me that you already know which one. Yes, it is about the quality of the camera, which is the worst compared to all the features. This does not mean, however, that it is hopeless. It is good, but average compared to the overall structure. However, this one was not entirely well thought out. I mean the obligation to disassemble the drone during transport and the inability to fold it. However, this problem was resolved with the Anafi, which recently debuted in the Parrot store.
Summary
Do you want to give a gift to your child, friend or just enjoy your time with a slightly higher-end drone? Then you will not be disappointed on Bebop 2 Power. The average camera is actually the only noticeable minus, because in terms of other elements, the Parrot proposition is simply impeccable. The batteries allow for almost 60 minutes of flight, the speeds will certainly impress you, and the 2000-meter range, in the absence of obstacles at the operator-drone level, will allow you to explore a large part of the area. However, if you happen to lose the signal, the programmed “Return to Home” mode will lead the equipment straight into your hands. You also have access to this function for typical flying. However, if you happen to hit something or its battery runs out during the return, you will find its last location in the application, which the drone also informs about using light and sound signs.

I would like to thank Kamil Pasternak for his help in making the photos
Related posts:
 Test zasilacza be quiet! Pure Power 11 500W CM
  Baseus GaN2 Pro charger test. Four ports and a full 100 watts of power at your fingertips
 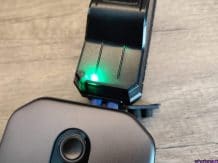 Baesus Super Energy Pro Car Jump Starter test. Use this power bank to start the car
  Genesis Zircon X 10 Anniversary Edition test, i.e. we are celebrating the 10th anniversary of Genesis
  We know the details of Samsung’s Galaxy M21 2021 Edition
  The drone does not need a human