For example: if you want to boot the system while you have an unrecognized USB device connected, an error will appear that says "security boot fail", and it is perfectly normal because Windows is designed to only boot when a reliable firmware is being used (digitally signed). However, there are times when we may need to do it because we need to do some tests or because we are having problems, so we are going to show you how you can do it.
How to enable and disable UEFI Secure Boot
The first thing you should do is start the system in advanced boot mode, and for this from Windows 10 you must access the menu of configuration -> Update and security -> Recovery. There you will see a button, under Advanced Start, which gives us the option of "Restart now".
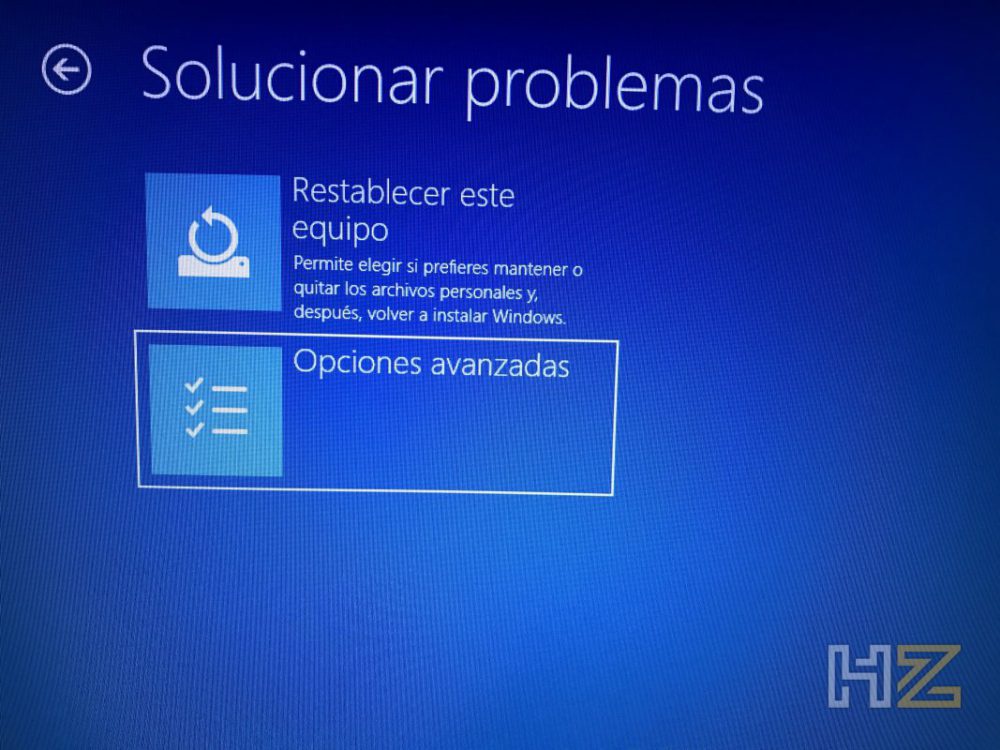
The system will restart and a blue screen will appear that will allow us to choose between several options. In the first instance we will select "Troubleshoot."
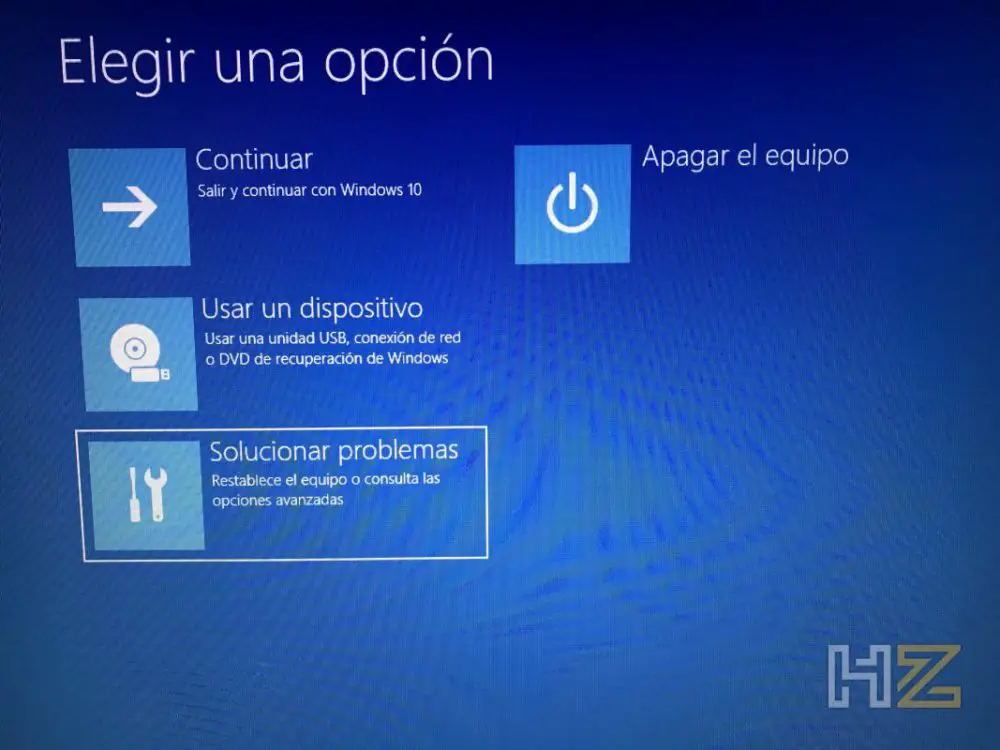
In the following, Advanced options.
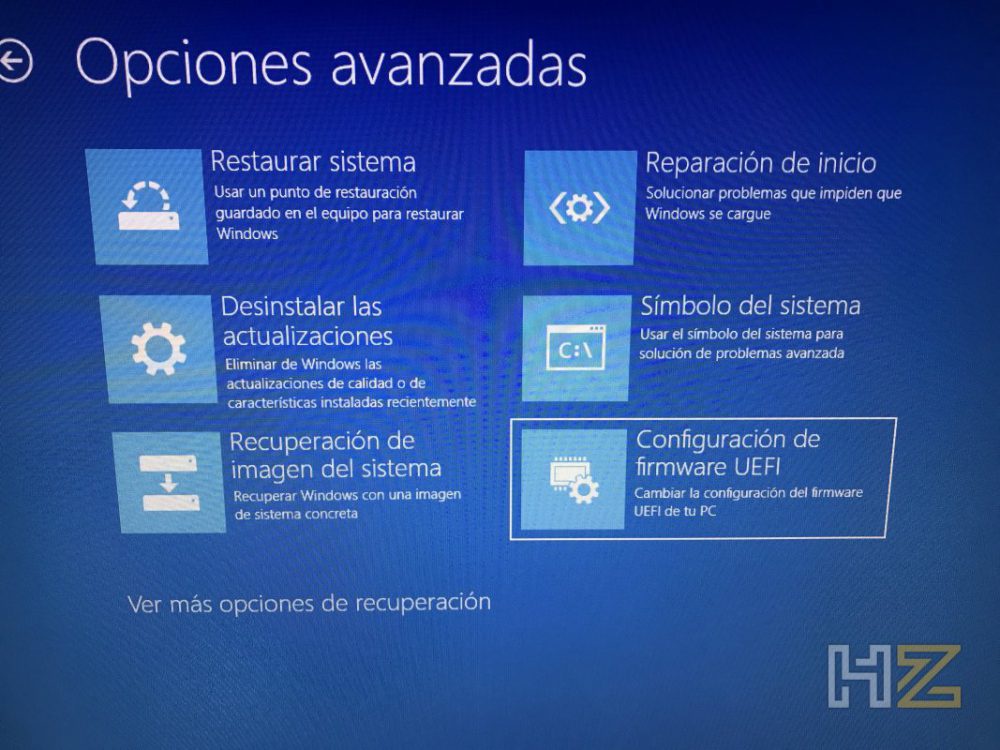
Within the advanced options, we must go to the last option: UEFI firmware configuration.
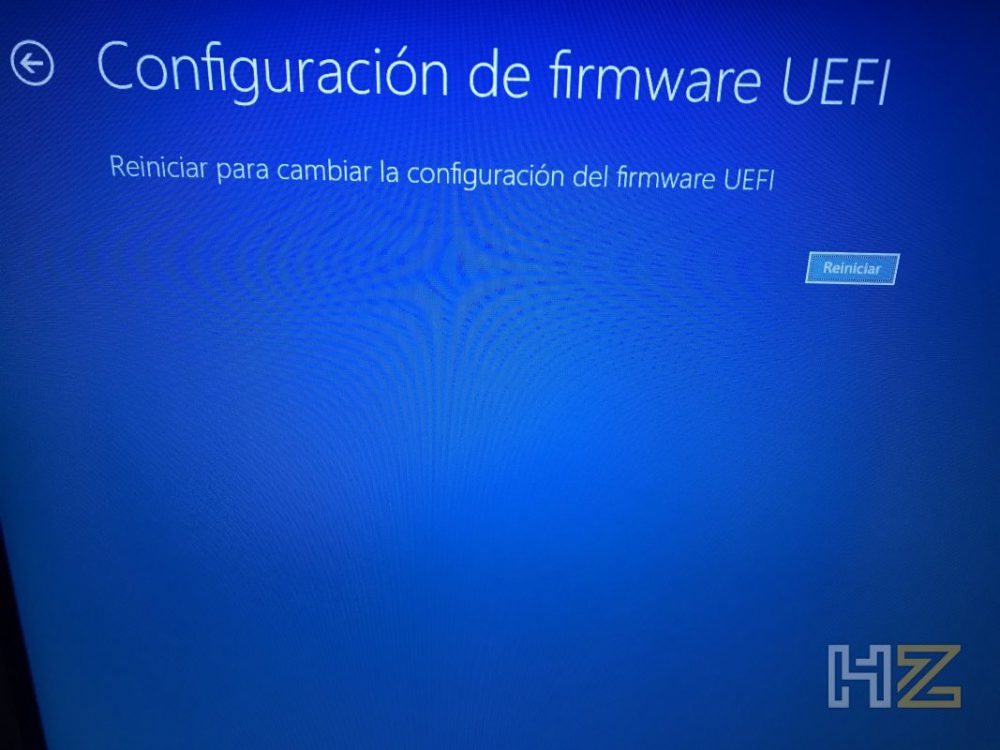
After giving it, the system will notify us that the device will be restarted, and after pressing the Restart button it will do just that.
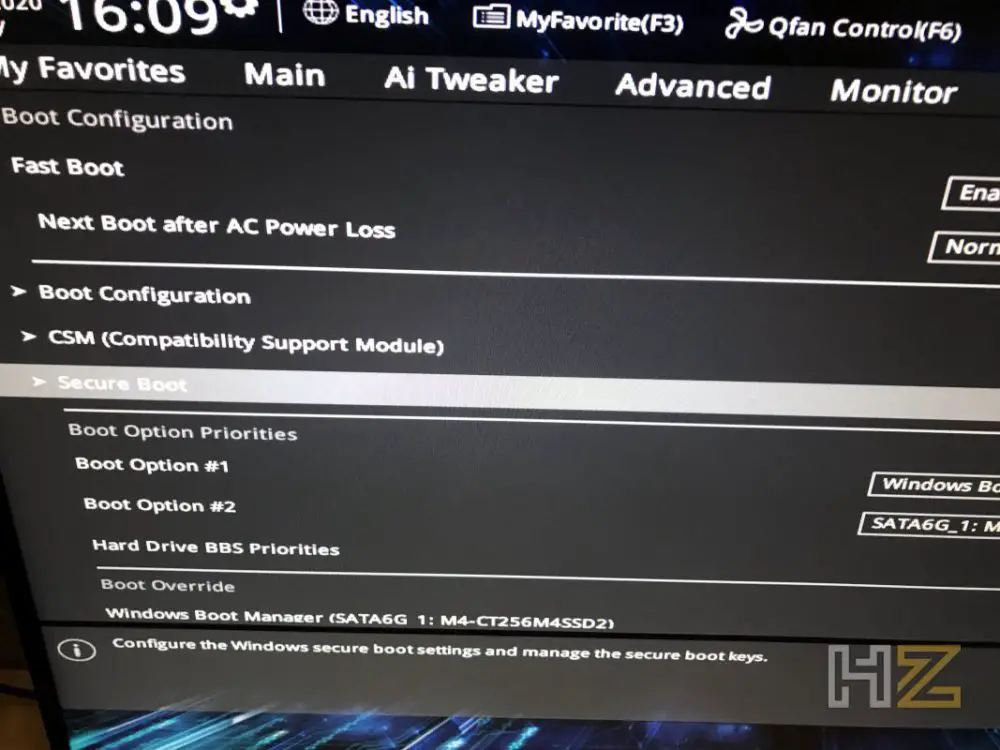
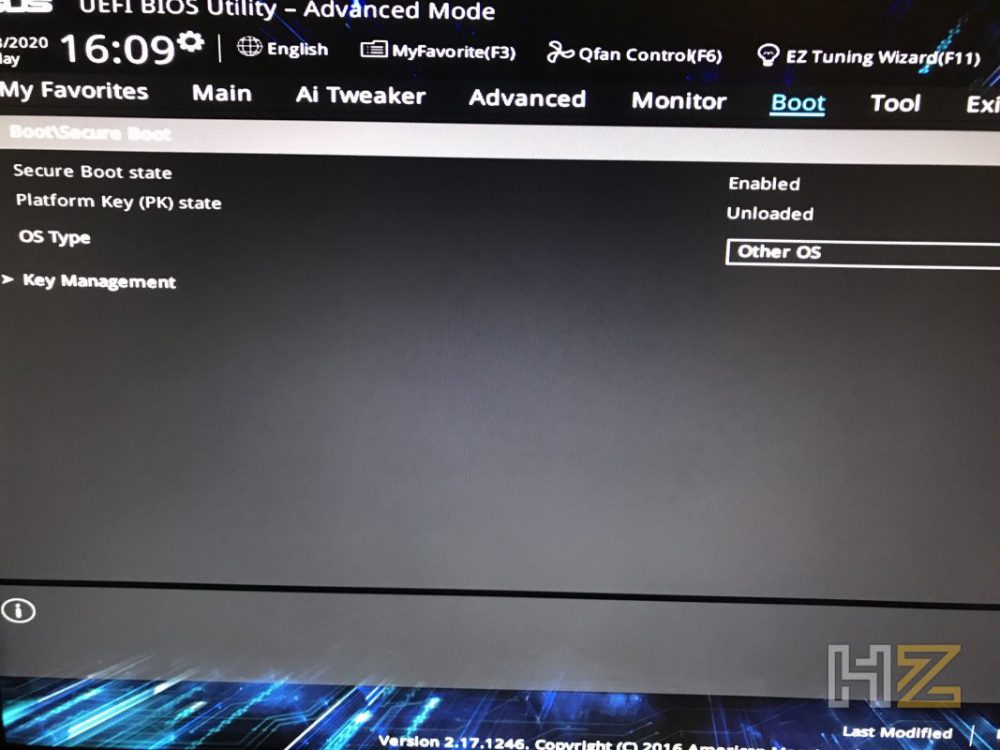
Upon restart, the computer will enter the BIOS without having to touch anything. There, we must go to the Boot section and select Secure Boot.
Here we will see if it is activated or not, and also its parameters. However, it will not let us touch anything, because in order for the option to deactivate it to be allowed we must first make a preliminary step, which is to establish a BIOS administrator password.
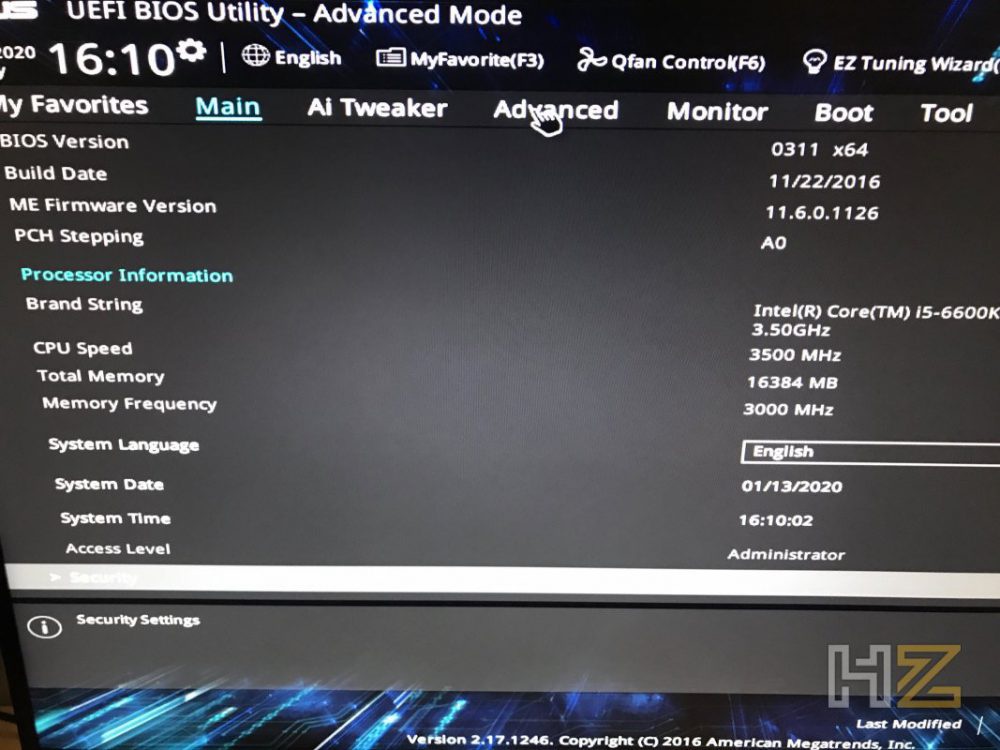
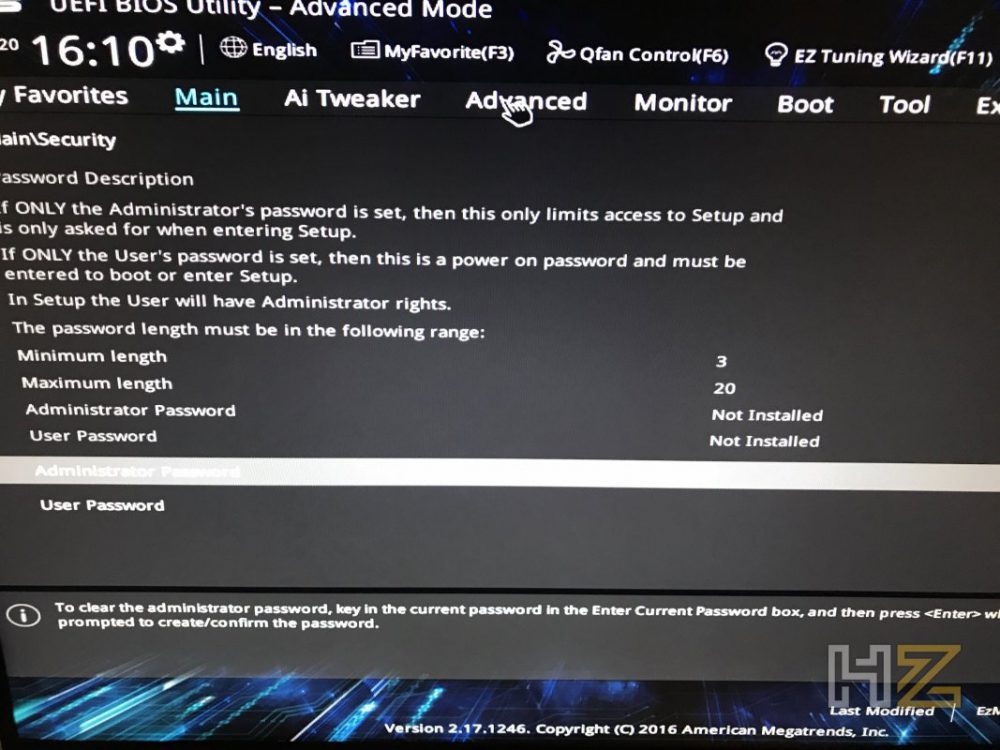
To do this, we must go to the Security section of the BIOS.
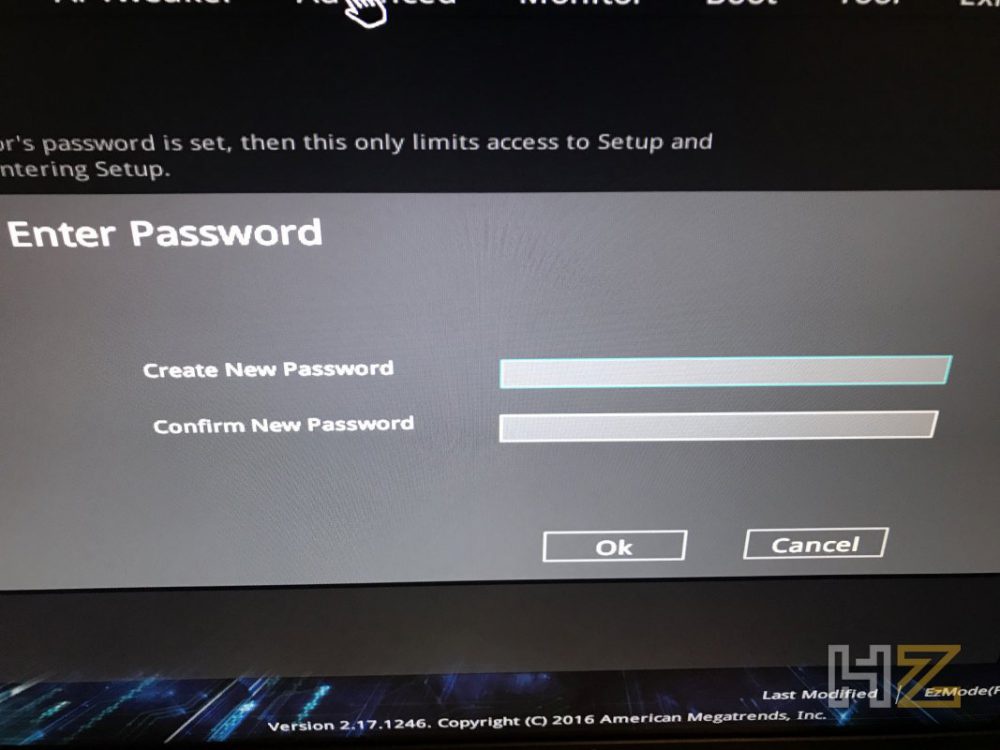
In Administrator Password, press and ask us to enter a password.
We introduce it, and voila. After that we can return to the Secure Boot menu and deactivate it if we need it, or activate it if we had it deactivated (recommended option).
By the way, once you change the Secure Boot parameter, it is highly recommended remove the BIOS password again, since if we lose it or do not remember we can have serious problems to re-access the configuration. To do this, we must simply follow the reverse steps; The system will ask us to enter the current password first, and then in the new one we simply leave it blank.
What do we achieve by enabling and disabling the UEFI Secure Boot?
The first objective of the UEFI Secure Boot is protect the system from unauthorized boot loaders, especially those that may come from malicious codes like the ones we sometimes find in processor vulnerabilities. At the same time, unlocking this mode will give us greater control over the PC, since having it deactivated we could encounter problems if, for example, we have left a USB flash drive connected with a bootloader on the computer when starting it.
Since we have the option to deactivate it, on the other hand, it will allow us to do the tests that we consider appropriate in the equipment, and modify what we want, although it is true that these are cases oriented for very advanced users who need to perform very specific tasks in the equipment.
Related posts:
 7-nanometer Nvidia GPU, TSMC will handle most of the production
  ASRock X299, a new BIOS allows you to install 2 TB of memory
  MSI Prestige X570 Creation Review: Test | Specs | Hashrate
  Radeon RX 5500 XT, PCI Express 3.0 castrates performance?
  An overclocker ran 1TB of RAM on an X299 motherboard limited to 256GB
  Best Review 2021: MSI MPG X570 Gaming Edge WiFi Under $250 ($200)