Luckily or unfortunately, when we are not cloning a hard drive by hardware, we have to use some program. Many of them have an interface in Windows, but in the end they often give problems or the advanced functions are only accessible when you buy the paid version of the software. For this tutorial we will look for the cheapest way to do it, with free software, and in which we will not need anything additional except a USB flash drive.
What do you need to clone the hard drive to an SSD
This is all we are going to need:
- The source hard drive, where you have everything installed.
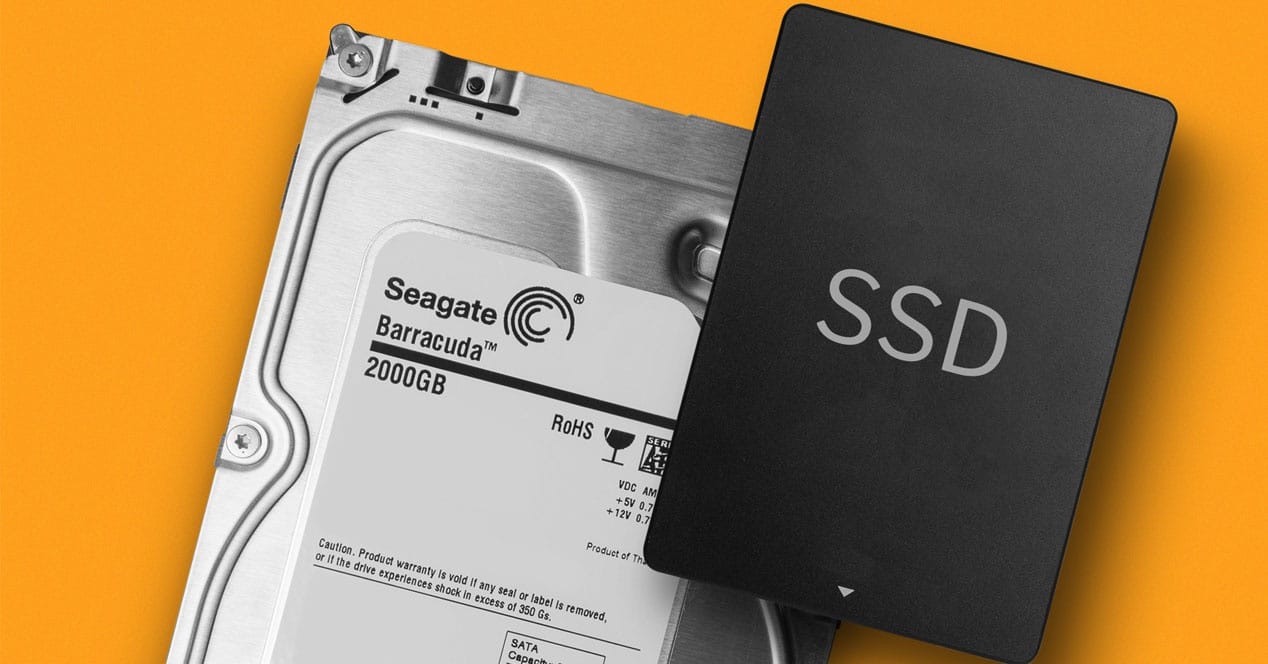
- The destination hard disk or SSD, which must be empty and with a capacity equal to or greater than that of the old one.
- A USB flash drive of at least 2 GB formatted in FAT or NTFS format.
We assume that you must have both disks (the new and the old) connected to the PC, either internally by SATA or via a USB adapter. It is indifferent.
Prepare a bootable USB flash drive
The first thing to do is to prepare a USB flash drive in which we will install everything necessary to start the free software that we are going to use. To do this, the first thing we will do is download Tuxboot, a free software that will directly download Clonezilla and convert the pendrive into a boot device so that we can start the PC from it and not from the hard drive.
Once we have downloaded it, we execute it (no need to install). At the top we select in «On-Line distribution» clonezilla_live_stable and current, which are the default parameters. At the bottom, we select USB Drive in Type and in Drive we select the letter of the drive where we have the USB stick connected (logically we must connect it before).
We do not have to do anything else, once the process is finished, we will have Clonezilla on the USB flash drive ready to go.
Clone the hard drive to a new one
With the USB pendrive connected, we restart and press F10 / F12 (it depends on the motherboard) to select the boot device, and logically we indicate to the system that it should boot from the pendrive with Clonezilla. When loading, we will get the following menu.
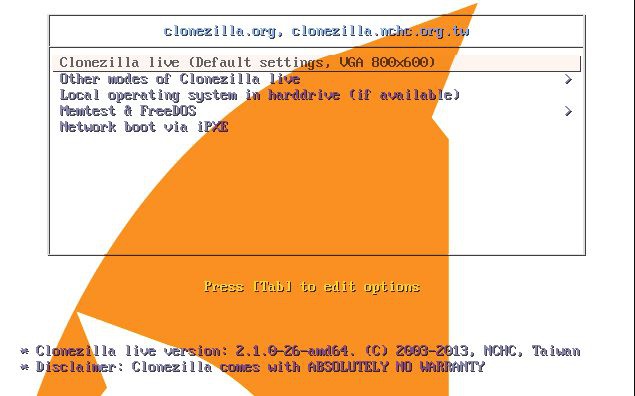
Here we must select the first option, Clonezilla live, and wait for the operating system to load. Next, a new window will appear in which we must select the language, and after doing so and accept, another one will appear asking for the map of the keyboard. In this second screen we do not change anything and simply press the ENTER key on the keyboard to continue.


In the next window that appears, we simply tell you Start Clonezilla.
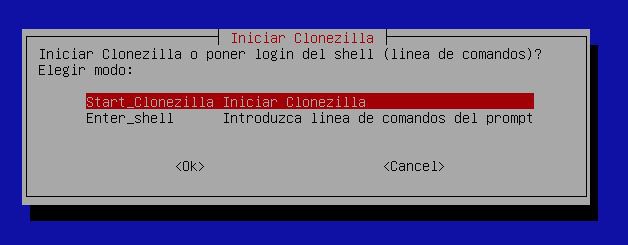
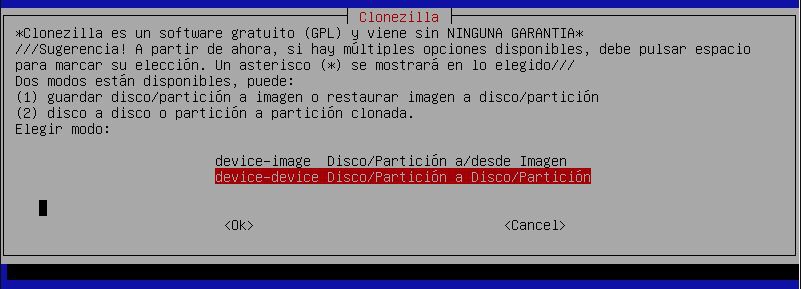
Now the software will ask us what we want to do. You have to select the second option, which is cloning from device to device. The first option is to make a copy from a disk image, but it is not what we want since we intend to clone the hard disk.
Now it will ask us if we want to access the default options or use expert mode. We can tell you to start in the beginner mode, but we will select the expert mode to see what options are offered to us.

In the next step, we must select the source disk, where we currently have our data. You have to make sure that we select the right hard drive. In the step that goes right after, it asks us for the destination disk, and there we must select the new hard disk or SSD.


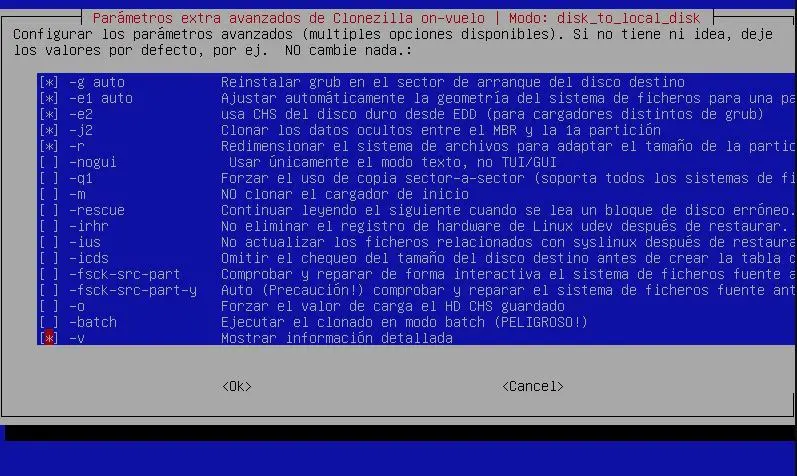
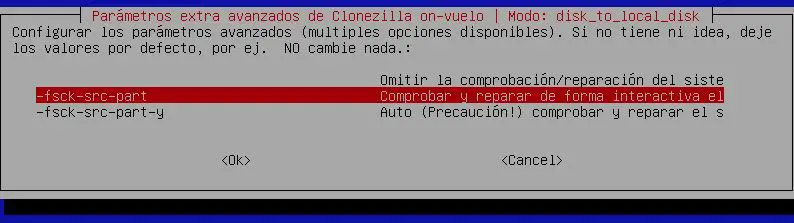
Now the advanced options screen will appear (for this we have selected the expert mode). It is best to leave the default values, or at most select the last option (-v) to see detailed information.
There is little left. Now the software asks us if we want to do a copy check when finished. If we select yes, keep in mind that the process will take much longer to complete. It is your choice.
Now you will ask us about the partition table. Ideally, check the option to use the same partition table as the source disk to avoid data corruption when cloning the disk.

Now it will show us a summary of everything you are going to do, as well as a warning because the data we have on the destination hard disk will be lost, since we are going to clone the source disk on top. We must answer yes, and for this we enter a «and» and press ENTER.

Only one step left. Now he asks us if we want to clone the bootloader from the source disk to the destination. Similarly, press «y» and ENTER.

Once this is done, the cloning of the hard disk will begin and we will only have to wait for it to finish.
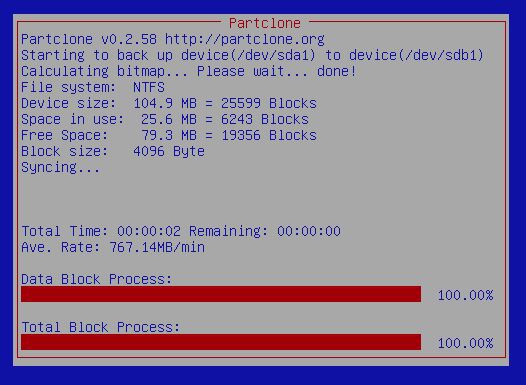
Once it is finished, it will urge us to turn off the system and change one hard disk for another, and that is what we should do: we turn off the PC, remove the old hard disk and put the new one in its place, if possible connected to it SATA port for the BIOS to detect at first. In this way, we can boot the system with the new disk and with exactly the same as we had in the old one.
Related posts:
 7-nanometer Nvidia GPU, TSMC will handle most of the production
  ASRock X299, a new BIOS allows you to install 2 TB of memory
  MSI Prestige X570 Creation Review: Test | Specs | Hashrate
  Radeon RX 5500 XT, PCI Express 3.0 castrates performance?
  An overclocker ran 1TB of RAM on an X299 motherboard limited to 256GB
  Best Review 2021: MSI MPG X570 Gaming Edge WiFi Under $250 ($200)