


How to change account type for user account in Windows 11
When there are many user accounts created on Windows 11 PC, you may have a requirement to change a user account type from standard to administrator. The procedure for changing the user account type has not changed much from the previous version of the operating system. In this article, we will discuss how to change the user account type from standard to administrator and vice versa in Windows 11.
How to change user account type from standard to administrator or vice versa in Windows 11
Paso 1: Open the Control Panel.
press To win key on your keyboard.
Writes Control Panel and hit Pay in wrench.
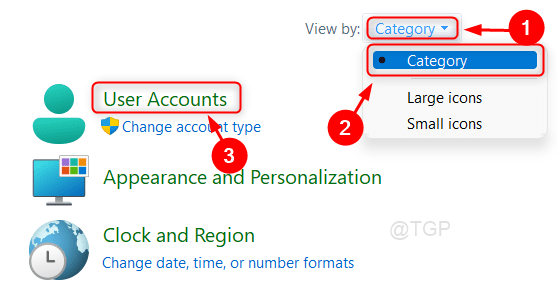
Paso 2: In the Control Panel window
Click on Category and select Category from the drop-down list as shown.
Then click User account.
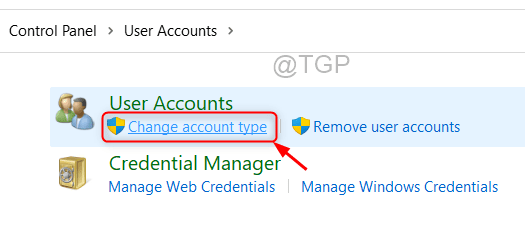
Paso 3: Next, click Change account type in User Accounts.
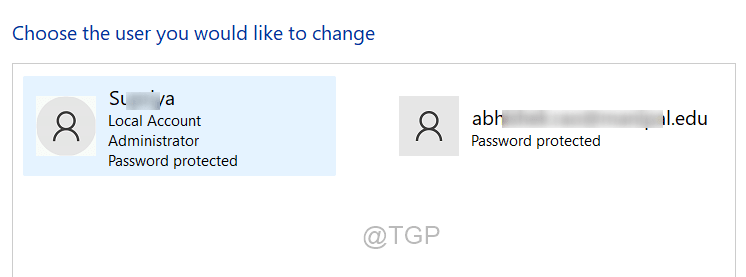
Paso 4: Now you can choose the user whose account type you need to change.
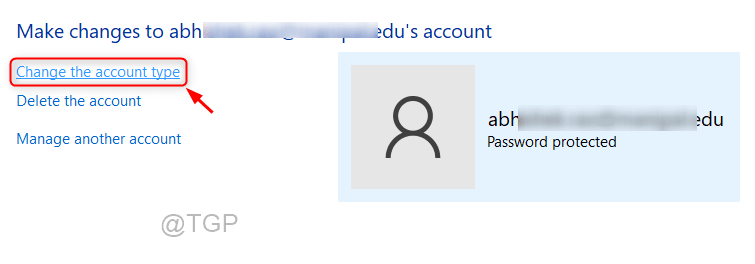
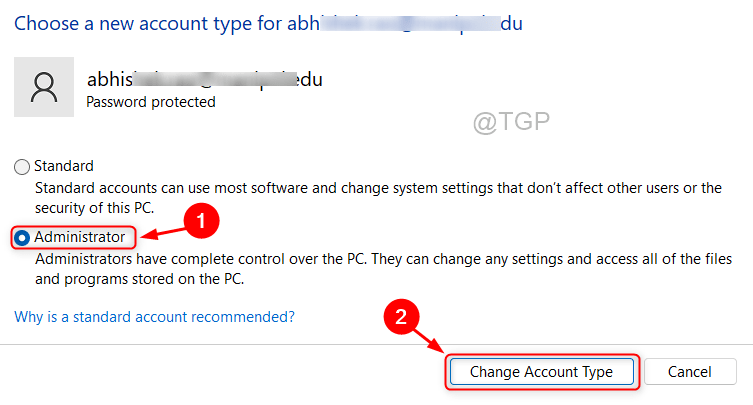
Paso 5: After selecting the user account, click Change account type As shown below.
Paso 6: Now you can change the user account type of an account on Windows 11 PC from Standard or Administrator.
Then click Change account type.
Now the user account type has been changed to the newly selected type.
Hope this article was helpful in changing user account type.
Please leave us your comments below.
Thanks!
Related posts:
 How to access Steam games without an internet connection
  How to view FPS with Xbox Game Bar in Windows 10: Steps Made Easy
  Hacked account? How to check and remedy
  How to make video calls from WhatsApp Web
  How to increase the RAM memory of a desktop or laptop + Tips and Tricks
  How to organize your YouTube subscriptions into categories
+ Tips and Tricks
How to organize your YouTube subscriptions into categories
+ Tips and Tricks


