


How to configure high refresh rate monitors in Linux
Have a high refresh rate monitor? Are you running Linux? Not sure how to change the refresh rate? We can help! Follow this guide as we go over how to change the refresh rate on popular Linux desktop environments!
Gnome shell
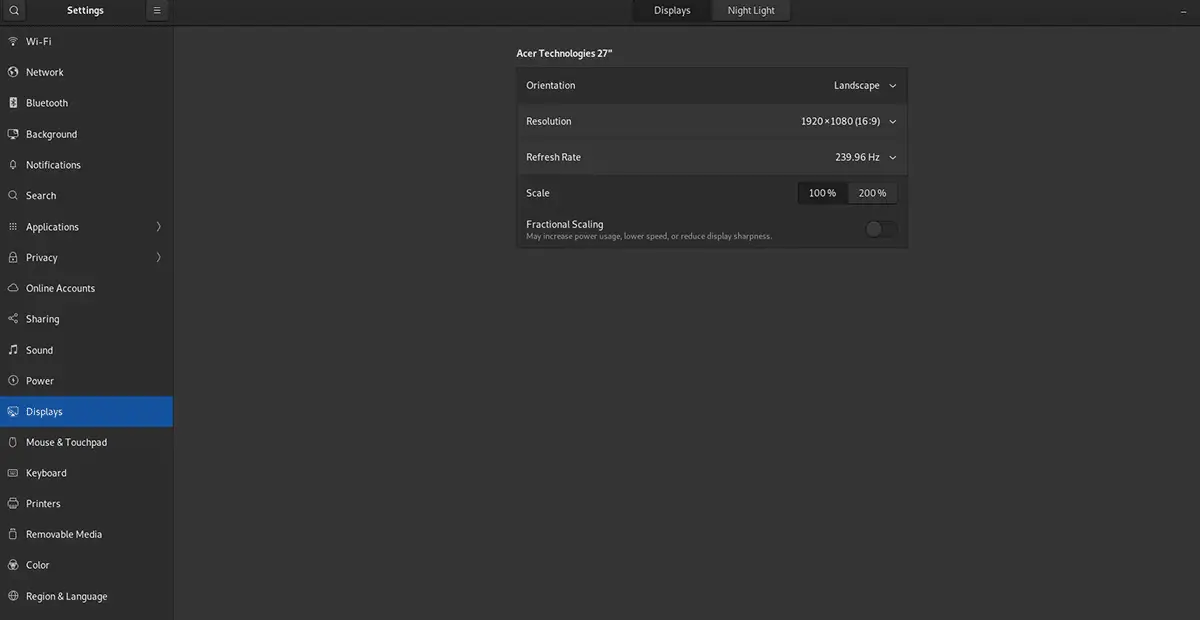
If you use Gnome Shell or a desktop that uses a modified version of Gnome Shell (Ubuntu), you can change the refresh rate on your computer monitor through the “Display” settings.
To access the display settings, press the To win key on your keyboard. Then type “Display” in the search box. Next, look at the search results and select the “Display” option to load the Gnome display settings.
Once inside the Gnome Shell display settings, find the “Refresh rate” section of the settings, find the drop-down menu, and click on it with your mouse. From here, you can set the correct refresh rate for your monitor on Linux.
KDE Plasma 5
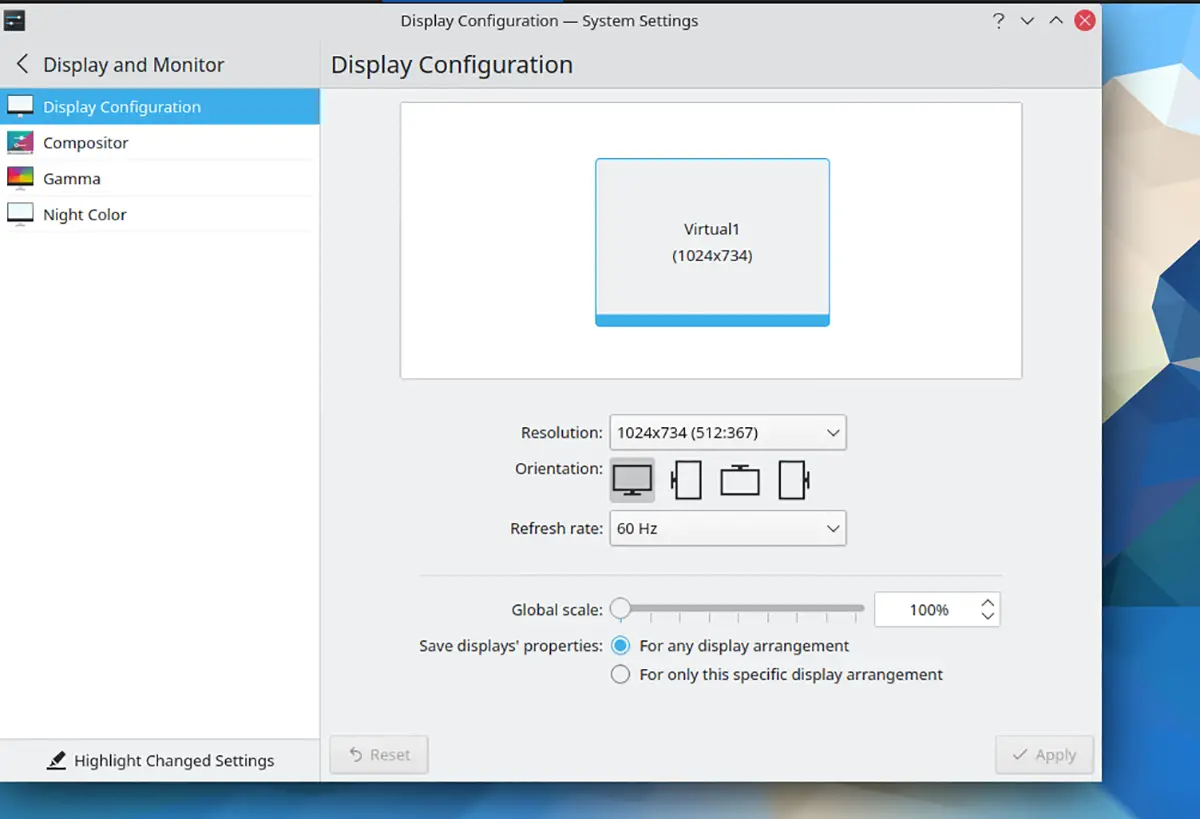
If you are using KDE Plasma 5 and need to configure your high-end monitor, please do the following. First, press the To win on the keyboard to open the KDE Plasma 5 application menu.
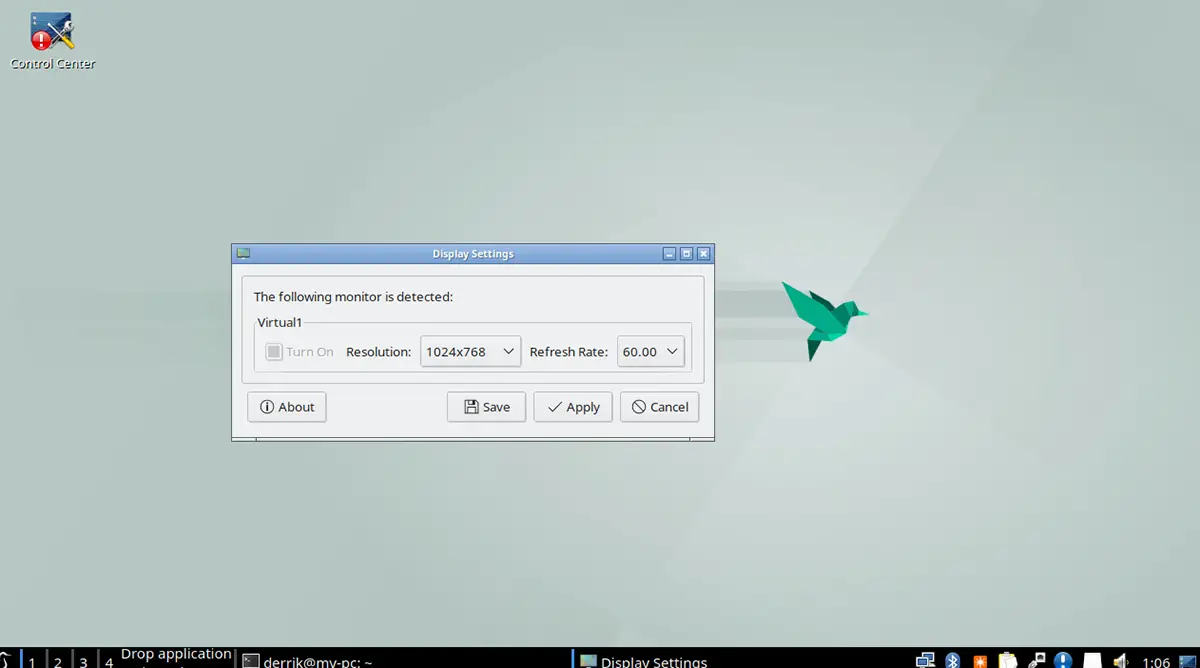
Inside the application menu, type “Display Settings.” Once you do, “Display Settings” will appear in the search results. Select it with the mouse to access the Plasma update settings.
Look for the “Refresh Frequency” menu near the bottom of the page. Once you’ve found it, select the drop-down menu and change its refresh rate to the one supported by your monitor.
XFCE
Those at XFCE will be happy to know that the desktop supports refresh rate changes. Here’s how to do it. First, press Alt + F2 to open the quick launch application.
Once the Quick Launch application is open and ready to use, type the following command in the text box.
xfce4-settings-manager
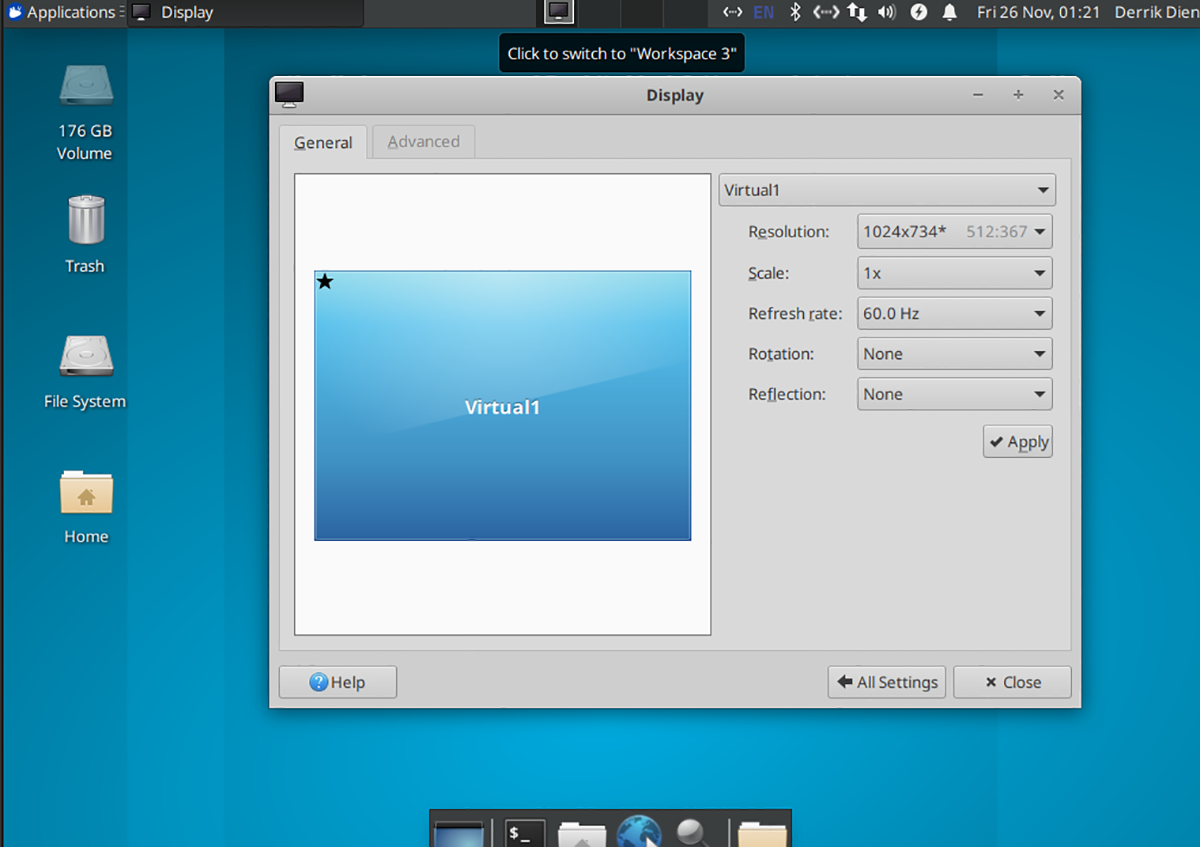
press the Get into key to start the program. When the application is open and ready to use, scroll down to the “Hardware” section of the settings window. Then select the “Display” button to open the XFCE display settings.
Within the XFCE display settings, find the drop-down menu and click on it with your mouse. Then change the refresh rate to the correct rate for your monitor.
Partner
Are you using the Mate desktop environment? That’s how. First, open the fast launcher by pressing Alt + F2 on the keyboard. Then type the command below to open the Mate Control Center.
mate-control-center
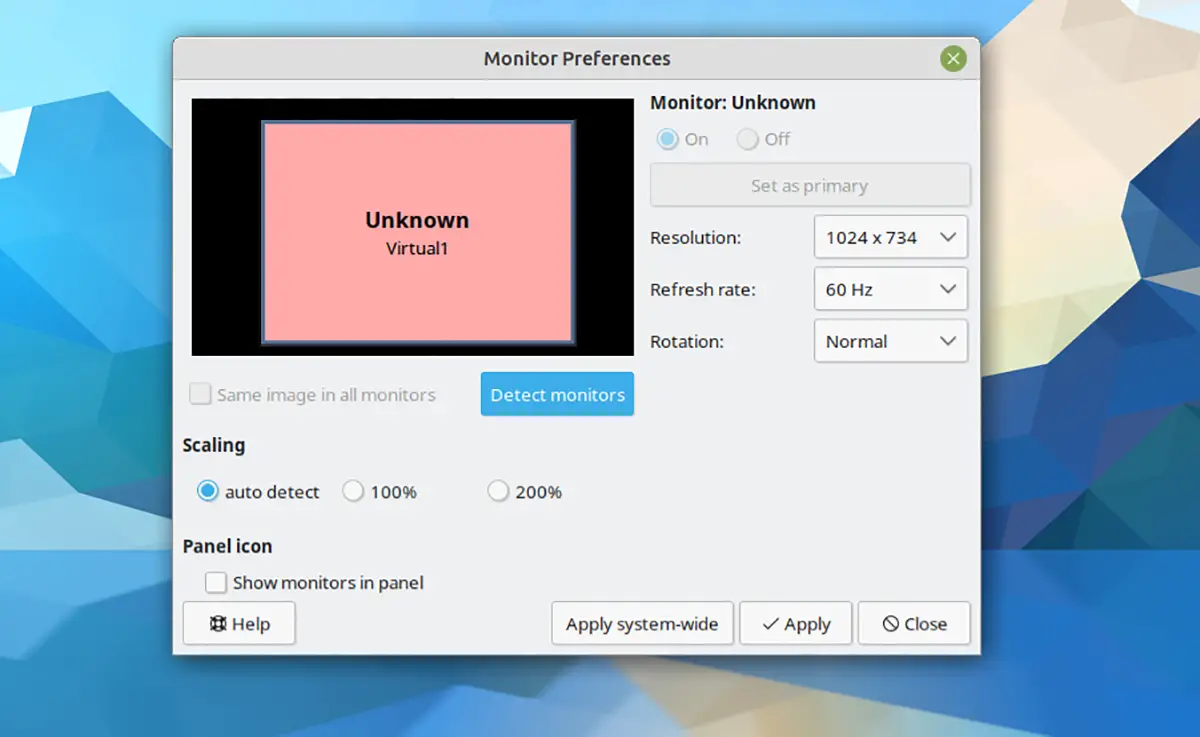
Once inside the Mate Control Center, locate the “Hardware” section. From here, find the “Displays” icon and click on it with your mouse. Selecting this option will open the “Displays” configuration area for the Mate desktop.
Within the “Displays” area in Mate, find the “Refresh Rate” drop-down menu. Then correct your refresh rate. Finally, click on “Apply to entire system” to confirm the changes.
LxQT
Unfortunately, the LXQt desktop environment does not have an excellent display configuration tool. Fortunately, you can install the Lxrandr application. This program is a GUI tool that will allow you to manage the display settings on the desktop.
To configure the Lxrandr application in LXQt, open a terminal window. You can open the terminal on the desktop by pressing Ctrl + Alt + T on the keyboard. Or looking for “Terminal” in the application menu and running it that way.
With the terminal window open, follow the Lxrandr installation instructions for the Linux operating system you are currently using.
Ubuntu
sudo apt install lxrandr
Debian
sudo apt-get install lxrandr
Arch Linux
sudo pacman -S lxrandr
Fedora
sudo dnf install lxrandr
OpenSUSE
sudo zypper install lxrandr
Launch the lxrandr application on the desktop. Once Lxrandr is open and ready to use, find the drop-down menu next to “refresh rate” and change it. After changing the settings, click the “Apply” button to apply your refresh rate settings.
Parakeet
To change your refresh rate in the Budgie desktop environment, do the following. First, open the Budgie app menu by clicking on it. Then select the search box and type “Settings”.
Look at the search results and click on the “Settings” result. Then scroll down to “Displays”. In the “Displays” area, locate the refresh rate area and change it. It should automatically update to the new rate.
Enabling Gsync
If you have a high-end monitor that only supports G-sync, you will need to enable this feature to get the most out of the screen. To enable G-sync, you will first need to install the Nvidia graphics drivers.
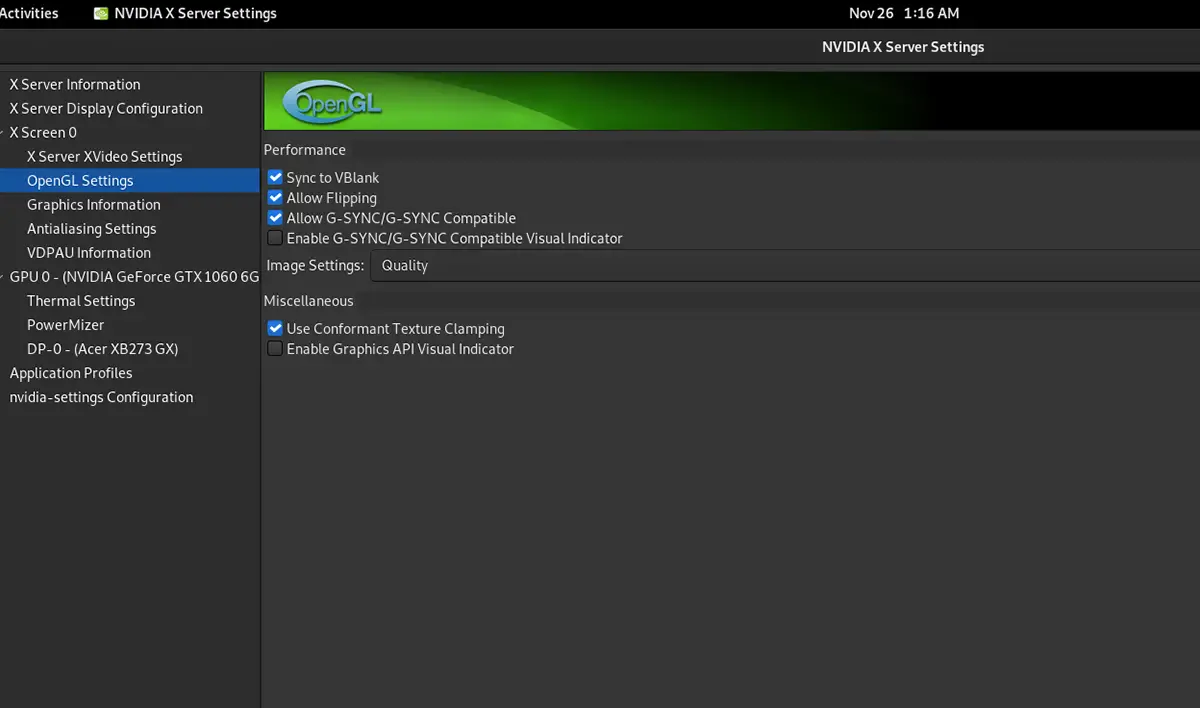
After configuring the Nvidia graphics drivers on your Linux PC, open the “Nvidia Configuration” application. Within the Nvidia Settings application, find the “OpenGL Settings” option and click on it.
Within the “OpenGL Settings” area, select “Allow G-SYNC / G-SYNC Compliant to enable the setting on Linux.
Related posts:
 How to access Steam games without an internet connection
  How to view FPS with Xbox Game Bar in Windows 10: Steps Made Easy
  Hacked account? How to check and remedy
  How to make video calls from WhatsApp Web
  How to increase the RAM memory of a desktop or laptop + Tips and Tricks
  How to organize your YouTube subscriptions into categories
+ Tips and Tricks
How to organize your YouTube subscriptions into categories
+ Tips and Tricks


