


How to disable Windows Defender SmartScreen in Windows 11, 10
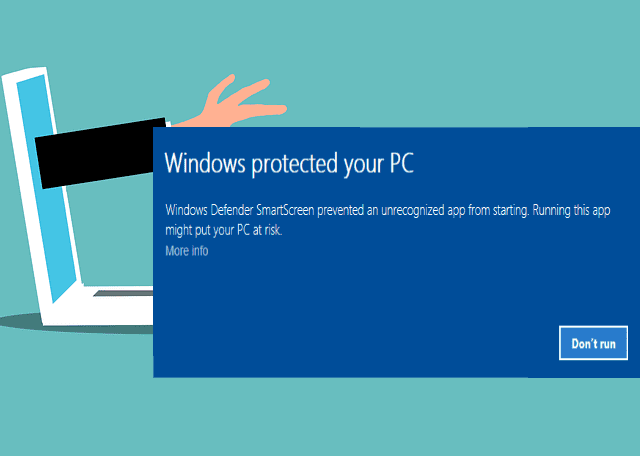
Many Windows users recently reported feeling irritated when Windows SmartScreen Defender warns the user not to start an application that Microsoft Windows does not recognize and to click the ‘Run Anyway’ option every time. Windows users are not sure what they can do at this point about how to avoid or disable it.
After investigating the issue, we discovered that the Windows Defender feature on the system can be disabled from the Settings app or local Group Policy editor or by editing the registry file. By doing so, users will no longer have to contend with the SmartScreen defender.
COMMERCIAL
If you are also facing the same problem on your system, then in this post you will find ways to disable Windows Defender, which will help to solve this problem.
How to disable Windows Defender SmartScreen through Windows Security
The Windows Defender SmartScreen feature has an option that only warns the user and allows them to run unrecognized apps on the device at their own risk. This can only be done from the administrative account on the system.
Here are the steps that will guide you on how to do it.
Step 1: open the windows security application on your system by pressing the button Windows key and click window security.
Step 2: Select the Windows security app from the search results as shown in the following image.
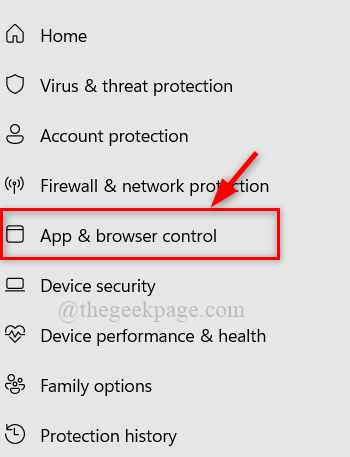
Step 3: Then click application and browser control in the left side menu as shown below.
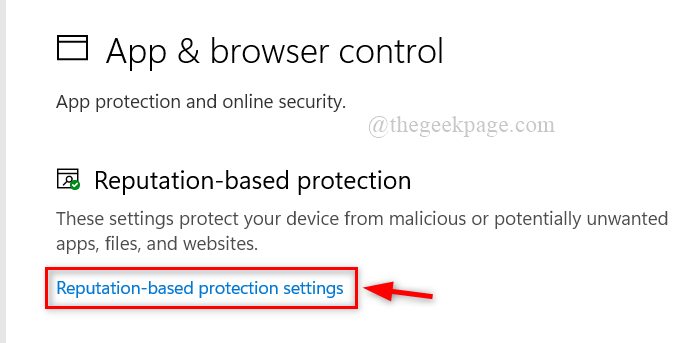
Step 4: On the right side, click Reputation-Based Protection Settings in the Reputation-Based Protection option.
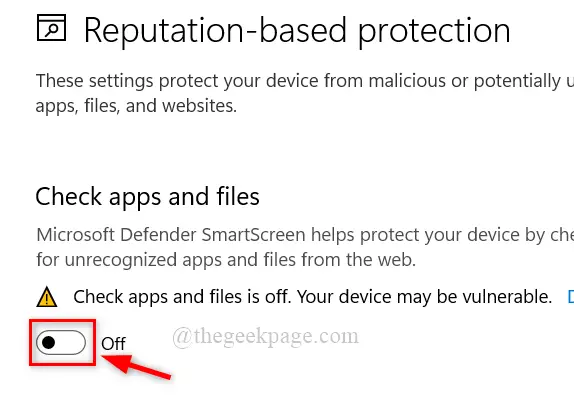
Step 5: Click on the activation button of the Check apps and files option to convert Off as shown in the following screenshot.
NOTE: Click Yes at the UAC prompt to continue.
Step 6: That’s it. Close the Windows Security window.
This is how any user can disable Windows Defender SmartScreen on the system using Windows Security app.
How to disable Windows Defender SmartScreen via Local Group Policy Editor
Windows Defender SmartScreen can be disabled on the system using the Local Group Policy Editor, for those who have the pro version of Windows 11. We have listed some simple steps on how to do it.
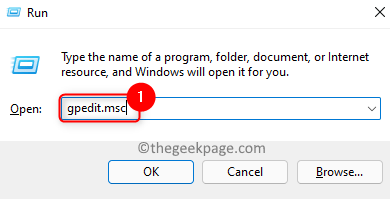
Step 1: Press Windows + R keys together on your keyboard to open the Run command box
Step 2: Then type gpedit.msc at run command box and press Get into wrench.
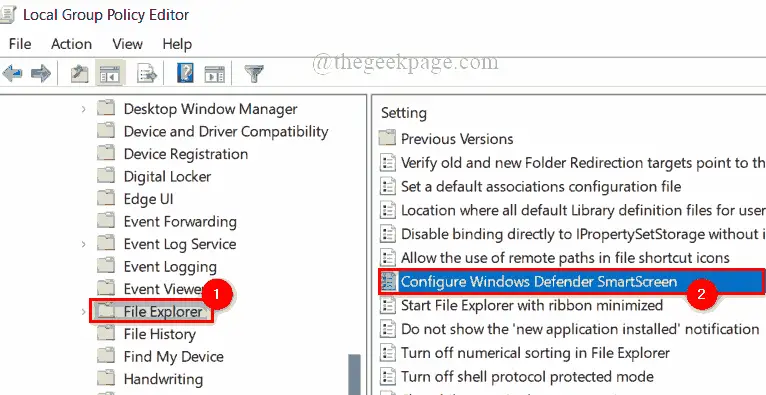
Step 3 – In the Local Group Policy Editor window, navigate to File Explorer using the path given below.
Computer Configuration > Administrative templates > Windows Components > File Explorer
Step 4: On the right side, double-click Set up Windows Defender Smart Display option as shown in the following image.
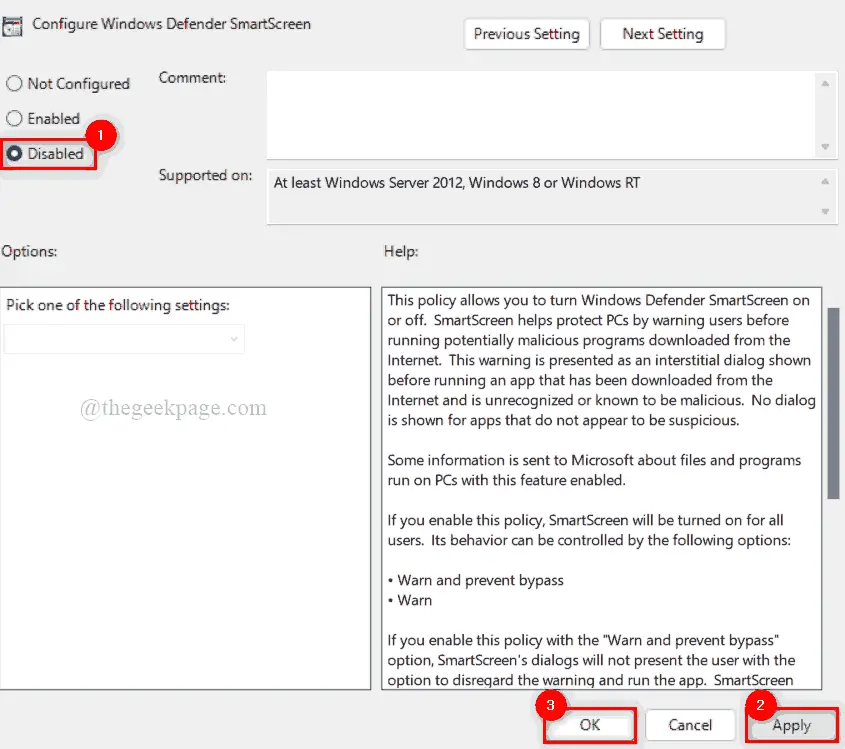
Step 5: In the Configure Windows Defender SmartScreen window, click the Disabled radio button and click Apply and OK to disable it as shown below.
Step 6 – Close the Local Group Policy Editor window.
Step 7 – Reboot the system for the effects to take place.
After the system boots up, check whether SmartScreen has been disabled or not.
How to disable Windows Defender SmartScreen via Registry Editor
NOTE: Before proceeding with this method, make sure that the log file has been exported to the system. Because you can revert it at any time later if something goes wrong while editing it. Even a minor change that goes wrong can damage the system.
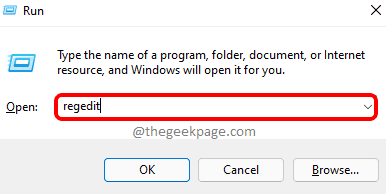
Step 1: Press Windows + R keys together on the keyboard to open the Run command box
Step 2: Write regeditar on it and press Get into key to throw Registry editor.
NOTE: Accept the UAC prompt by clicking Yes to proceed.
Step 3: In the Registry Editor window, copy and paste the below-given path into the empty address bar and hit Get into key to get to System registry key as shown below.
HKEY_LOCAL_MACHINESOFTWAREPoliciesMicrosoftWindowsSystem
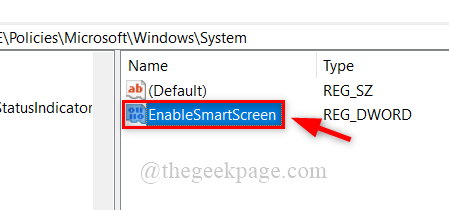
Step 4 – If you can’t find a DWORD value of EnableSmartScreen on the right side of the registry editor window, create a DWORD value by right clicking about him System Register key.
Step 5: Select Nuevo > Valor DWORD (32 bits) from the context menu as shown below.
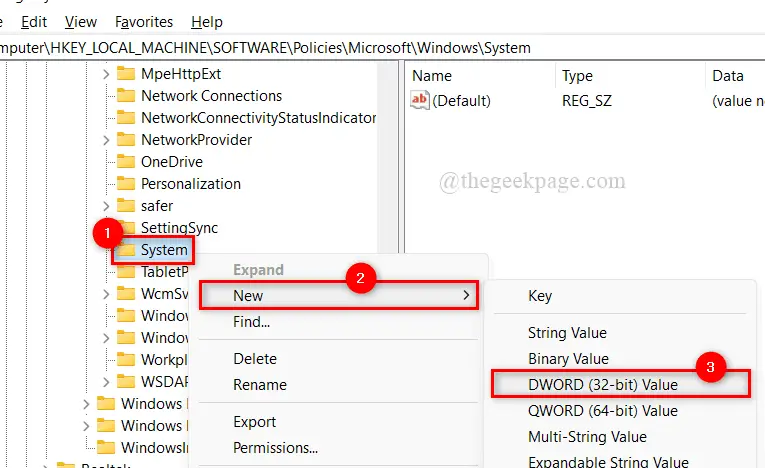
Step 6 – Rename it to Activar SmartScreen and double click on it to open it.
Step 7: To disable SmartScreen, enter 0 at value data field and click OK to make changes.
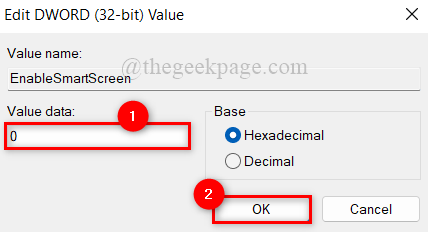
Step 8: Once done, close the registry editor window.
Step 9: Then reboot the system once and after it boots, check whether it is disabled or not.
That’s it, guys. I hope this post has been informative and helpful.
Please leave us your comments below. Thank you for reading!
Related posts:
 How to access Steam games without an internet connection
  How to view FPS with Xbox Game Bar in Windows 10: Steps Made Easy
  Hacked account? How to check and remedy
  How to make video calls from WhatsApp Web
  How to increase the RAM memory of a desktop or laptop + Tips and Tricks
  How to organize your YouTube subscriptions into categories
+ Tips and Tricks
How to organize your YouTube subscriptions into categories
+ Tips and Tricks


