


How to enable continuous playback in VLC Media Player
When VLC player closes while playing a video, most of the Windows users have complained that when they restart the video through VLC player, it starts playing from the beginning. Users will get irritated if they are watching a large file movie, and users will often forget where the video was playing after it ended.
We gathered this problem and found the solution, in which users need to enable or turn on the option to resume playback in the VLC media player preferences in the system.
COMMERCIAL
Don’t worry if you have the same problem. In this post, we will show you how to enable resume playback option in VLC media player in Windows 11.
How to enable continuous play in VLC Media Player on Windows 11, 10
Here are some steps explained below on how you can enable continuous play option in VLC media player.
Step 1: open the VLC media player in the system by pressing the Windows key and click VLC media player.
Step 2: Select VLC media player from the search results as shown below.
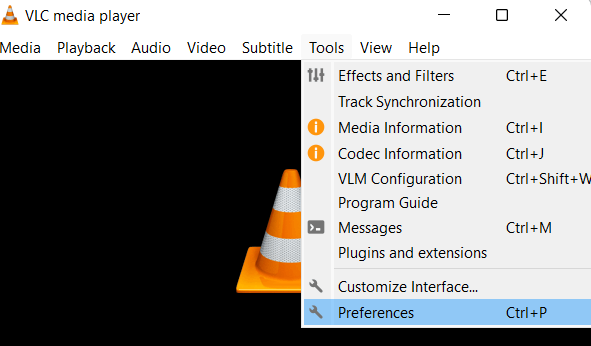
Step 3: Once the VLC media player opens, click on the Tool option from the top menu bar as shown.
Step 4: Select preferences of the list O press CTRL + P Keys to directly open the VLC player preferences window.
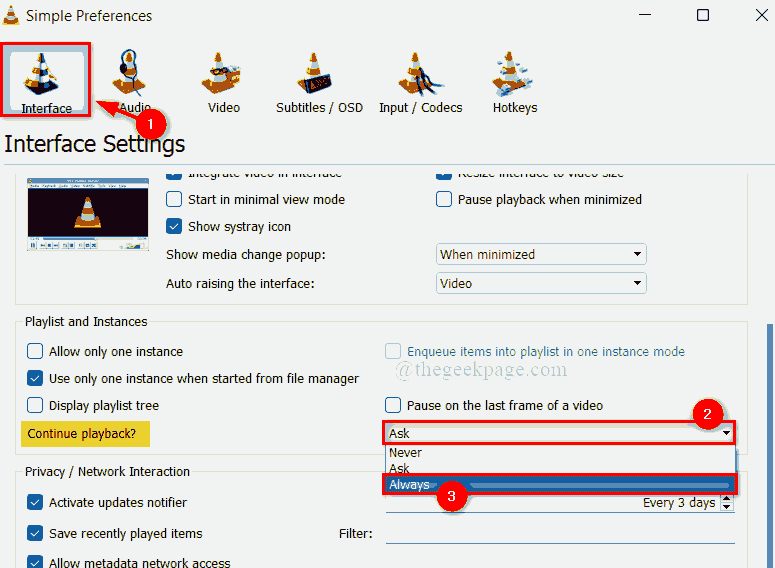
Step 5: In the Preferences window, make sure you have selected the Interface tab as shown below.
Step 6: Under the Playlist and instances section, click the dropdown list in the continue playback option as shown below.
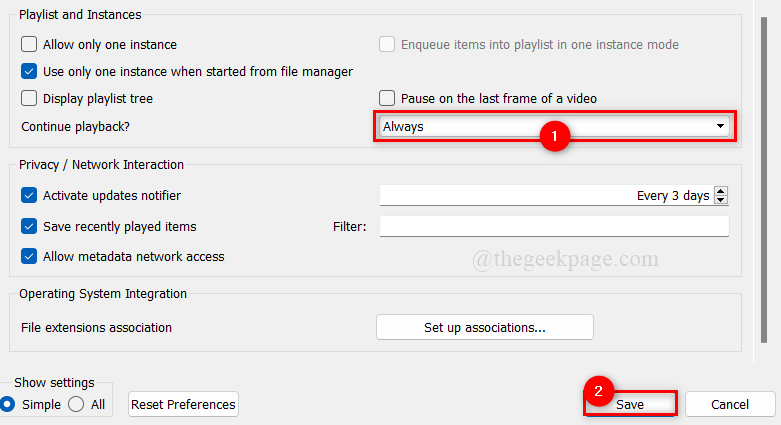
Step 7: Choose Always from the Continue Play drop-down list.
Step 8: After Choosing Always, Click on the To save at the bottom of the Preferences window as shown in the image below.
Step 9: Once done, close VLC media player.
That’s it. And you close the video on the means, medium from that, that Will now Follow for play.
I hope this article has been informative and helpful.
Let us know in the comments section below.
Thank you for reading!
Related posts:
 How to access Steam games without an internet connection
  How to view FPS with Xbox Game Bar in Windows 10: Steps Made Easy
  Hacked account? How to check and remedy
  How to make video calls from WhatsApp Web
  How to increase the RAM memory of a desktop or laptop + Tips and Tricks
  How to organize your YouTube subscriptions into categories
+ Tips and Tricks
How to organize your YouTube subscriptions into categories
+ Tips and Tricks


