


How to fix Gmail signature image not showing problem
Adding a signature in an email is quite common. Signatures can also have an image. Many users have reported that they cannot see the signature image in the email. In some cases the signature email is displayed as an attachment, in certain cases it is not seen at all. If you are facing this problem, read on. In this article, we have collected some fixes that can help you fix the Gmail signature image.
Solution 1: delete and re-add the image
1. Open your Gmail in the browser.
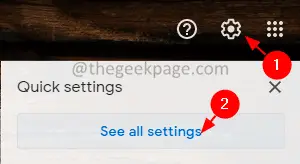
2. Click the Settings. (The gear-shaped icon in the upper right corner)
3. Click See all configurations button.
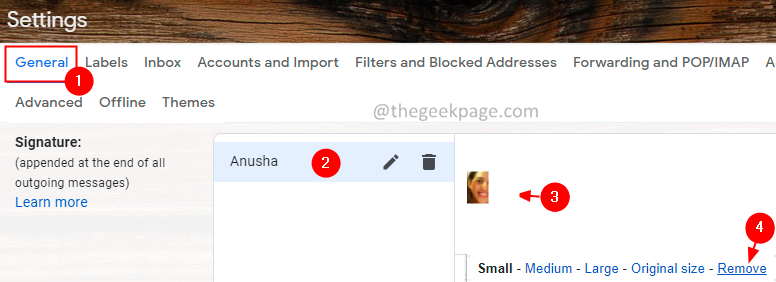
4. In the initial window, make sure you are in the General tab.
5. Scroll down to locate the Company section.
6. Click on the signature want to edit.
7. On the right side, Click on the image.
8. You can see a small banner with options appear. Click on Remove.
9. Now add the account again. To do so, follow steps 4-6 and open the Signature edit section.
10. Click the Insert image icon as shown below.
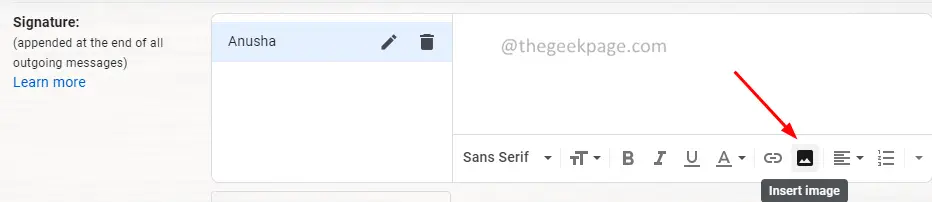
11. Find and select a required image.
12. Try sending a test email and see if this fixes the problem.
Solution 2: host the image online and use it in your signature
If the above solution didn’t help, try hosting the image on the web and use it in signing. You can use any hosting site. In this tutorial, we are using postimages.org
1. Open your web browser, visit postimages.org
2. Low Post your images here section, click Choose images button.
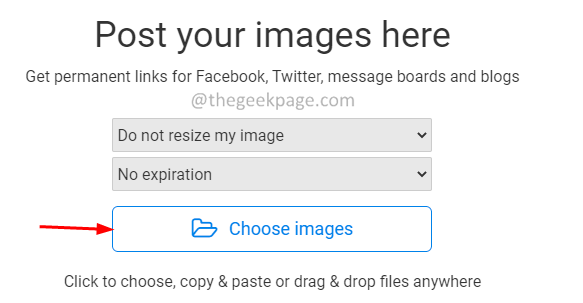
3. Browse your files on the PC and upload the image of your choice.
4. Once the image is uploaded, you will see the status as complete.
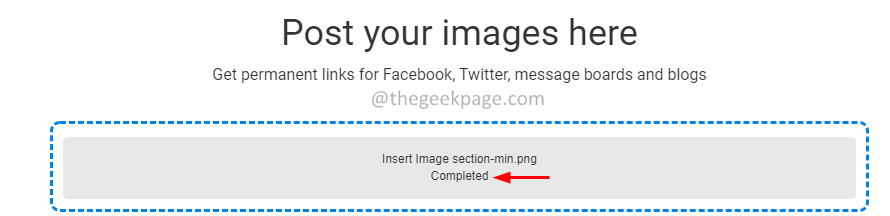
5. Now, you will see many links below, please choose Direct link and click copy paste button as shown below.

6. In the browser window, open another tab and open your Gmail.
7. Click the Settings. (The gear-shaped icon in the upper right corner)
8. Click See all settings.
4. In the initial window, make sure you are in the General tab.
5. Scroll down to locate the Company section.
6. Click on the signature want to edit.
7. Click the Insert image icon as shown below.
8. Click the Web address (url) tab.
9. Now, paste the link you copied from Step 5 below the Paste an image URL here
10. You will see the preview of the image.
11. Click the Please select button.

12. Now try sending a test email and check if the attachment looks good.
If none of these have helped, check to see if the configuration on the receiver end is causing the problem. The email service or program may be blocking the image.
That is all.
We hope this article has been informative.
Please comment and let us know the solution that helped you solve the problem and stay tuned to us for more tips and tricks.
Related posts:
 How to access Steam games without an internet connection
  How to view FPS with Xbox Game Bar in Windows 10: Steps Made Easy
  Hacked account? How to check and remedy
  How to make video calls from WhatsApp Web
  How to increase the RAM memory of a desktop or laptop + Tips and Tricks
  How to organize your YouTube subscriptions into categories
+ Tips and Tricks
How to organize your YouTube subscriptions into categories
+ Tips and Tricks


