


How to Fix Roblox 403 Forbidden Error in Google Chrome
Many Windows users have recently experienced an unusual error called Roblox 403 Forbidden Error while trying to access website URL in Google Chrome browser. They can’t do anything about it even after restarting the Chrome app several times.
There can be several potential reasons for this error and we have described and listed some of them below.
COMMERCIAL
- Chrome browsing history and other cache and data corrupted
- Unstable internet connection
- Incorrect website URL
- Extensions installed from third party sources
After considering all the aspects mentioned above, we have come up with some solutions that can help users to fix this problem. If you have the same problem, check out the solutions in this article.
The main reason for this problem is that sometimes the browsing data, cookies and other cache data in Google Chrome gets corrupted.
As a result, it is preferable to clear Chrome browsing data and other data by following the instructions below.
Step 1: Open Google Chrome pressing the button Windows key and click Google Chrome.
Step 2: Select Google Chrome from the search results as shown below.
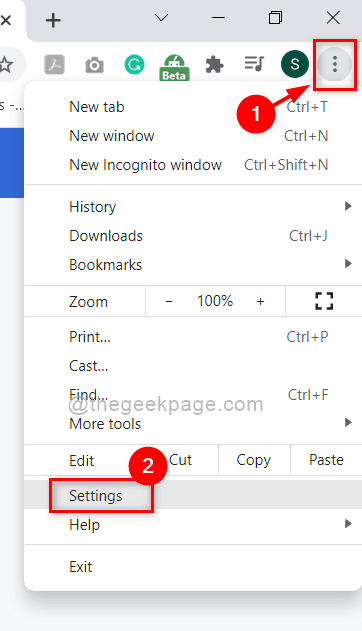
Step 3 – In the Google Chrome app, click three vertical dots (show more options) in the upper right corner as shown.
Step 4: Then select Settings of the list.
Step 5 – On the Settings page, click security and privacy in the left menu as shown below.

Step 6: Click Delete navigation data As shown below.

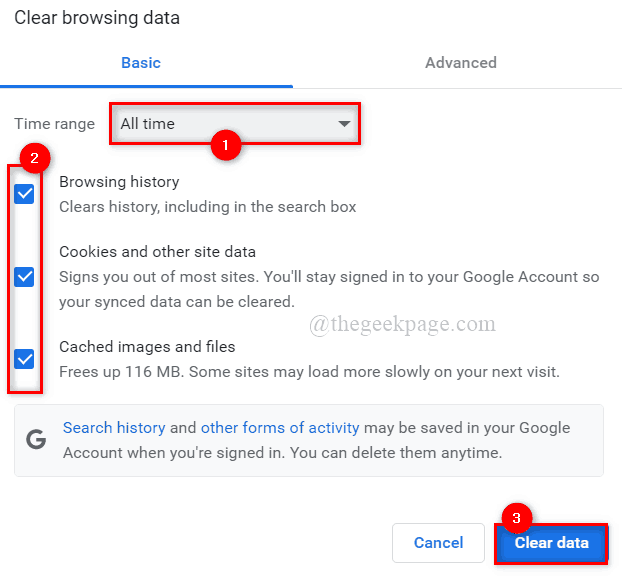
Step 7: Then select All the time What Time interval.
Step 8 – Check all three checkboxes (Browsing history, Cookies and other site data, and Cached images and files).
Step 9: Once done, click Delete data to delete Google Chrome browsing data as shown below.
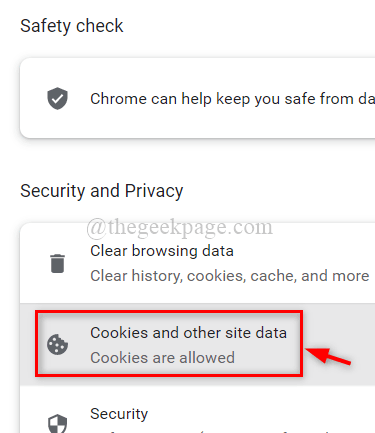
Step 9: After clearing the data, go back to the Security & Privacy page by clicking it on the left menu.
Step 10: Select Cookies and other site data option as shown below.
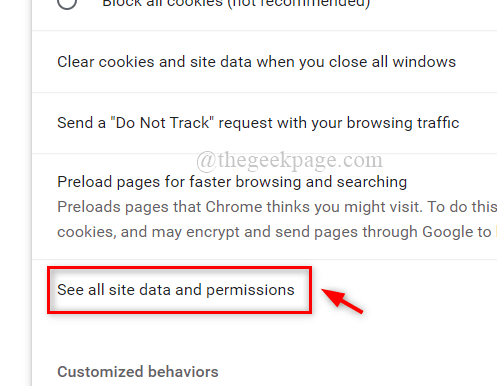
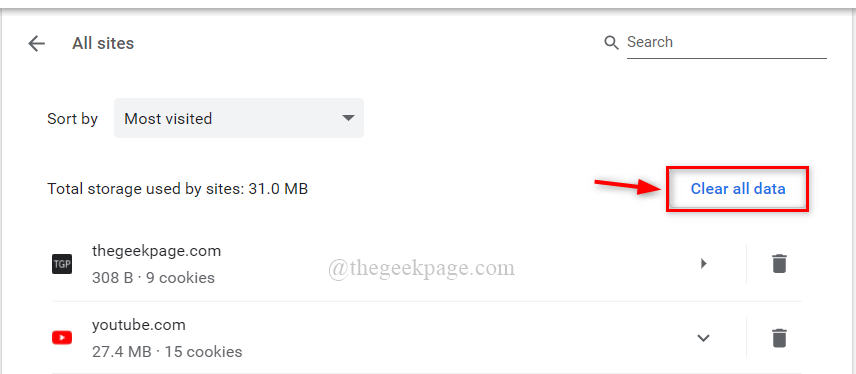
Step 11: Scroll down the page and click View all site data and permissions.
Step 12: Once done, click Clear all data option in the upper right corner as shown.
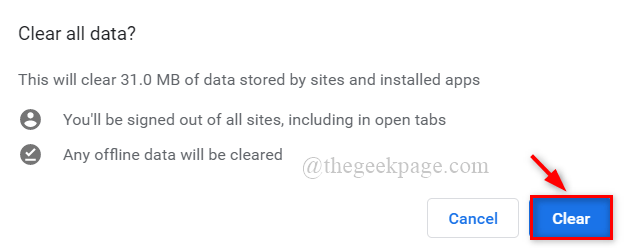
Step 13 – In the Erase All Data window, click Of course button to delete all cookies stored in google chrome.
Step 14 – Close the Settings page and restart the Google Chrome app once.
Now check if the problem persists.
Solution 2 – Change the DNS server address
DNS server addresses, like website URLs and web servers, are a mapping of the IP address to its corresponding domain name.
As a result, if the DNS server address is changed, the browser may display this error.
Therefore, we recommend changing the DNS server address on your PC over a network connection, which is described below in easy steps.
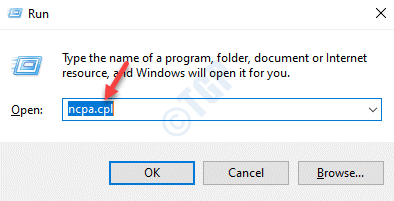
Step 1: Press Windows + R keys together on your keyboard to open Run command box
Step 2: Write ncpa.cpl in the Run box and press Get into key to open Network connections window.
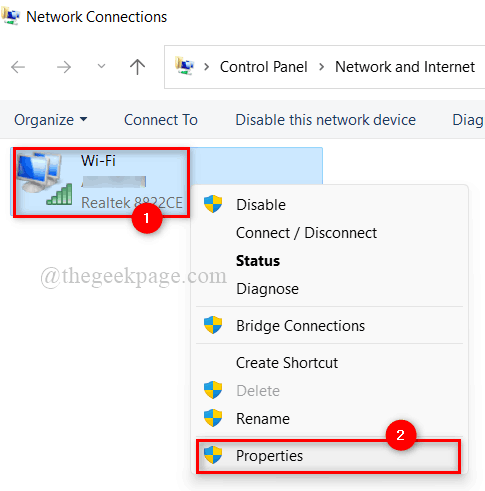
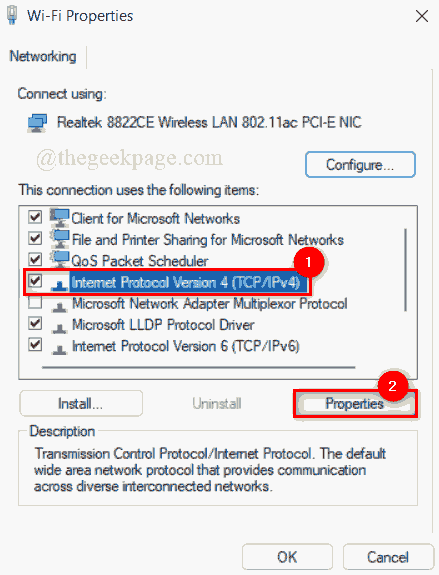
Step 3 – On the network connections page, right-click on the network connection that is in use, either Ethernet or Wi-Fi.
Step 4: Then select Properties from the context menu as shown in the following screenshot.
Step 5 – In the Network Properties window, select Internet Protocol version 4 (TCP/IPv4) clicking on it once.
Step 6: Then click Properties button below it.
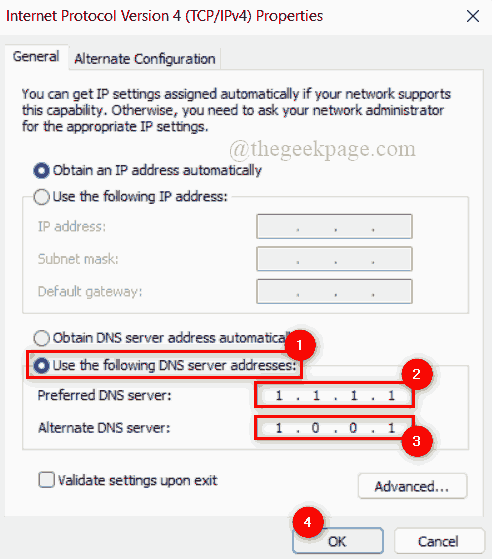
Step 7: This will open the Internet Protocol Version 4 Properties window.
Step 8: Click Use the following DNS server addresses radio button as shown below.
Step 9: Enter 1 1 1 1 at Preferred DNS Server and 1 0 0 1 at Alternate DNS Server as shown.
Step 10 – Close the TCP/IPv4 Properties window by clicking it’s fine.
Step 11: Then close all the windows and reboot the system once.
Step 12 – After the system boots, check if the issue still occurs.
I hope this fixes the problem.
Solution 3 – Disable extensions in Chrome
For increased browser speed, extensions is it so forever preferable. Despite improving the functionality of the Chrome browser, extensions can be harmful to the browser if they are downloaded and installed from untrustworthy third-party sources.
Therefore, we recommend our users to disable extensions on their Chrome browser with the simple steps below.
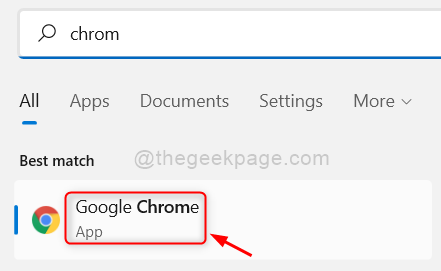
Step 1: Open Google Chrome pressing the button Windows key and click Google Chrome.
Step 2: Select Google Chrome from the search results as shown below.
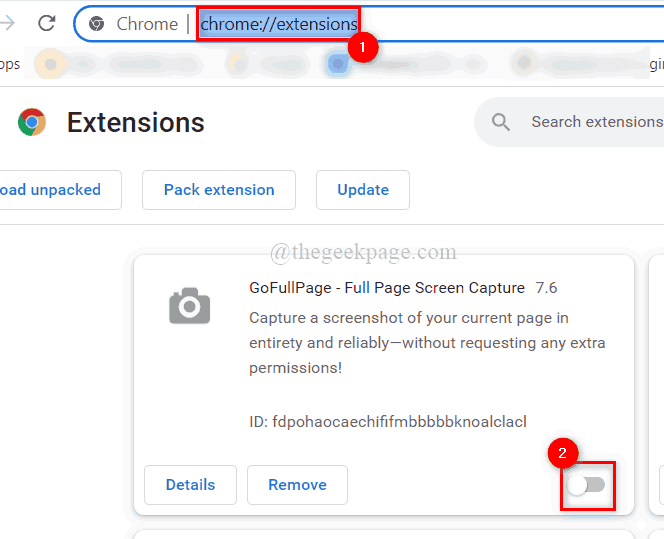
Step 3 – In a new tab, copy and paste the path given below and hit the button Get into wrench.
chrome://extensions/
Step 4 – On the Extensions page, click activation button of a extension (eg GoFullPage) to convert it Off as shown in the following screenshot.
Step 5: Repeat the same for all the other extensions that are installed on the Chrome browser.
Step 6: Once done, restart the Chrome browser and check if the problem appears or not.
I hope this has solved the problem.
That’s all guys.
I hope you found this article interesting and informative.
Let us know in the comments section below.
Thanks!
Related posts:
 How to access Steam games without an internet connection
  How to view FPS with Xbox Game Bar in Windows 10: Steps Made Easy
  Hacked account? How to check and remedy
  How to make video calls from WhatsApp Web
  How to increase the RAM memory of a desktop or laptop + Tips and Tricks
  How to organize your YouTube subscriptions into categories
+ Tips and Tricks
How to organize your YouTube subscriptions into categories
+ Tips and Tricks


