


The command prompt window opens and closes automatically in Windows 11
Does a command prompt window close as soon as it appears on your new Windows 11 machine? Some users have reported this issue on various forums that a command prompt terminal briefly flashes on the screen before instantly crashing when they are booting their systems. If you have such a problem on your computer, follow these resolutions to quickly identify and fix the problem.
Solution 1: modify the registry
If the malware is using your machine to mine cryptocurrencies, a terminal window will open and start the operation as soon as the machine starts.
1. At first, press the Tecla de Windows + R keys together.
2. Then write «regedit«In the terminal Run and press Pay in.
Warning – Before modifying the registry on your computer, you should create a backup copy of the registry on your system. Therefore, pay close attention to these instructions.
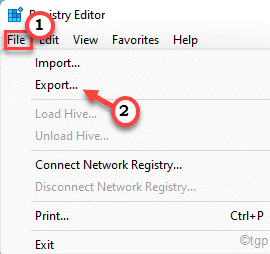
When Registry Editor opens, click «Proceedings“. Then click on «To export”To make a new backup on your computer.
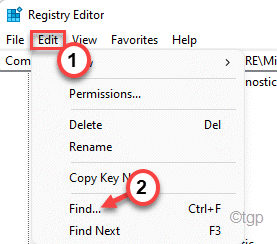
3. When Registry Editor opens, click «Edit“.
4. Then tap «Find…“.
5. Now type «SOUND MIXER” in the frame.
6. Then click on «Find next«To find the key
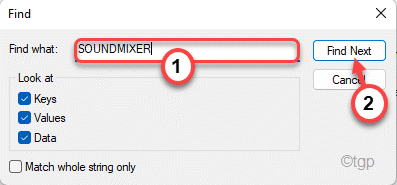
Now, Windows will find and locate the key in the Registry Editor. If you can’t find any key related to ‘SoundMixer’ then this is not the reason you are facing this problem. You can proceed to the next solution.
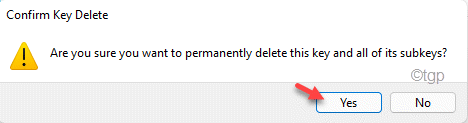
6. When you have found the affected key, right-click on the «Automatic execution“In the right panel.
7. Now, touch «Delete”To remove it from your computer.
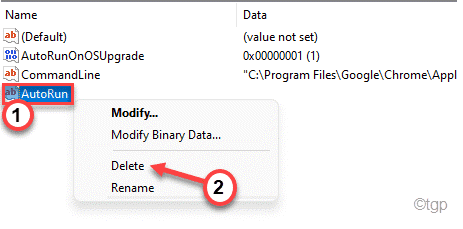
7. You will see a warning message. Just click «Yes”To confirm the deletion.
After doing this, close Registry Editor. Later, restart your computer.
Solution 2: add a new environmental variable
You need to add an additional environment variable as it may disappear after upgrading your system to Windows 11.
1. At first, press the Tecla de Windows + R keys together.
2. Then write «sysdm.cpl«And hit Pay in.
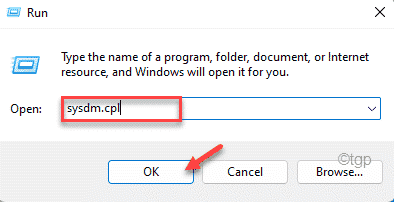
3. Now go to the «Advanced” tab.
4. Then tap on the «Environment Variables“.

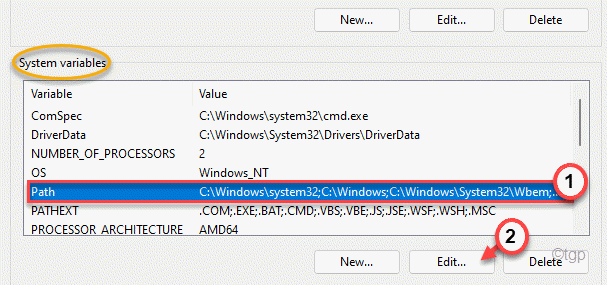
5. Then select the «Path”Parameter in the system variables.
6. Then tap on the «Edit…“.
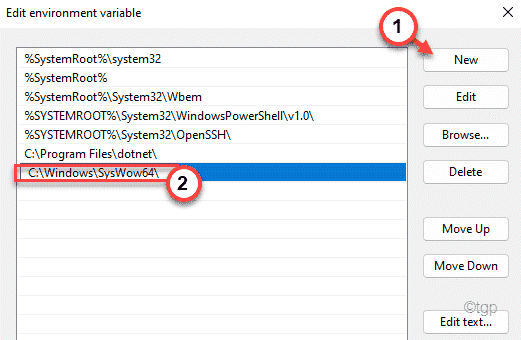
7. When the Edit Environment Variable window appears, tap «New“.
8. So, catch this address in the blank to complete the process.
C:WindowsSysWow64
9. Don’t forget to touch «OK”To save this change.
After that, close the Task Scheduler window and restart your computer.
Once the system boots, check if the same terminal keeps showing up or not.
Solution 3: disable the Office task
Whenever your computer starts up, the Office license is verified by autorun OfficeBackgroundTaskHandlerRegister task.
1. At first, press the Tecla de Windows + R keys together.
2. Then type this command and click on “OK“.
taskschd.msc

3. When Task Scheduler opens, go like this ~
Task Scheduler (Local) > Task Scheduler Library > Microsoft > Office
4. Now, in the right panel, you will find the «OfficeBackgroundTaskHandlerRegister“.
5. Then, right-click on the task and tap «Deactivate“.
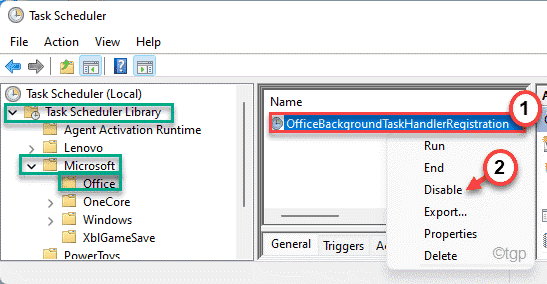
After disabling the task, close Task Scheduler and restart your computer.
Solution 4: run a deep scan
A malware or PUP can start automatically at startup to start working in the background. Use Windows Security to run a full scan to identify and remove any malware.
1. At first, press the Windows key and type «Windows security“.
2. Then tap on the «Windows security»To open it.

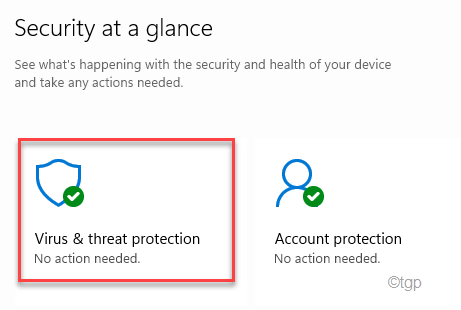
3. In Windows Security, tap «Protection against viruses and threats“.
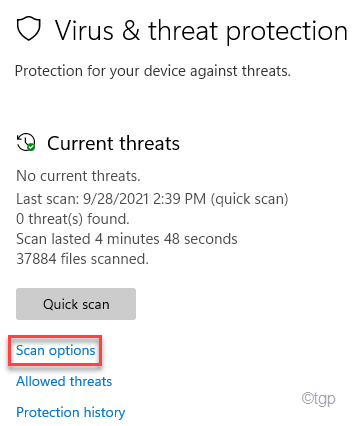
4. To view all scan options, tap «Scan options“.
5. Then select the «Complete analisis”Among all the available scanning options.
6. Finally, tap «Scan now”To start the full analysis.
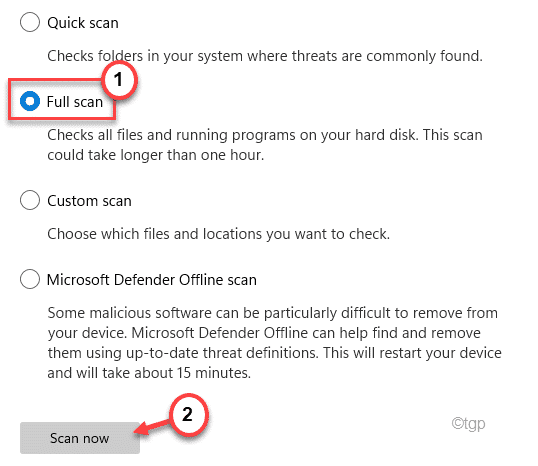
Keep this in mind that this process will take a long time depending on the number of applications / files you have on your system.
Windows will scan all files and remove any scripts or malware from your system. After running the scan, reboot the system once and check again.
Solution 5: run a DISM scan
You should run a DISM scan to check and repair system files if you have upgraded your computer from Windows 10 to Windows 11.
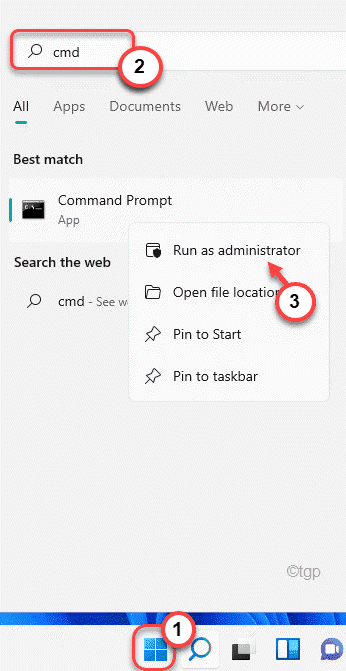
1. At first, press the Tecla de Windows + S keys together and type «cmd“.
2. Then, right-click on the «Symbol of the system“And click”Execute as an administrator”To access the terminal.
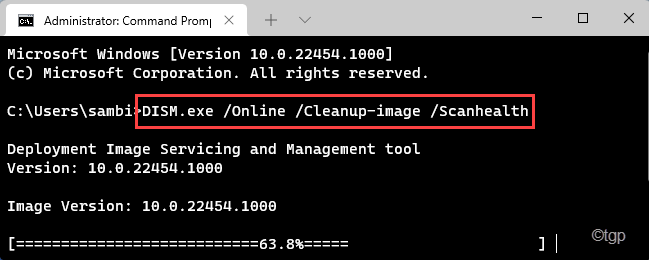
3. Once the command prompt opens, catch these commands one by one in the terminal.
Then hit Pay in to clean up existing image files.
DISM.exe /Online /Cleanup-image /Scanhealth
DISM.exe /Online /Cleanup-image /Restorehealth
DISM.exe /online /cleanup-image /startcomponentcleanup
Then close the terminal from command prompt and restart your computer.
When the system is starting up, check again.
Solution 6: use the process monitor
Download and use the Process Monitor to check which process is causing this problem.
1. You have to download Process Monitor.
2. Once you have done that, close your browser.

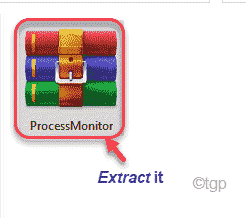
3. Once the zip file is downloaded, unzip the “Process monitor” proceedings.
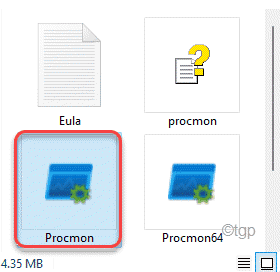
4. Now, double click about him “Procmon“To run it.
This will open the Process Monitor on your computer. Wait a moment for Process Monitor to load all current processes.
5. Now, touch «Filter”In the menu bar.
6. Then click on «Filter…”To filter the specified process.

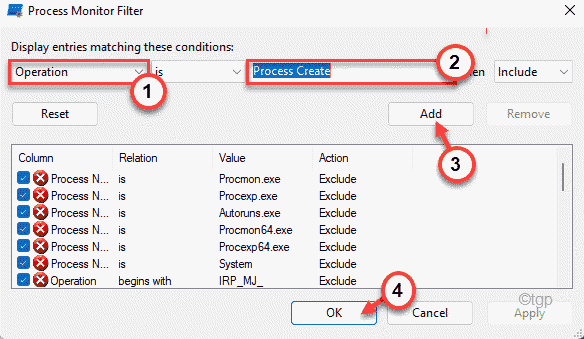
7. In the Process Monitor Filter window, set the first drop-down menu to «Operation“.
8. Next, set the following drop-down menu to «it is“. Then set it to «Create process” of the list.
9. Then click on «Add”To add the filter.
10. Finally, tap «OK”To complete the process.
11. Now, all you have to do is wait for the Process Monitor to scan and display the processes that match the criteria you set in the filter.
You can minimize this and work at the same time. After a while, go back to Process Monitor again and check if you can find the culprit with the path of the executable file.
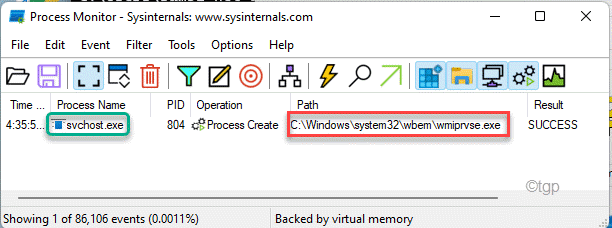
If you are not sure about the origin / content of this file, just drop it into VirusTotal and check if it is malware or virus.
Related posts:
 How to access Steam games without an internet connection
  How to view FPS with Xbox Game Bar in Windows 10: Steps Made Easy
  Hacked account? How to check and remedy
  How to make video calls from WhatsApp Web
  How to increase the RAM memory of a desktop or laptop + Tips and Tricks
  How to organize your YouTube subscriptions into categories
+ Tips and Tricks
How to organize your YouTube subscriptions into categories
+ Tips and Tricks


