


Wrong permissions in Windows search directories problem
Windows Search works quite well on Windows machines, but like other sections of Windows, it is not completely error free. If you are running the search troubleshooter in Windows, you may see this error message:
«Incorrect permissions in Windows search directories”On the diagnostic panel. As you can assume, this error is associated with improper permission from Windows search directories. Modifying the permission settings should solve this problem.
Solution 1 – Own the data folder
You must take ownership of the Data folder in the Windows search directory.
Paso 1 –
1. First, press the Tecla de Windows + R keys together.
2. Then type this address in terminal and press Get into.
C:ProgramDataMicrosoftSearch
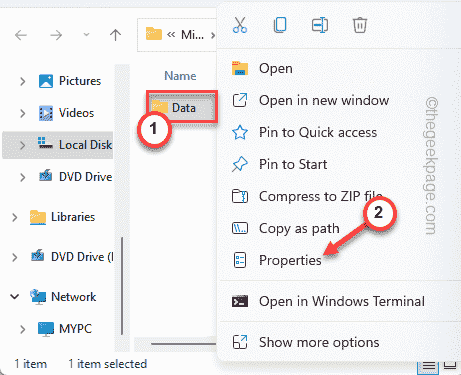
3. When the search folder opens, right-click on the «Data«Folder and tap»Properties (edit)“.
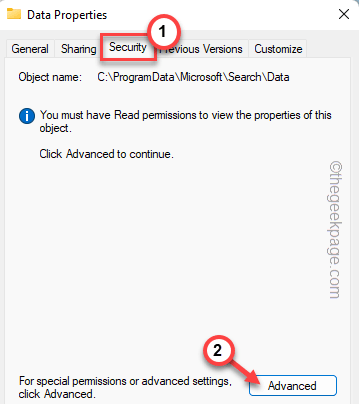
4. When Properties opens, go to the «Security»Settings.
5. After that, tap «Advanced“To continue.
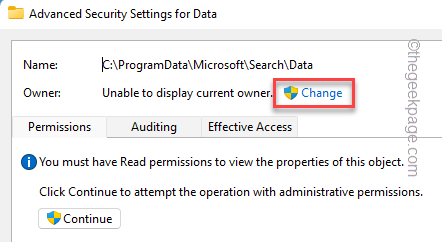
6. In the next window, click on «Change” at ‘Owner‘option.
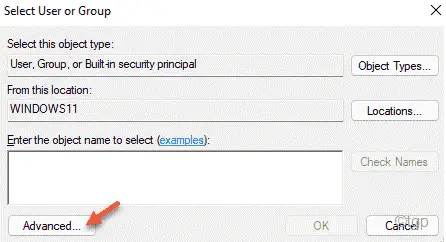
7. Now, tap on the «Advanced“.
8. In the next step, tap «Find now”To see the full list of user groups.
9. Now scroll down and select your account name from the list.
10. After that, click on «OK”To select it.
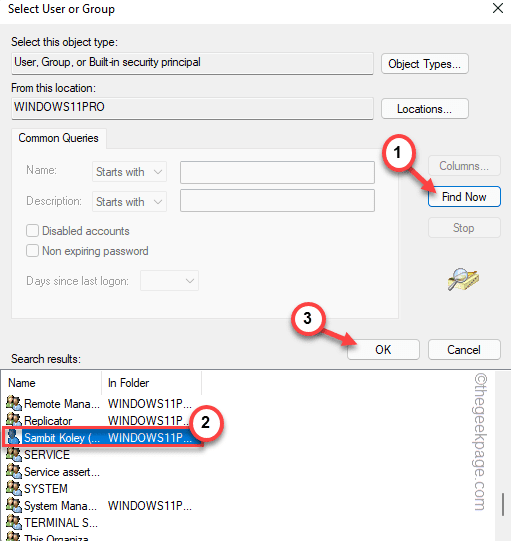
11. To save these settings, tap «OK“.
Now your account has taken ownership of this folder.
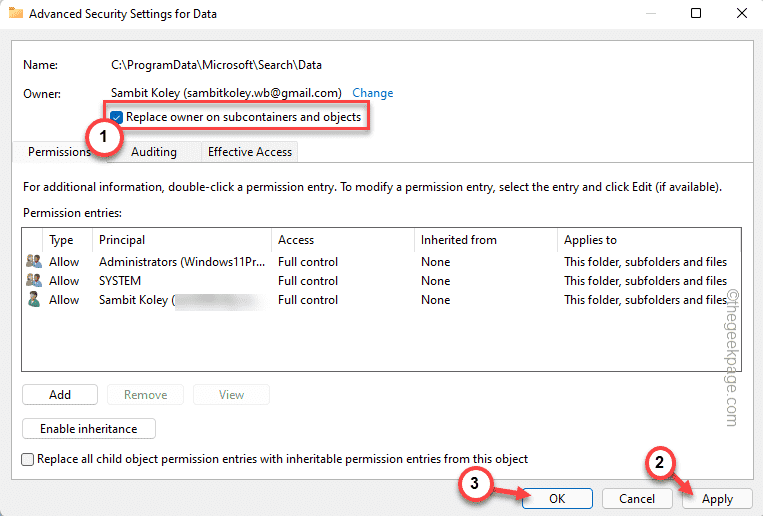
12. Now, signal mark the “Replace owner on subcontainers and objects»Option.
13. Finally, tap «Request” Y “OK”To save these changes.
Paso 2 –
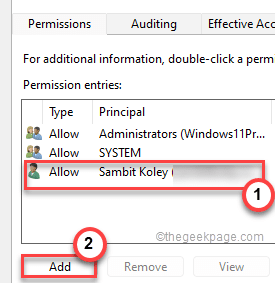
1. Returning to the Properties window, again, tap on the «Advanced»Option.
2. On the Permissions tab, tap «Add“.

3. Now, touch «Select a director“.
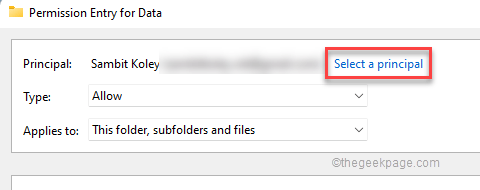
3. Then click on «Advanced»Option.
4. Again, use the «Find now”To view the list of user groups.
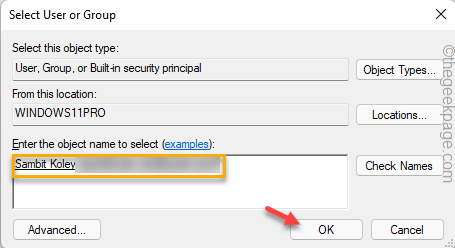
5. Next, choose the name of the account you have chosen before (in our case, it is «Koley said“.)
6. After that, click on «OK”To select it.
7. Finally, click on «OK“To continue.
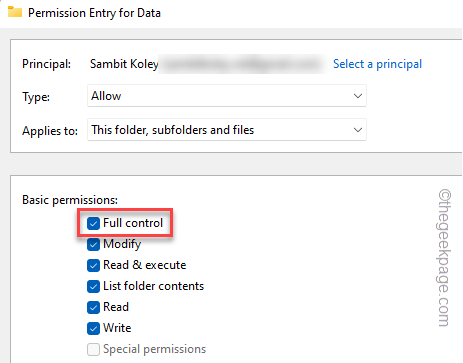
8. Next, check the box «Total control‘.
9. Finally, click on «Request” Y “OK”To save the settings.
10. Now is the time to click the button «Enable inheritance” button.
11. So, cheque the “Replace all child object permission entries with inheritable permission entries from this object»Option.
12. Finally, tap «OK”To save these settings.
Now, close all windows and reboot your system.
Once you restart it, Windows will rebuild the search index. You will not face this problem again.
Solution 2: run a SFC, DISM scan
Running an SFC scan, DISM has solved this problem for many users.
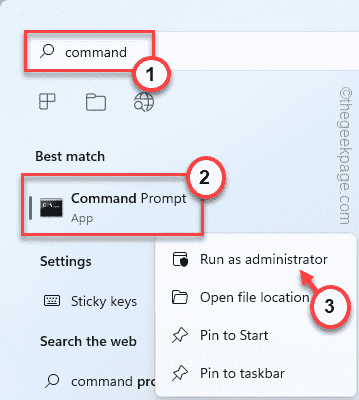
1. At first, press the Windows key and type «cmd“.
2. Then, right-click on the «Symbol of the system“And then touch”Execute as an administrator“.
3. Now, just type this code in the terminal and hit Enter to start an SFC scan.
sfc /scannow

Let Windows scan for system file corruption and fix it in the process.
4. Once the SFC scan is complete, catch this command and hit Get into to run a DISM scan.
DISM /Online /Cleanup-Image /RestoreHealth
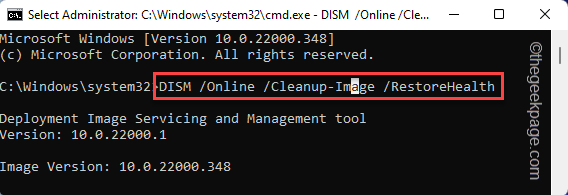
Let this DISM scan complete. Then restart your system. See if the ‘Wrong Permissions in Windows Search Directories’ keep showing up or not.
Fix 3 – Reset Cortana
Resetting Cortana can offer a useful solution.
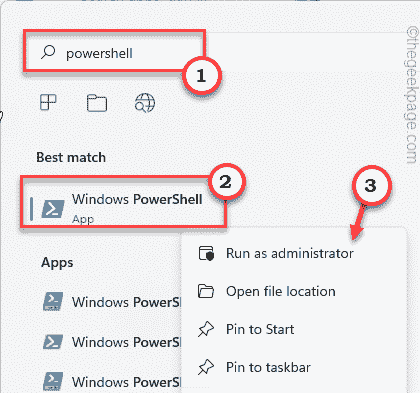
1. First, press the Tecla de Windows + S keys together and type «potencia Shell“.
2. Then, right-click on the «Windows PowerShell«And touch the»Execute as an administrator“.
3. When PowerShell opens with administrative rights, copy get this command and hit Get into.
Get-AppXPackage -Name Microsoft.Windows.Cortana |
Foreach {Add-AppxPackage -DisableDevelopmentMode -Register
"$($_.InstallLocation)AppXManifest.xml"}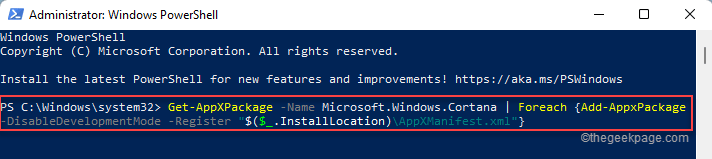
After passing this reset of this command, close the PowerShell window. Later, restart your system.
After system startup, run the Search and Indexing troubleshooter and check if you keep seeing the same error message.
Solution 4: create and use a new account
You must create a new user account and use it to fix the problem.
1. First, press the Tecla de Windows + R keys together.
2. Then, writes this code and click «OK“.
ms-settings:otherusers

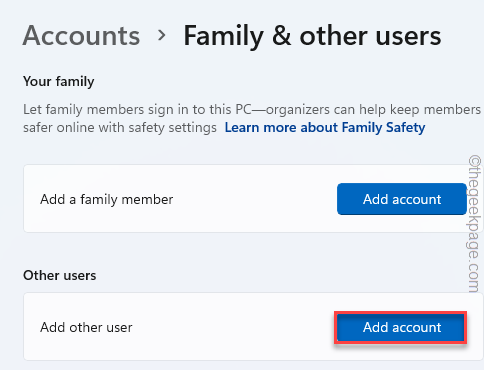
3. When the Settings window appears, on the right side, tap «Add Account”In the ‘Other users’ section.
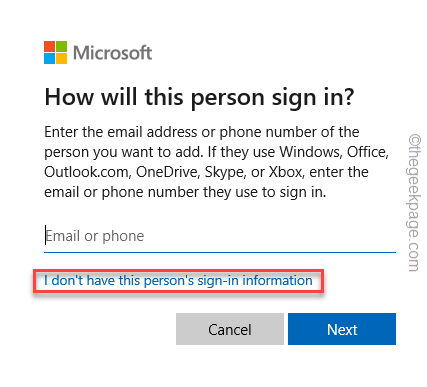
4. After that, tap on the «I do not have the login information for this person“.
5. Now click on «Add a user without a Microsoft account“.

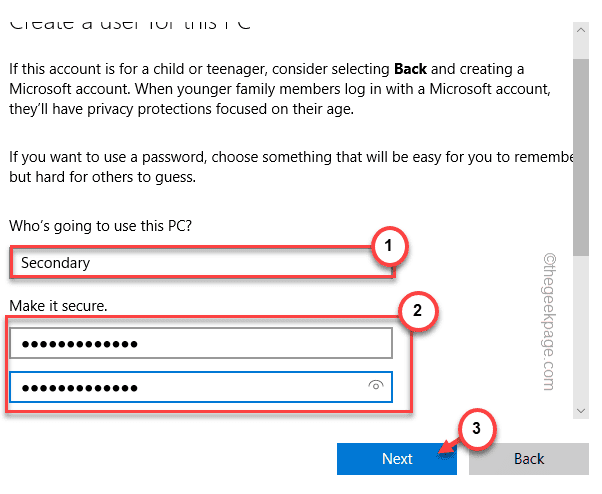
6. So, to write Make a note of a username that you want to use.
7. After that, fill in the password and security questions as you prefer.
8. Finally, touch «next“To continue.
9. After doing this, press the Ctrl + Alt + Delete all three keys together.
10. Then tap «disconnect“.
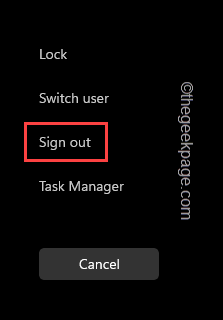
11. You will return to the lock screen.
12. Now, in the lower left corner, choose the new account.
13. Enter the account password and press Get into.
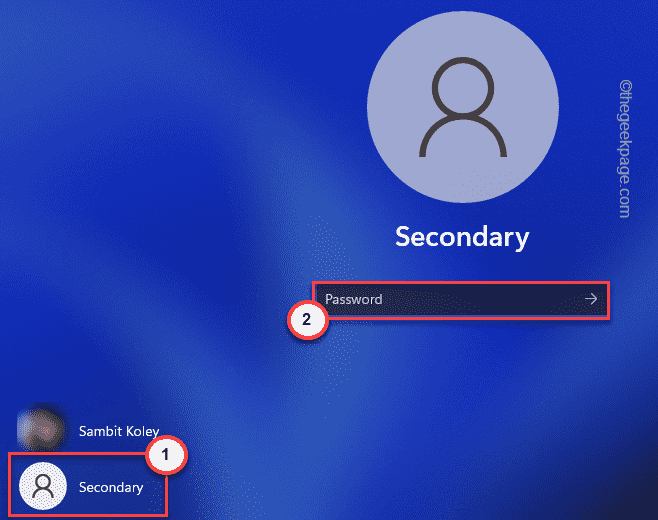
Once you’ve logged into your system with the new account, run the search and indexing troubleshooter one more time.
This time, your problem will be solved.
Solution 5: automate the Windows search service
You need to check whether the Windows search service is running or not.
1. First, press the Tecla de Windows + R keys together.
2. Then write this line and press Get into.
services.msc
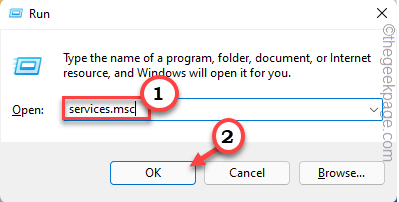
This will open the services.
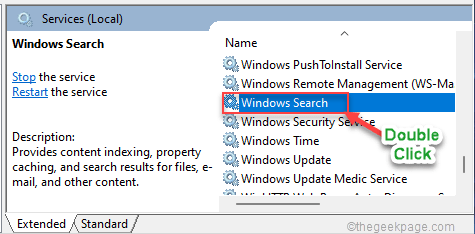
3. When the Services window appears, look for the «Windows Search” Service.
4. So, just double click on it to access it.
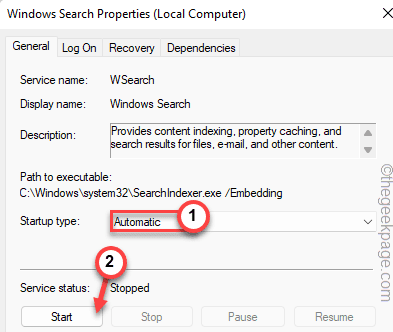
5. At first, set the “Startup type:” to “Automatic“.
6. Later, tap «Start”To start the service, if it is not already running.
7. Finally, tap «Request” Y “OK”To save the changes.
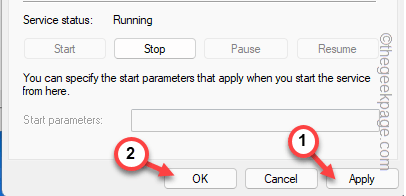
Then close the Services. Now, try running the troubleshooter again. It will solve all search related problems.
Related posts:
 How to access Steam games without an internet connection
  How to view FPS with Xbox Game Bar in Windows 10: Steps Made Easy
  Hacked account? How to check and remedy
  How to make video calls from WhatsApp Web
  How to increase the RAM memory of a desktop or laptop + Tips and Tricks
  How to organize your YouTube subscriptions into categories
+ Tips and Tricks
How to organize your YouTube subscriptions into categories
+ Tips and Tricks


