


Error code 0xc0000034 when starting Windows 11 and 10
When starting your computer, if you have entered the blue screen of death with just the Error code 0xc0000034, you cannot start Windows unless you fix the problem yourself. Starting from misconfigured boot preferences, there can be many reasons behind this error. Just follow the instructions mentioned in this article thoroughly and you will get your Windows 11/10 back very quickly.
NOTE –
COMMERCIAL
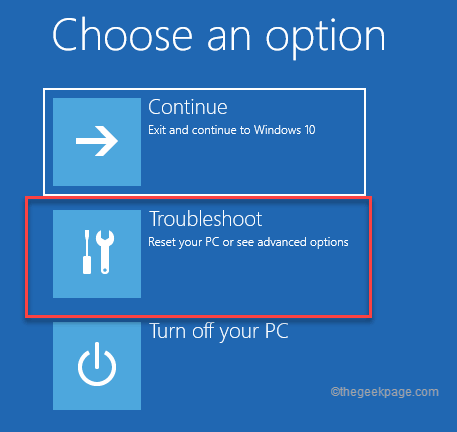
Since you can’t log in to Windows, you need to access the Windows Recovery Environment. Here are the steps to boot your system into recovery mode:
1. First of all, turn off your device completely.
2. Now, press the power button to start your system.
3. While the system boots, wait until you see the manufacturer’s logo on your screen. Alone press and hold the power button again to force shut down your system.
4. Then just repeat this action 1-2 more times and for the third time let your computer boot normally.
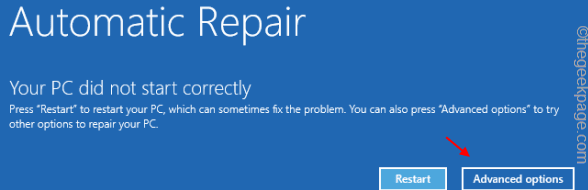
Your system will automatically go into self-repair mode.
Solution 1 – Run a startup repair
1. At first, follow the steps to start Windows recovery mode.
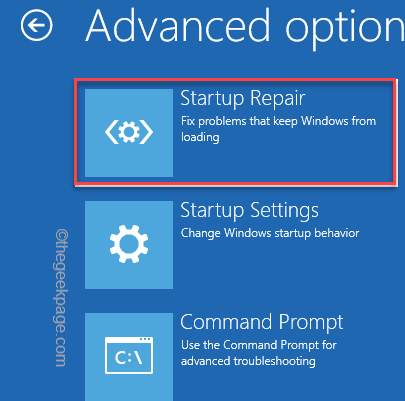
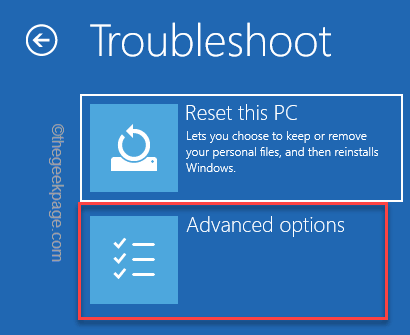
2. Once the Automatic Repair screen appears, click «Advanced Options“.
3. Then touch the button “Solve problems” option to open it.
4. After that, you need to click on the button “Advanced Options“.
COMMERCIAL
5. Click the button “initial repair” to access it.
Windows will automatically start your system in Startup Repair mode and check what is wrong. It will try to fix the problem and finally start Windows.
Check if this works or not.
Solution 2 – Fix MBR and Rebuild BCD
One of the key reasons behind this problem is the corrupt Master Boot Record (MBR). Follow these instructions carefully –
1. Once again force boot the system into Windows recovery mode.
2. Once the Automatic Repair screen appears, tap on the “Advanced Options“.
3. To fix the problem, tap «Solve problems“.
4. Then click “Advanced Options” to access advanced settings.
COMMERCIAL
7. Here, simply click on the button “Symbol of the system“.
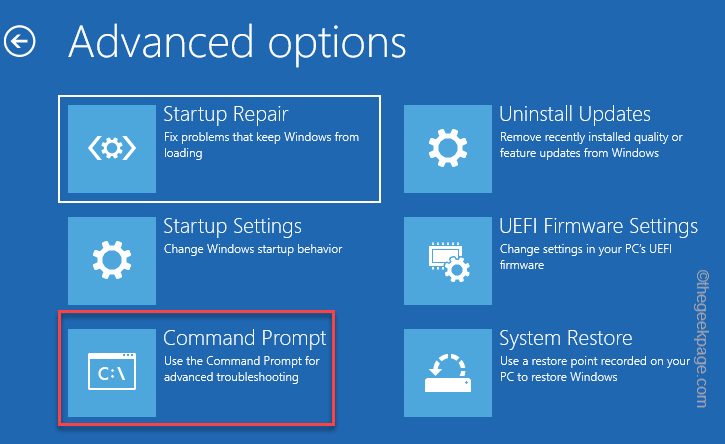
8. Next, tap on your administrative account.

9. Also, touch «Continue” to finally access the terminal.
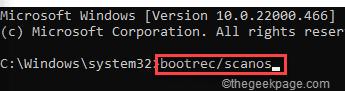
10. When the command prompt appears, copy take these commands and press Get into to fix the master boot record.
bootrec /fixMBR
bootrec/fixBoot
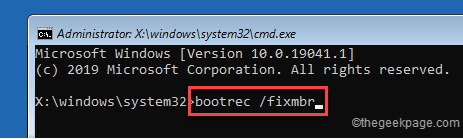
11. After that, run these codes to rebuild the boot configuration directory.
bootrec/scanos
bootrec /rebuildBCD
COMMERCIAL
This process may take some time to complete.
After that, close the command prompt terminal.
12. You should be back to the home page. Just touch «Continue” to proceed.
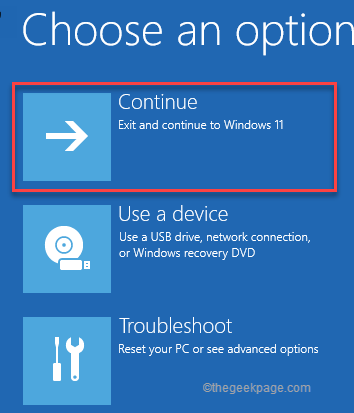
This way, the problem should be fixed.
Solution 3 – Update your PC
Refreshing PC resets your system files but leaves your important data intact.
1. At first, boot your system into recovery mode.
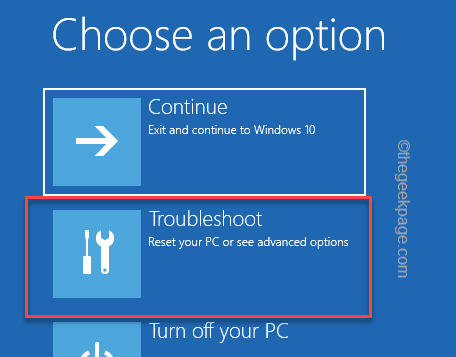
2. When you get to the Automatic Repair screen, tap «Advanced Options“.
3. Again, click the button “Solve problems” section.
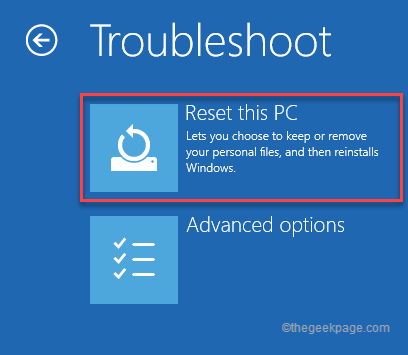
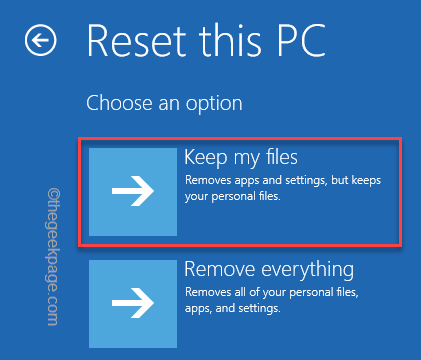
4. In the Troubleshoot window, tap «Reset this PC” to access it.
COMMERCIAL
5. Here, you will notice two different options.
6. Simply click on “save my files“. This will remove some apps and settings, but leave important personal files behind.
In this way, Windows will reboot the system. Windows will reset to default settings. You will not see error code 0xc0000034 again.
Solution 5 – Try system restore
System Restore is the last resort when other methods fail to resolve this issue.
NOTE –
System Restore, as the name suggests, restores the system to a specific date. In this way, you may lose some recently installed apps on your system.
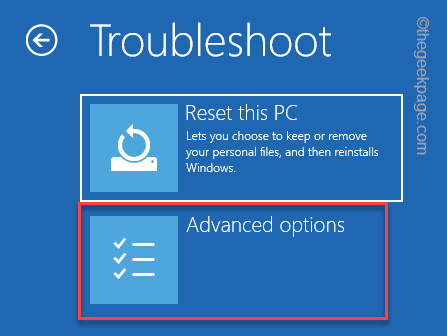
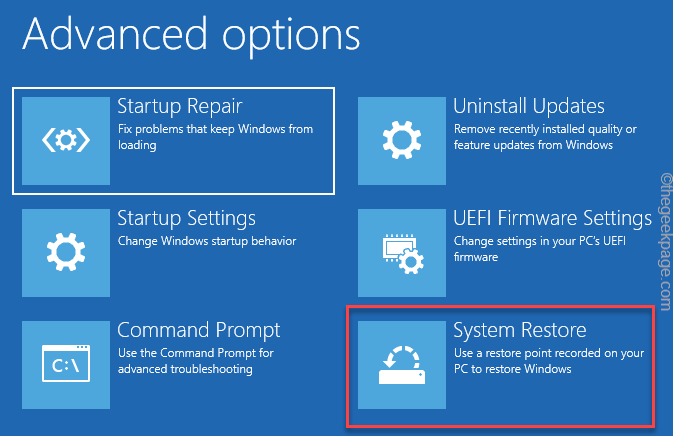
1. Reboot your system in Automatic Repair mode and then tap «Advanced Options“.
2. Now, follow this path –
Troubleshoot > Advanced options
COMMERCIAL
3. In the Advanced Options window, tap the “system restore» option.
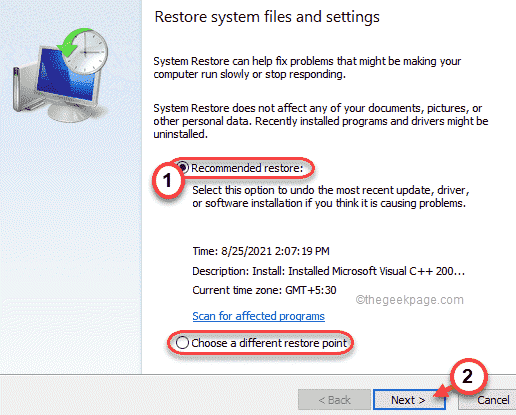
4. When the System Restore window appears, click «Recommended restoration:» option.
5. There is another option you can choose “Choose a different restore point“.
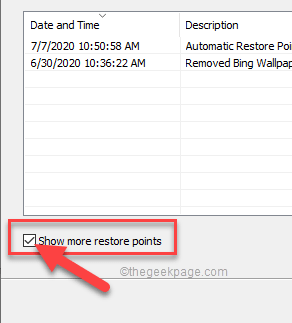
6. After that, control the “Show more restore pointoption ” on the left side.
In this way, you will see more restore points on your screen.
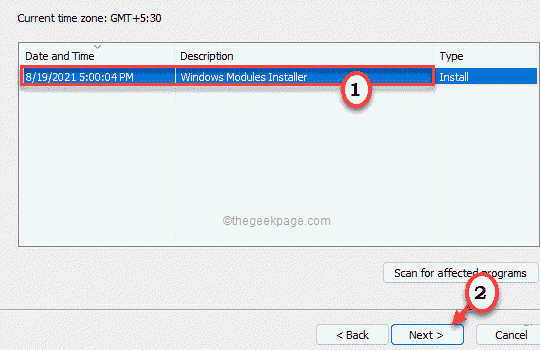
7. Now carefully select a restore point from which your computer was working fine.
8. After that, click «Next” to proceed.
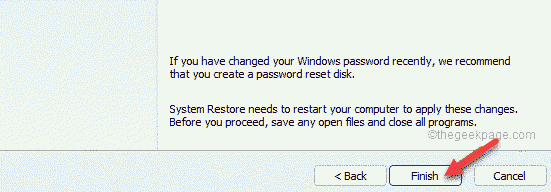
9. Finally, tap on “Finalize” to start the system restore process.
COMMERCIAL
You will get your system restored to the state where the error was not occurring at all.
Related posts:
 How to access Steam games without an internet connection
  How to view FPS with Xbox Game Bar in Windows 10: Steps Made Easy
  Hacked account? How to check and remedy
  How to make video calls from WhatsApp Web
  How to increase the RAM memory of a desktop or laptop + Tips and Tricks
  How to organize your YouTube subscriptions into categories
+ Tips and Tricks
How to organize your YouTube subscriptions into categories
+ Tips and Tricks


