


Fix: CMD window appears and disappears in Windows 11/10
Command Prompt terminal is one of the most important and relevant utilities of Windows operating system even in Windows 11. There are some advanced commands, scripting processes that require Command Prompt terminal. But some users recently noticed a rare event on their systems, where the terminal appears and disappears multiple times. This can be a very serious case of a self-executing malware file or a minor case of failure.
alternative solutions –
If the terminal opens and disappears only once and twice, it is not a cause for concern. It can be part of a background script executed by any native process. Just reboot the system and check again. If the same phenomenon repeats, follow these solutions.
alternative solution –
You can set the command prompt to stay open at all times. This will solve the problem by bypassing the main issue.
a. At first, press the button Tecla de Windows+R keys together.
B. Then write “cmd /k ipconfig /todos” and hit Get into.
This can be a good alternative as the command prompt will not appear and disappear again. If this doesn’t fix the problem, look for the top solutions.
Solution 1 – Check Task Scheduler
There may be some tasks set to run automatically on your system.
NOTE –
Windows Update and some other background processes can use autorun scripts from the background thread. But, they should appear only from time to time.
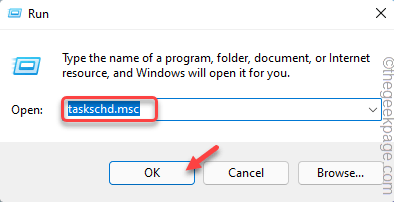
1. At first, press the button Tecla de Windows+R keys together.
2. Then type “taskchd.msc” and click “OK“.
3. When Task Scheduler opens, you will see several header files on the right side. Check if you can find any third-party apps on the list.
4. If you can find such a folder, touch it.
5. Now in the middle pane you will see the associated tasks along with their «Last run time“.
[Example – In our case, Mozilla has a task named “Firefox Default Browser Agent 308046B0AF4A39CB“. ]
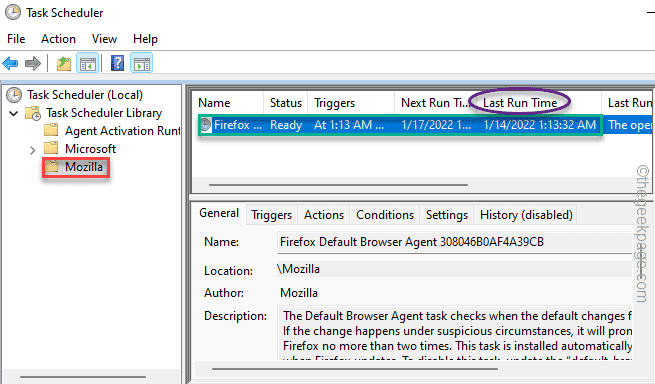
Now, if you see this task running automatically at the time you noticed the problem with the terminal, then you can safely disable it from your system.
6. Simply right-click on the task in the middle panel and click «Deactivate” to disable it.
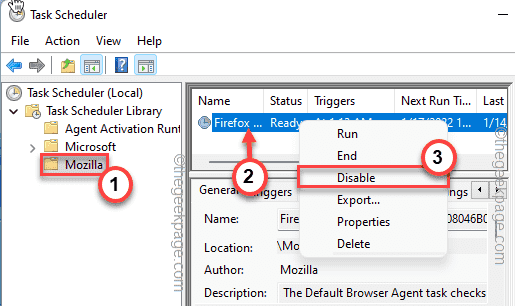
In this way, you can continue your search for other third-party applications from the left panel and identify and disable any tasks that may be causing the problem.
Restart the system once you are done, and check again.
Solution 2 – Check Task Manager
If there are any third-party apps that are set to start automatically, you need to disable them.
1. At first, press the button Tecla de Windows+X keys together.
2. Then touch the button “Task Manager” to access it.

3. When Task Manager opens, go to «Start up” section.
4. Here you will find the list of applications that start automatically. Simply, right-click on any unwanted app and tap «Deactivate“.

This way, make sure you have disabled all the apps you don’t want. After that, just close Task Manager and restart your system. Check if this stops the sudden problem or not.
Solution 3 – Disable any suspicious services
Disable any suspicious services, reboot and check.
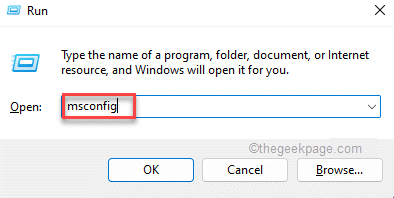
1. At first, press the button Tecla de Windows+R keys together.
2. Then type “msconfig” and hit Get into.
3. When System Configuration opens, go to «Services” tab.
4. Then, cheque the “Hide all Microsoft services” cash register.

5. After that, Mark off the boxes next to the suspicious services in the list.
6. Then tap on “Request” Y “OK” to save the changes.
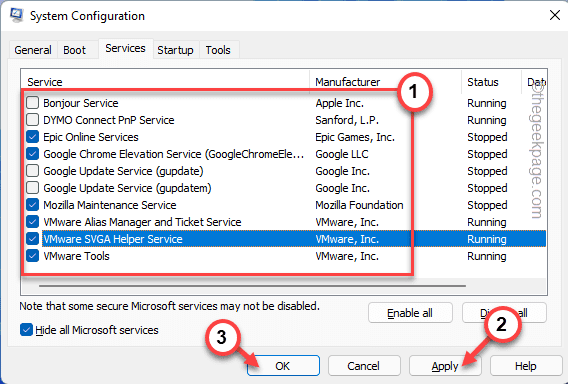
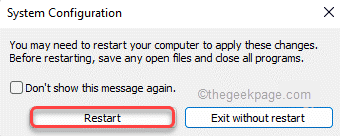
7. Now, you will see a message to restart the system. Tap on “Restart” to reboot and enact these changes.
This will exclude the suspicious service and restart machine. Check if you are facing the problem again or not.
If the error goes away, one of these services is to blame. You can further narrow your search by repeating the following steps:
1. Open System Settings, again.
2. On the Services page, enable a suspicious service.
3. Tap on “Request” Y “OK» To restart.
Check if this time you are facing a problem.
Repeat the steps again until the error reappears. Once it does, that’s the service causing the problem. So, you can act according to your situation.
Solution 4 – Disable the Office subscription task
Some users have reported that the Office subscription task is the culprit. Although it is not harmful, you can easily disable it.
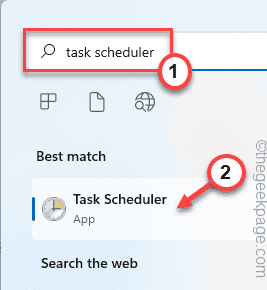
1. At first, type «task scheduler” in the search box.
2. Then touch the button “task scheduler” to access it.
3. Once it opens, proceed as follows:
Task Scheduler Library > Microsoft > Office
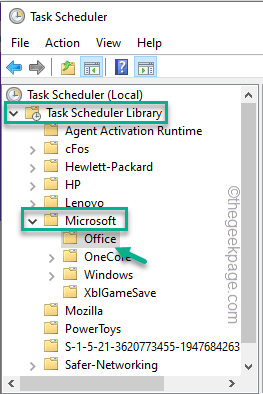
4. Then right click “Office subscription maintenance” task and tap on “Deactivate“.

Also, you can disable the OfficeBackgroundTaskHandler task on the same page.
Once you’re done, close Task Scheduler. You have to restart your device once. Now try if this works for you.
Solution 5 – Run a full scan
There may be malware that is automatically running the script. You can use the default Windows security to run a full scan of your entire system.
1. At first, press the Windows key and type «windows security“.
2. Then tap on “windows security” to open Windows Security.

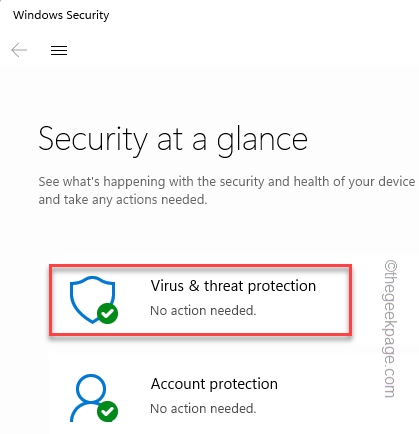
3. Under Windows Security, tap on “Protection against viruses and threats” in the section to the right.
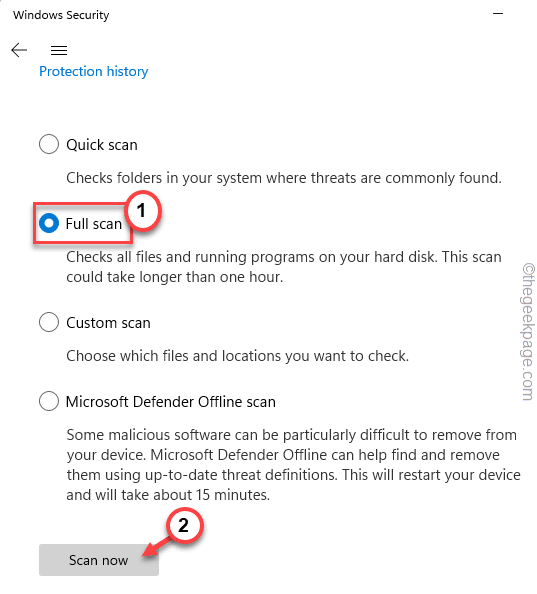
4. Now, click on the button “scan options“.

5. Then select the “Complete analisis” option and tap on “scan now” to run the scanning process on your system.
Windows will start a full system scan to identify the malware/trojan automatically running the script behind the screen.
Depending on how many files you have, this process may take some time. You can let it run in the background. It will automatically quarantine potentially threatening subjects during the scan.
Try if this works for you.
Solution 6 – Update the existing .NET Framework
If you have noticed that the terminal that appears has the title “Installutil.Exe“, then there may be a pending .NET Framework update on your system.
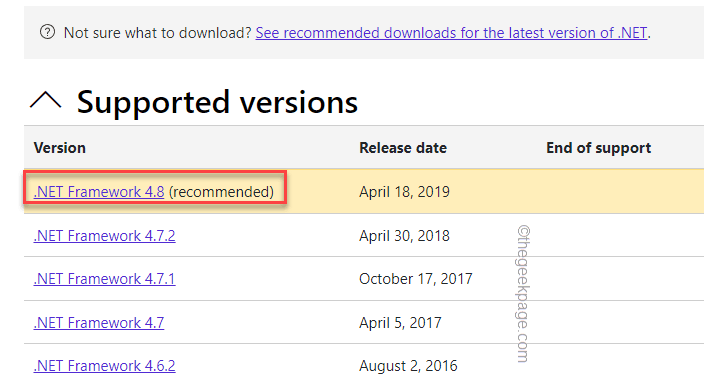
1. At first, go to the official .NET Framework Download section.
2. Here, tap on the “.NET Framework 4.8” (or what the latest version is based on the ‘Release Date’ tab).
3. You will be given two options. In the ‘Runtime’ section, tap «Download the .NET Framework 4.8 runtime“.
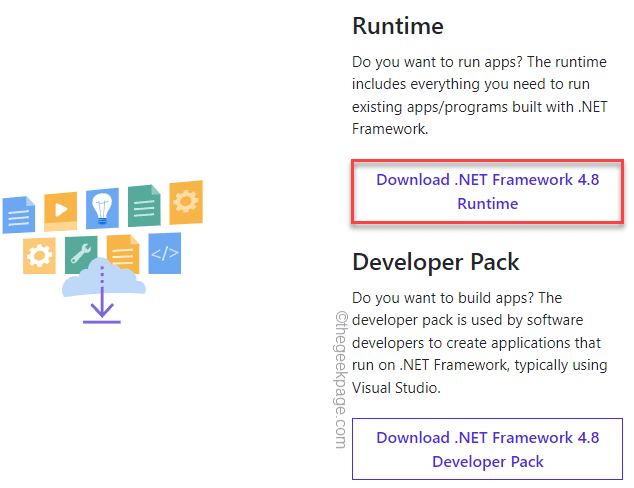
Now, it will download the .NET Framework Runtime installer to your system. Once you are done, close the browser window.
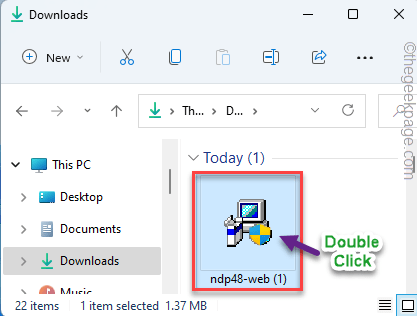
4. Then go to the downloaded installation file.
5. After that, double click in the installer to install the latest version of the .NET Framework on your system.
When prompted, simply restart the system once. This should prevent the terminal from appearing and disappearing on your screen.
Your problem should be solved.
Related posts:
 How to access Steam games without an internet connection
  How to view FPS with Xbox Game Bar in Windows 10: Steps Made Easy
  Hacked account? How to check and remedy
  How to make video calls from WhatsApp Web
  How to increase the RAM memory of a desktop or laptop + Tips and Tricks
  How to organize your YouTube subscriptions into categories
+ Tips and Tricks
How to organize your YouTube subscriptions into categories
+ Tips and Tricks


