


In Windows 10, you can enable the Hardware accelerated GPU scheduling option to improve computer performance
But if we are wondering what it actually does, what hardware-accelerated GPU planning means, and if it can actually improve performance or if it can cause problems, let’s understand something more.
GPU Planning dates back to the introduction of the first ones Windows Display Driver Model (WDDM) allowing applications to be able to send their work to the GPU without queuing up, but with a smarter system done they assign varying priorities depending on the type of program used. In other words, very simple, to leave games and graphics applications the priority in the use of the video card. The only problem was a certain delay in the interaction between GPU and CPU, which still remains the central component of data processing (and I don’t go further because you really get into the technical, as well as my skills).
However, with the Windows 10 May 2020 update, a new GPU scheduler was introduced that is disabled by default, but can be activated by the user which allows, with the right hardware and drivers, to be able to download most of the programming graphics on a dedicated GPU-based scheduler.
If you want to understand more (I understand that it is not clear), you can read the explanatory article on the Microsoft developer blog.
According to some tests, with this option activated in a high-end computer and with a powerful video card, one can achieve gain between 1-2 frames per second when running a game, which is not much, but, if not there are contraindications, it can be fine.
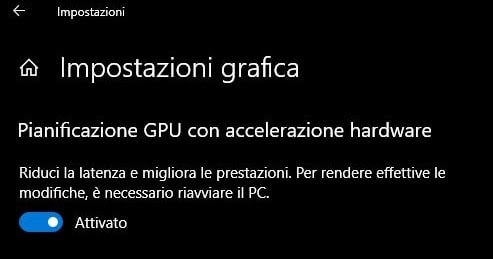
Be that as it may, if you want to try to enable hardware accelerated GPU scheduling, just open the Windows 10 settings, then go to System> Display and on the right side press the link Graphics settings. Please note that this option appears only if you are using a computer with compatible hardware and, more precisely, with a recent video card from NVIDIA.
If you do not see the option and you still have an Nvidia Ge Force video card, download the latest driver for the GPU from the Nvidia website or by using the updater already installed.
Personally, after activating it, I have not noticed great improvements but, fortunately, neither problems or worsening. This is probably an activation that benefits the most during video games on high-performance computers, which does not have much effect in daily work.
Given the novelty so interesting even if mysterious, let me know your impressions if you try this option on your PC.
READ ALSO: How to improve Windows PC performance
Related posts:
 How to access Steam games without an internet connection
  How to view FPS with Xbox Game Bar in Windows 10: Steps Made Easy
  Hacked account? How to check and remedy
  How to make video calls from WhatsApp Web
  How to increase the RAM memory of a desktop or laptop + Tips and Tricks
  How to organize your YouTube subscriptions into categories
+ Tips and Tricks
How to organize your YouTube subscriptions into categories
+ Tips and Tricks


