


How to change the DHCP lease time in Windows 11/10
Have you thought about why your big downloads, which take a bit longer, get interrupted and you have to save them to download once again? Well! DHCP lease time is the culprit here. DHCP is a dynamic protocol established by the router server which is configured to renew the DHCP lease time after certain intervals. Every device that is connected to the Wi-Fi router gets a dynamic IP address and this is necessary to connect to the Internet. But after a certain time set in the router settings, the IP address of your device changes or renews. This is the cause of Internet connection fluctuation leading to interruption of downloads. In this post, we will show you how you can check lease time details and renew and change it using router configuration settings on your Windows 11 system.
Check the details of the DHCP lease time using the command prompt
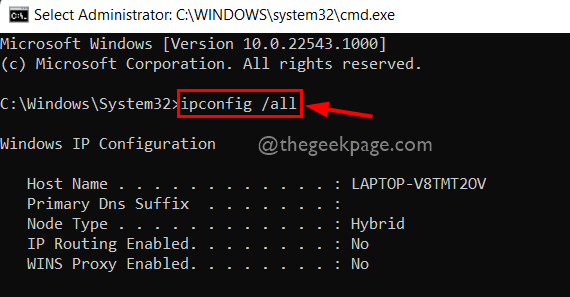
Step 1: Press Windows + R keys on your keyboard to open Run dialog box.
Step 2: Then type cmd in the run box and press CTRL + SHIFT + ENTER keys on your keyboard to open Symbol of the system What management.
Step 3: Accept the UAC prompt by clicking Yes continue.
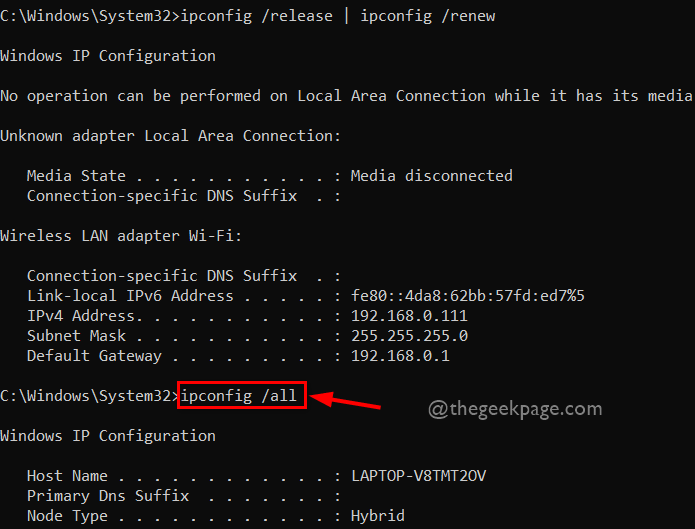
Step 4: Write ipconfig / all at the command prompt and press the button Get into to see all the network adapter configuration details as shown below.
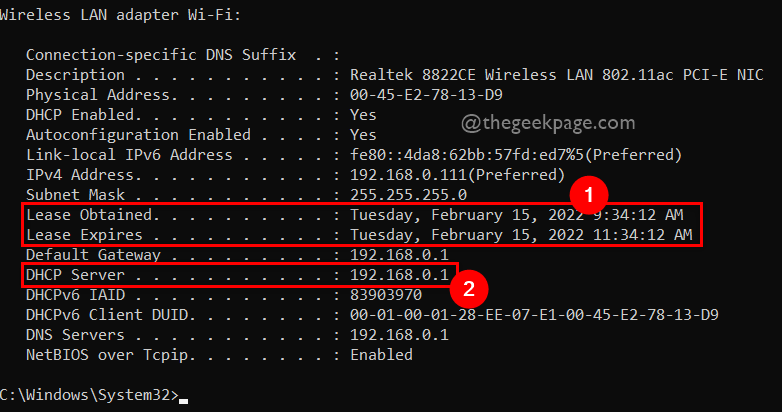
Step 5 – Scroll down the Command Prompt output and see Wi-Fi Wireless LAN Adapterdetails as shown below.
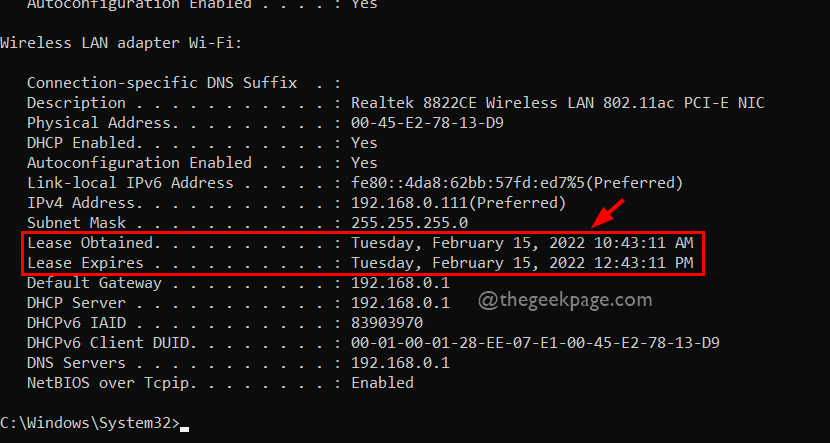
Step 6: Here Contract obtained it is the moment when the router sets the new IP address on the device.
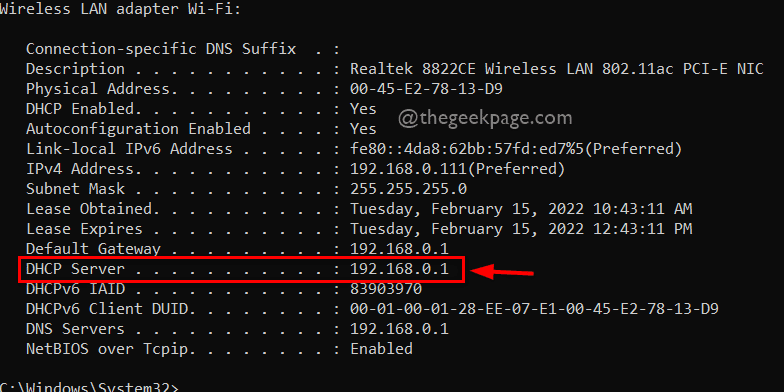
Paso 7: The lease expires it is the moment when the device releases its IP address. As well, servidor DHCP is the IP address of the router that is used to log in as an administrator to change its settings.
That’s it.
How to renew the DHCP lease time
Sometimes the user will not have any details or is not authorized to change the configuration settings of the router. Therefore, renewing the DHCP lease time can be useful before starting any downloads because most of the time, the router’s lease time is set to 2 hours (120 minutes). Here are some simple steps on how to do it.
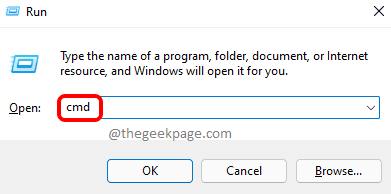
Step 1: Press Windows + R keys on your keyboard to open Run dialog box.
Step 2: Then type cmd in the run box and press CTRL + SHIFT + ENTER keys on your keyboard to open Symbol of the system What management.
Step 3: Accept the UAC prompt by clicking Yes continue.
Step 4 – Type the following given command and hit the button Get into to run it as shown below.
ipconfig /release | ipconfig /renew
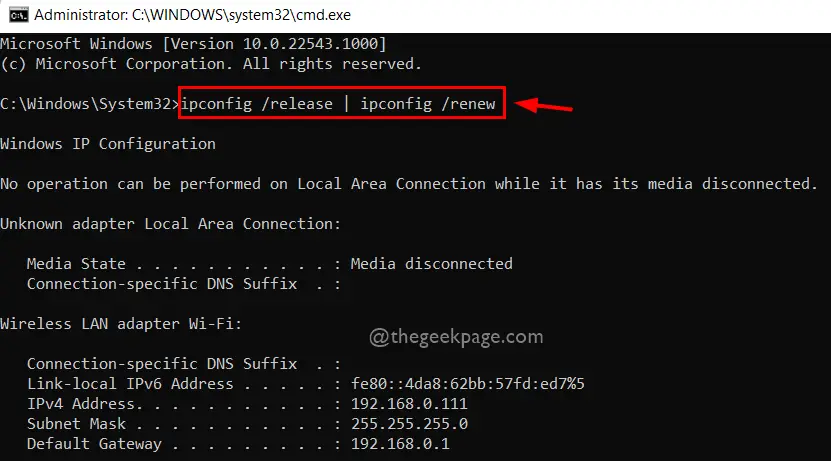
Step 5 – After renewing the DHCP lease time, run ipconfig / all command to view the DHCP lease time details on your system as shown below.
Step 6: In the screenshot below, you can see the obtained lease time is renewed and the lease expires.
Step 7 – Now you can close the command prompt.
That’s it.
How to change the DHCP lease time
NOTE : Changing DHCP lease time using router credentials requires your router administrator credentials. Read on if you have a username and password for your wi-fi router administrator.
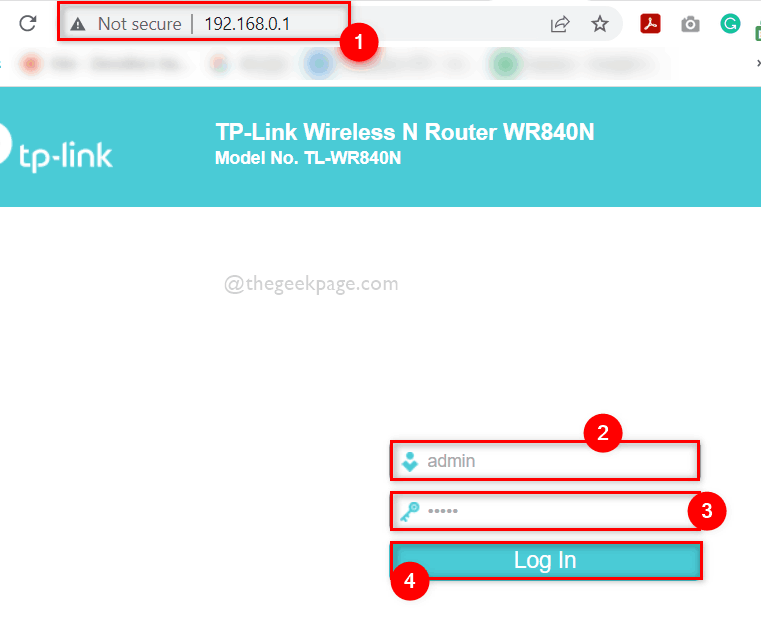
Step 1 – Open a new tab in your browser.
Step 2: Copy and paste the IP address (192.168.0.1) and press the Get into to get to the home page of the router.
NOTE: 192.168.0.1 which is mostly common for most router. If you want to know or confirm the IP address of your router, please follow some steps given below.
- Opened Command Prompt as Administrator pressing Earn + R for launch Run box and type cmd and press CTRL + SHIFT + ENTER keys.
- Then Run ipconfig / all at the command prompt and see the servidor DHCP details what the IP address of your router is.
Step 3 – After you get to the home page of the router in the new tab, enter the Username and Password of the router to log in by clicking Log in button as shown in the image below.
Step 4: After signing in, go to DHCP in the left side panel of the router settings.
Step 5: Then make sure DHCP configuration choose the option just below DHCP as shown below.
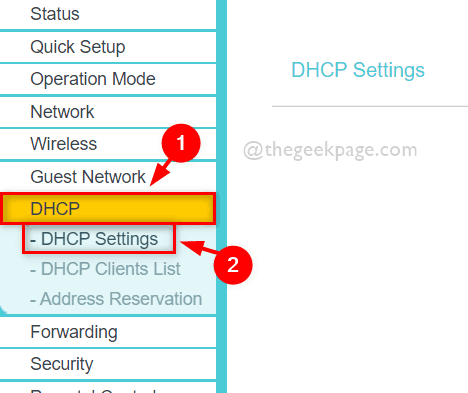
Step 6 – On the right side of the page, you will see the DHCP configuration page.
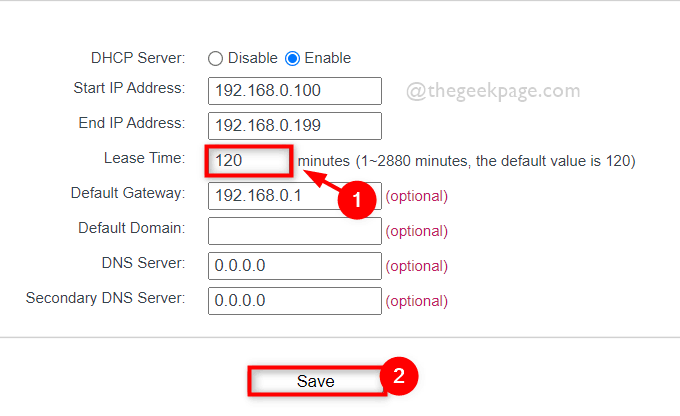
Step 7 – Find the Lease Time field and update it to the length of time in minutes.
NOTE: The default value is set to 120 minutes, i.e. 2 hours.
Step 8: Once done, you need to click on Save to change your router’s lease time settings, as shown in the following screenshot.
Step 9: Close the router page tab if you want.
This is how you can change the DHCP lease time for your wi-fi router on your Windows 11 system.
That’s all guys. I hope you found this post informative and useful.
Let us know in the comments section below which one you found useful.
Thanks!
Related posts:
 How to access Steam games without an internet connection
  How to view FPS with Xbox Game Bar in Windows 10: Steps Made Easy
  Hacked account? How to check and remedy
  How to make video calls from WhatsApp Web
  How to increase the RAM memory of a desktop or laptop + Tips and Tricks
  How to organize your YouTube subscriptions into categories
+ Tips and Tricks
How to organize your YouTube subscriptions into categories
+ Tips and Tricks


