


Raw mode is not available courtesy of Hyper-V error in Windows 11/10
A large number of users have reported seeing the error message. “Raw mode is not available courtesy of Hyper-V. (VERR_SUPDRV_NO_RAW_MODE_HYPER_V_ROOT) “ when trying to start a virtual machine on your Windows PC. Some have encountered this error even when Hyper-V technology is turned off on their systems.
Read this article to learn about the troubleshooting strategies adopted by users facing this problem.
Solution 1: Turn off Hyper-V
1. Using Windows y R key combination open To run dialogue.
2. Type Optionalfeatures.exe to open Windows features.
3. In the Windows features window, scroll down and find Hyper-V on the list.
4. Mark off the box associated with Hyper-V if it is checked.
5. Click OK to confirm the changes.

6. Restart the system and check if the error has been fixed.
Solution 2: disable hypervisor verification
Sometimes this error is seen even when Hyper-V is turned off. One situation that may be the cause is when the service HyperVisorLaunchType is established in Automatic. Disabling this service has helped users correct this error.
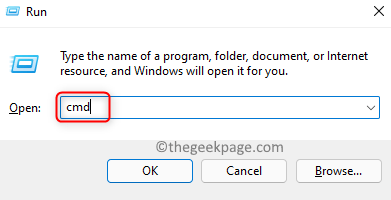
1. Open To run using Windows y R key combinations.
2. Type cmd and use the keys Shift, Ctrl and Enter simultaneously to open the command prompt with administrator privileges.
3. Click Yes when requested UAC.
4. To check the status of the hypervisor, type the command below and press Enter.
bcdedit
5. In the results displayed, look for hypervisorlaunchtype and check the status.

6. If the status of this service is Off, then go to Solve 3 after skipping the steps below.
7. If the status of this service is set to Auto, use the following command to change the state of the service to Off.
bcdedit /set hypervisorlaunchtype off8. Once the command is run, to close the command prompt and restart your computer.

9. Open the virtual machine and check if the problem is resolved after startup.
Solution 3: disable device protection in group policy editor
1. Press Windows + R to open the To run dialogue.
2. Type gpedit.msc to open Local Group Policy Editor. Click on Yes if you see a UAC righ now.

3. In the Local Group Policy Editor, go to the location mentioned below on the left panel.
Local Computer Policy --> Computer Configuration --> Administrative Templates
4. Select System folder inside Administrative Templates.
5. Click Device guard within System.
6. On the right side, open the settings Enable virtualization-based security by Double click in that.

7. In the configuration window that appears below, select the option Disabled.

8. Click Request and then in OK to confirm the configuration changes.
9. Now open Run (Window + R), writes cmd, and use the Ctrl, Shift and Enter keys to open Command prompt as administrator.
10. Enter the following set of commands one after the other to remove the EFI variables.
mountvol X: /s
copy %WINDIR%System32SecConfig.efi X:EFIMicrosoftBootSecConfig.efi /Y
bcdedit /create {0cb3b571-2f2e-4343-a879-d86a476d7215} /d "DebugTool" /application osloader
bcdedit /set {0cb3b571-2f2e-4343-a879-d86a476d7215} path "EFIMicrosoftBootSecConfig.efi"
bcdedit /set {bootmgr} bootsequence {0cb3b571-2f2e-4343-a879-d86a476d7215}
bcdedit /set {0cb3b571-2f2e-4343-a879-d86a476d7215} loadoptions DISABLE-LSA-ISO,DISABLE-VBS
bcdedit /set {0cb3b571-2f2e-4343-a879-d86a476d7215} device partition=X:
mountvol X: /d
Note: Here X is a placeholder for an unused drive. Enter a unit name based on your preference.
11. Restart your PC once you finish running the above command. Check if the error has been fixed when starting the virtual machine.
Solution 4: disable kernel isolation feature in Windows Defender
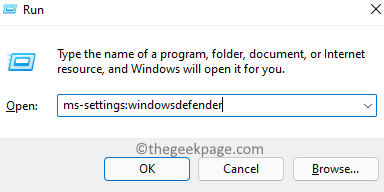
1. Maintain Windows y R keys together to open To run.
2. Type ms-settings: windowsdefender to open Windows security in the configuration of.
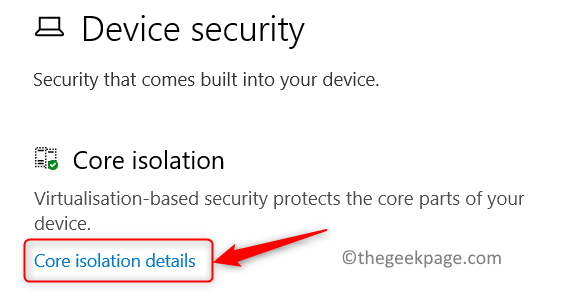
3 in Windows security, Select Device security in the right panel.

4. Click Core insulation details under the Core insulation option in Device security.
5. Delete the lever next to the option Memory integrity at Core insulation functions.

6. Restart your PC and check if the problem is solved.
If the Memory Integrity option switch is disabled or there is an error trying to shut it down, follow the steps below.
1. Open Ejecutar (Windows + R) and write regedit to open Registry editor.

2. Copy and paste the location below into the Registry Editor navigation bar.
ComputerHKEY_LOCAL_MACHINESYSTEMCurrentControlSetControlDeviceGuardScenariosCredentialGuard
3. Once you have reached the previous location, double click about him Activated in the right panel.
4. In the Edit window, let the base be Hexadecimal and set the Value data for 0.

5. Close Registry Editor and restart the system. Start the virtual machine and check if the problem is fixed.
Solution 5: enable virtualization in BIOS or UEFI
1. For a BIOS-based computer, turn on and when you see the Home screen press the Configuration key (F2, F4, F6, F8 or Delete key).
2. If you have a UEFI PC, follow the steps in this link to access the UEFI firmware settings.
3. Once you get to the settings, look for the option Virtualization technology related to your motherboard.
4. make sure Virtualization the option is activated.
Note: Generally, the location of this option differs between systems.

5. Now save these changes and restart your PC in the normal way. Check if the hypervisor error still exists or not.
Thank you for reading.
We hope that the fixes in this article have helped you overcome the error associated with Hyper-V on your PC. Comment and let us know the solution that worked for you.
Related posts:
 How to access Steam games without an internet connection
  How to view FPS with Xbox Game Bar in Windows 10: Steps Made Easy
  Hacked account? How to check and remedy
  How to make video calls from WhatsApp Web
  How to increase the RAM memory of a desktop or laptop + Tips and Tricks
  How to organize your YouTube subscriptions into categories
+ Tips and Tricks
How to organize your YouTube subscriptions into categories
+ Tips and Tricks


