


How to change user accounts in Windows 11
With Windows 11, just like your previous versions of Windows, you can switch between multiple user accounts simultaneously on your PC. So if you’re working on a shared PC, you’ll need to switch between accounts, without closing any apps or tabs, or losing any critical files or information. And Windows 11 lets you do this seamlessly, without signing out of any accounts.
This can also be useful in circumstances where you have set up parental controls and need to switch between your (parent’s) account and the child’s account to monitor their online activity. So if your PC has more than one user account, the Switch User feature comes in handy. This feature, as said above, helps you switch between different accounts seamlessly, with all apps, files, tabs, etc. saved, across all login sessions, while staying logged in to all accounts. You can simply go back to your other account and continue from where you left off.
COMMERCIAL
However, the one thing you need to be careful of is that if someone is remotely connected to your PC, they will not be able to use the Switch User feature as it is disabled for remote desktop connections. Also, it is recommended to save your work, because if any other user logged into one of your accounts shuts down or restarts their PC, your PC will lose all unsaved work.
So how do you switch user accounts in Windows 11? Read on to learn more..
This is one of the easiest methods to try and therefore should be your first attempt at switching user accounts on your Windows 11 PC. Let’s see how:
Paso 1: Navigate to the Windows icon on your taskbar (Start), click on it and you will see a popup menu with some options.
Here, click on the other user account you want to switch to.
Method 2: Using the shortcut keys Ctrl+Alt+Delete
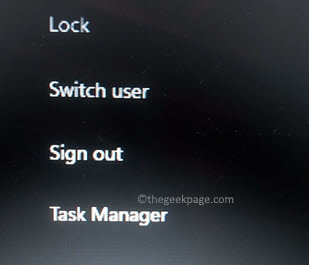
Ctrl + Alt + Delete it is one of the shortcuts that have been persistent in all versions of Windows to date. It is mainly used to open Task Manager O disconnect from the current account or lock the screen usually when the system hangs and none of the desktop options work.
So if you don’t want to go the classic way like Method 1you can simply follow the instructions below to switch user accounts:
Paso 1: press the Ctrl + Alt + Delete shortcut keys simultaneously on your keyboard.
This will open a list of options.
Paso 2: Click on Change user to switch to a different user account.
This will help you switch to another account of your choice.
Method 3: Use the Alt + F4 hotkey
Alternatively, you can also try another shortcut while on the desktop. However, before using the hotkeys, make sure to close all open windows, or it will just close the open window. Now, proceed with the following steps:
Paso 1: Close all open windows on your desktop and hit the shortcut leys – Alt + F4 on your keyboard at the same time.
This will open the close windows righ now.
Paso 2: Here, go to the ” What do you want your computer to do?”, click the drop-down menu and select Change user.
press the OK bottom button.

You will now see the login screen and here, you can select the account you want to switch to.
Method 4: Via Windows Terminal
This method is applicable for Windows 11 Pro users or those using a higher version of Windows 11. This solution gives you the feeling that a hacker can lock the screen in a jiffy just by running a simple command in Windows Terminal and then change the user account. Let’s see how:
Paso 1: Go to the Start button, right click on it and click windows terminal (Management).

Paso 2: on the high windows terminaltype the following hit command Get into run:
tdiscon

Paso 3: As soon as the command is executed, your screen will lock.
Just unlock the screen and when you see the login screen, click on the user account you want to switch to.
Method 5: From the lock screen
This is another quick method to switch to another user account on your Windows 11 PC, namely through your lock screen. That is how:
Paso 1: Lock your screen, using combination keys – Earn + L on your keyboard at the same time.
Paso 2: This will lock your screen.
Here, go to the bottom left of the screen and select the user account you want to switch to.
The best part is that you don’t lose any open tabs or programs when you switch user accounts.
Method 6 – Use Elevated Command Prompt
You can also easily navigate between two user accounts on your Windows 11 PC, using Command Prompt with administrator rights. Follow the instructions below to switch to another user account:
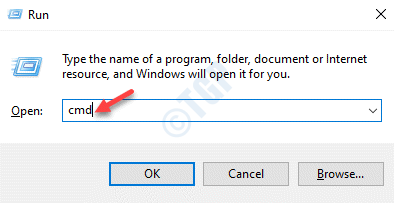
Paso 1: Open the run command window using the Earn + R shortcut keys (press them together simultaneously on your keyboard).
Paso 2: At run command search bar, type cmd and press the hotkey combination – Ctrl + Mayús + Intro together on your keyboard.
This will open the elevated Symbol of the system.
Paso 3: Copy and paste the following command into the Symbol of the system (management) window and press Get into:
runas /user:UserAccountName explorer.exeReplace the highlighted part with the name of the user account you want to switch to.

*Note – In this case, you must know the username and password of the user account you want to switch to.
Stage 4: When you run the above command, you will be prompted to enter the password of the user account you want to switch to.
Type the password and press Get into.
Now, you will have successfully logged in to the other user account you want to switch to.
Method 7: Use Windows PowerShell (administrator)
This method helps you to switch to the other user account on your PC using Windows Powershell with administrator rights. Let’s see how:
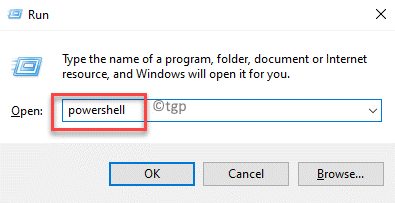
Paso 1: press the Earn + R combination of shortcut keys on your keyboard (make sure you press them at the same time) and the run command the box will be released.
Paso 2: In the search field, type Potencia Shell and now press the Ctrl + Mayús + Intro keys simultaneously to open the PowerShell de Windows window with administrator rights.
Paso 3: on the high PowerShell de Windowsrun the following command and press the button Get into wrench:
runas /user:<UserAccountName> explorer.exeSimply replace the highlighted part with the name of the user account you want to switch to.

*Note: Make sure you have the username and password of the account you want to switch to, and replace the highlighted part with the account username accordingly.
Stage 4: When prompted to enter the password, enter the password for the desired user account and press Get into.
As soon as you enter the password, you will have access to the desired user account that you want to switch to.
Related posts:
 How to access Steam games without an internet connection
  How to view FPS with Xbox Game Bar in Windows 10: Steps Made Easy
  Hacked account? How to check and remedy
  How to make video calls from WhatsApp Web
  How to increase the RAM memory of a desktop or laptop + Tips and Tricks
  How to organize your YouTube subscriptions into categories
+ Tips and Tricks
How to organize your YouTube subscriptions into categories
+ Tips and Tricks


