


How to configure an NFS share in Webmin on Ubuntu Server
NFS (AKA Network File System) is a handy network tool that makes file transfer in Linux very fast. However, setting it up is tedious if you don’t know what you’re doing.
That’s where Webmin comes in. It is a web user interface manager for UNIX-like operating systems that makes it easy to configure complex things like NFS. In this guide, we will show you how you can configure an NFS share with it.
Configure Webmin on Ubuntu Server
Before you can use Webmin on your Ubuntu server to configure NFS shares, you will need to configure Webmin on your Ubuntu server. To configure Webmin on your Ubuntu system, you will have to download and install the latest DEB package on your computer.
To download the latest version of Webmin for Ubuntu, click on this link and go to the official site. Webmin website. Once there, look for the “Debian Package” button and select it with your mouse to start the download.
Once the DEB package is downloaded, transfer it to your Ubuntu server via SSH. When the DEB package is transferred to the Ubuntu system, install it. Then go to your computer, open a web browser, and follow the link below to open the Webmin web user interface.
http://YOUR_UBUNTU_SERVER_IP_OR_HOSTNAME:10000
Root password for Webmin
To access the Webmin web UI on the Ubuntu server, you must have access to the root account and know the root password. Unfortunately, in Ubuntu, this is not so easy, as the root password is disabled for security reasons.

To change the root password for Ubuntu, do the following. First, login to Ubuntu Server via SSH. Or sit at the TTY console. Once on the console, use sudo -s command to gain root access to the Ubuntu server.
sudo -s
Now that you have obtained root access, use the passwd command to change root password in Ubuntu. Make sure this password is secure and easy to remember.
passwd
Install NFS packages on Ubuntu Server
With Webmin installed and the root password configured, you will need to install NFS packages on Ubuntu Server. Without these packages, Webmin will not be able to configure its NFS shares through the web user interface.
To install the NFS packages on the Ubuntu system, open a terminal window and login via SSH. Or sit at the server and interact with the command line using the TTY console.
Use the following fit to install command to configure the latest NFS server package with terminal access.
sudo apt install nfs-kernel-server
After writing the fit to install command above, Ubuntu will ask for your password. Using your keyboard, type your username password. When you have entered your password, Ubuntu will collect all the packages to install. Then it will ask you to press the AND to confirm that you want to install the packages. Do it to continue.
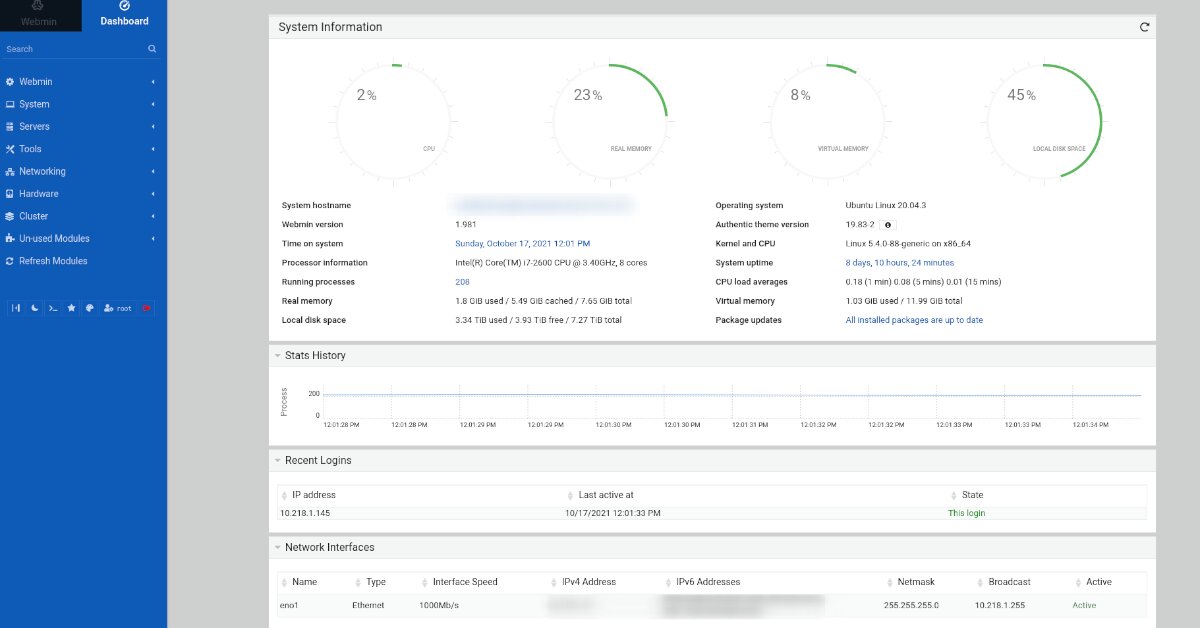
To configure an NFS share in Webmin, start by logging into the Webmin web UI interface in a web browser. Once you are logged in, find the “Update Modules” button and click on it with your mouse.
After upgrading the modules, follow the step-by-step instructions below to configure your NFS shares in Webmin.
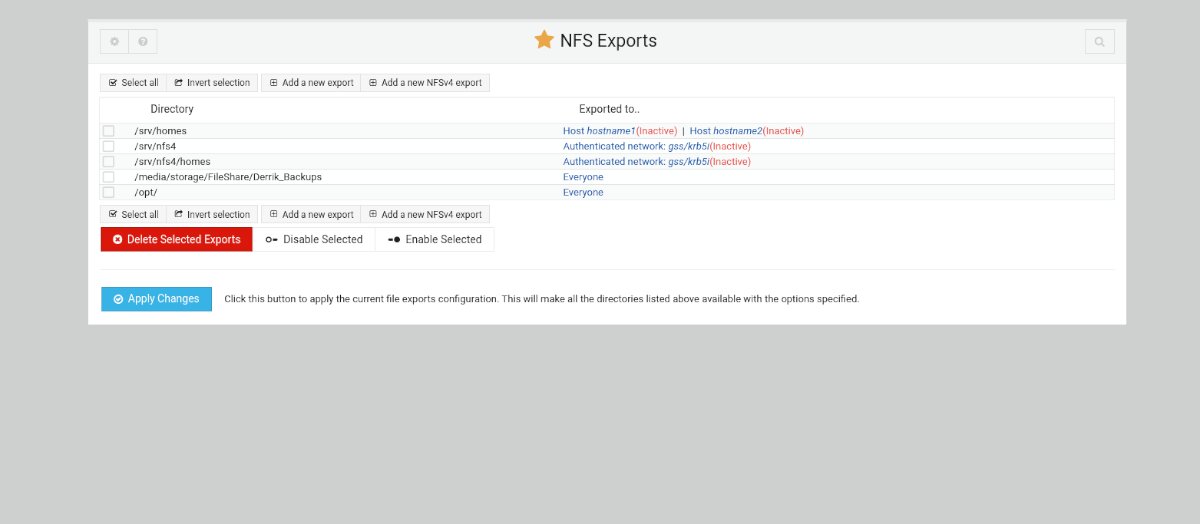
Paso 1: In the Webmin sidebar, click on the “Networks” section with the mouse to expand the menu items. Then look in the “Networking” area for “NFS Exports” and click on it with your mouse.
Paso 2: Inside the “NFS exports” area, find the “Add a new export” button and click on it with the mouse to create a new NFS export.
When you click the “Add a new export” button with the mouse, the “Export details” window will appear. Find the “Directory to Export” area and select the icon next to the text box.
Paso 3: By clicking the icon next to “Directory to Export”, browse for the folder you want to share via NFS. Then find the “Read Only” section and click “No”. If you do not select “No”, your NFS share will not be writable.
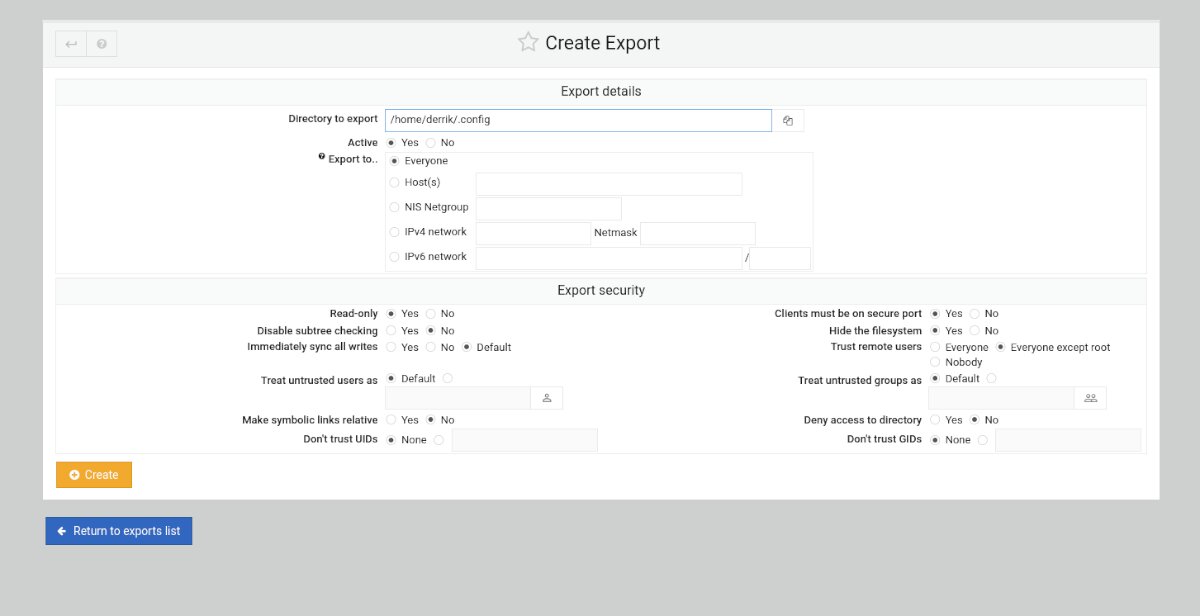
Paso 4: After changing the write settings, review the other settings and customize your NFS share as you see fit. When you’re done customizing everything, click the green “Create” button to create your new share.
Then click on the “Back to Exports” list to return to the list of NFS shares in Webmin.
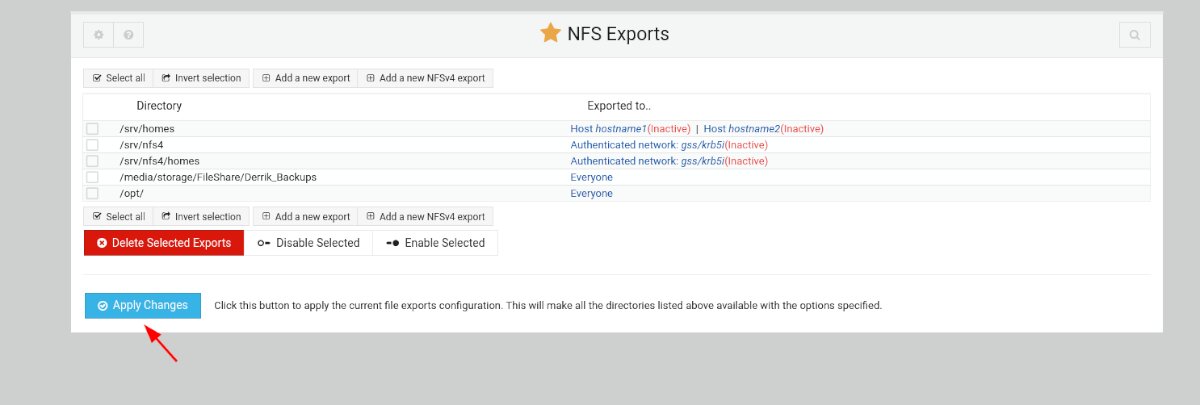
Paso 5: Click “Apply Changes” in the list of NFS shares to apply the changes to your new NFS share. When you select this button, you will be able to access your share over the network.
Assembling an action
Not sure how to mount your new NFS share on Linux? Enter the following command below in a terminal window.
sudo mount YOUR_WEBMIN_LINUX_SERVER_IP_OR_HOSTNAME:/location/of/nfs/export/ /local/location/to/mount/share/
Related posts:
 How to access Steam games without an internet connection
  How to view FPS with Xbox Game Bar in Windows 10: Steps Made Easy
  Hacked account? How to check and remedy
  How to make video calls from WhatsApp Web
  How to increase the RAM memory of a desktop or laptop + Tips and Tricks
  How to organize your YouTube subscriptions into categories
+ Tips and Tricks
How to organize your YouTube subscriptions into categories
+ Tips and Tricks


