


How to customize the Touch Bar on your MacBook
This article explains how to customize the MacBook Touch Bar, Control Strip, and how to make these changes in supported third-party apps.
How do I customize my Apple Touch Bar?
The MacBook Touch Bar has two areas: the contextual or application-dependent controls on the left and the Control Strip on the right. The control strip shows the same icons (screen brightness, volume, Siri, etc.) no matter what app you’re using, while the area on the left changes depending on your activity.
macOS gives you the ability to control what’s on the Touch Bar by default, whether it changes based on the app you’re using, and more. To customize the overall appearance and functionality of the Touch Bar, follow these steps:
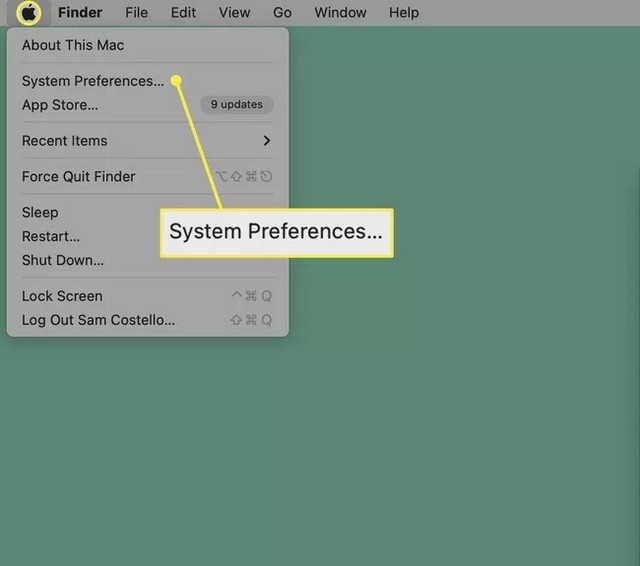
1. Click on the menu Apple > System Preferences.
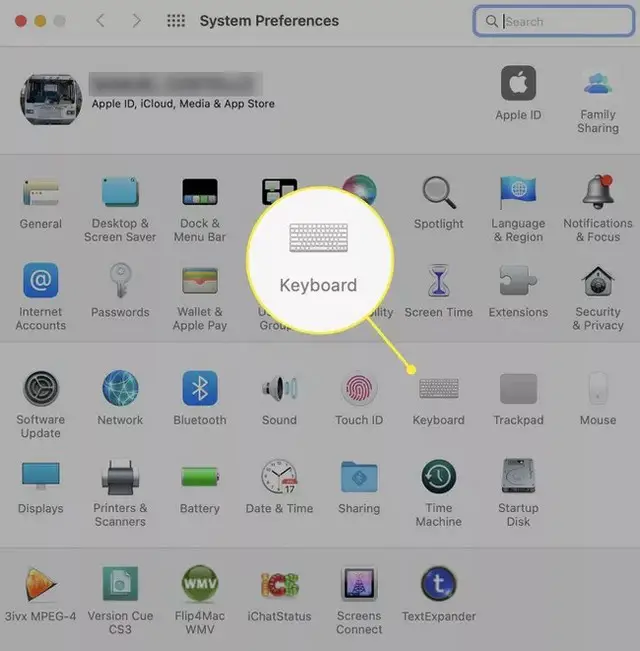
2. Click Keyboard.
3. On the tab Keyboardclick the dropdown menu next to Show the touch bar.
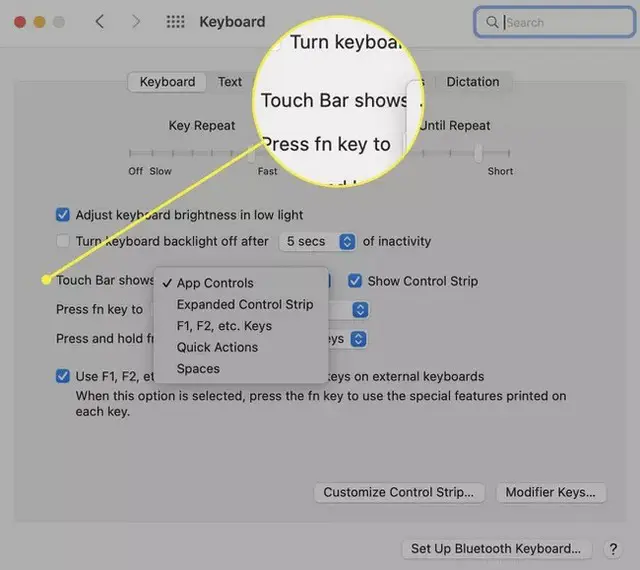
4. From this dropdown menu, you can choose the layout and features of the Touch Bar. The options are:
- Application controls: select this option to display application-specific shortcuts on the Touch Bar when available.
- Extended control strip: this option always expands the Control Strip and does not display application-specific controls.
- Teclas F1, F2, etc. : Do you want your Touch Bar to act like a traditional keyboard with function keys above the numbers? Select This.
- Quick Actions: If you’ve set up your own automations using Quick Actions, this option provides faster access to them.
- Show spaces: get direct access to switch between all your spaces with the option.
The option you click will be applied. Close the System Preferences window.
Do you want to hide the control strip? Uncheck the box next to show control strip.
How do I customize the Control Strip on my Apple Touch Bar?
The control strip is part of the Touch Bar and consists of the icons to the right of the Touch Bar. You can also customize them to work the way you want. This is what you need to do:
1. Go to the Apple menu > System preferences > Keyboard > Keyboard.
2. Click Customize the control strip.
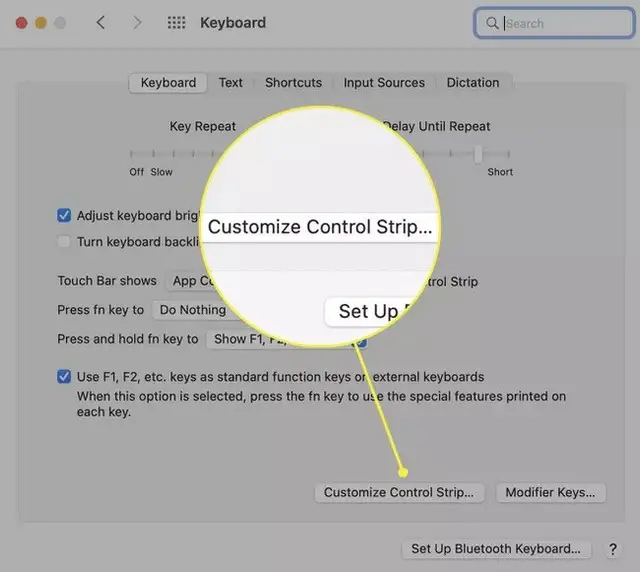
3. A set of Touch Bar icons will appear on your screen. You can drag new icons from the icon pool on your main screens onto the Touch Bar (try moving your mouse “towards” the Touch Bar and you’ll see your movements reflected there). The icons move just like when you rearrange apps on the iPhone or iPad.

You can also jump to this step from the Finder by going to Show > Customize the touch bar.
4. To remove unwanted icons, drag them from the Touch Bar to the screen.
To change the order of the Touch Bar icons, place your mouse “on” the Touch Bar, click the controls you want to move, then drag and drop.
5. Once arranged, the touch bar is arranged as you like, click Finished.
Can you customize the MacBook Touch Bar in apps?
Apple introduced the MacBook Touch Bar in 2016 with the new MacBook Pro models. Since then, all MacBook Pro models had the Touch Bar, at least until Apple’s second-generation silicone MacBook Pro models from 2021 removed it. No MacBook Air model had the Touch Bar.

So far, we’ve covered how to customize the Touch Bar and Control Strip, but you can also customize the app-specific controls that display on the Touch Bar (if you chose to review them in step 1, c, eg).
Not all apps are compatible with the Touch Bar, but Apple apps and many popular third-party apps are, too.
In apps that support Touch Bar customization, access the menu Showthen click Customize the touch bar. The full set of options available on the Touch Bar for that application is displayed on the screen. Follow the drag and drop instructions in the last section of this article to customize the controls for this app.
conclusion
In this guide, you learned how to customize the Touch Bar on MacBook. If you too have any questions or suggestions, let us know in the comments. Also check this guide if you want to learn how to find my ip address on a macbook.
Related posts:
 How to access Steam games without an internet connection
  How to view FPS with Xbox Game Bar in Windows 10: Steps Made Easy
  Hacked account? How to check and remedy
  How to make video calls from WhatsApp Web
  How to increase the RAM memory of a desktop or laptop + Tips and Tricks
  How to organize your YouTube subscriptions into categories
+ Tips and Tricks
How to organize your YouTube subscriptions into categories
+ Tips and Tricks


