


How to disable background apps in Windows 11
When an application runs in the background, your system tends to run a bit slower as the background application takes up a lot of system resources such as RAM space, CPU power, etc. Also, if you have a limited data packet, background applications using the Internet without your knowledge is definitely not desirable.
Windows 11 is designed for new machines. So if you have it installed on an older machine, bypassing the security checks and system requirements, the issues you face due to applications running in the background are very likely to be of greater magnitude.
Read on to learn how you can stop running apps in the background to save resources and improve your system performance.
Method 1: via app and feature settings
Paso 1: Launching Settings application by pressing the WIN + ME keys together.
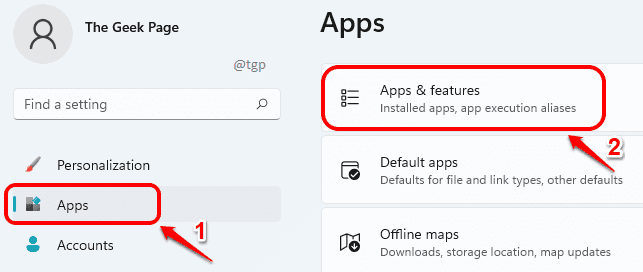
At left window pane, click on Applications tab and in the right window pane, click on Apps and Features.
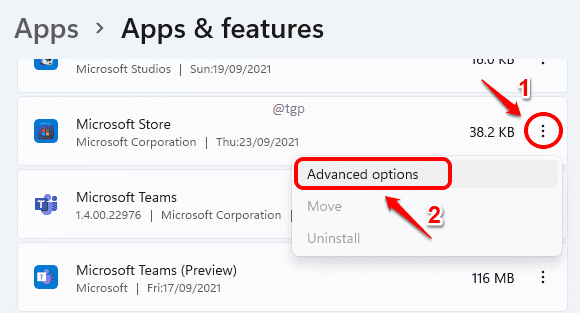
Paso 2: At Apps and Features window, scroll down to find the list of all applications installed on your machine.
Find the app for which you want to stop background activity, click the 3 vertical points associated with it and then click Advanced Options.
Note: If you don’t see the Advanced Options in the menu, it means that background activity management is not supported by the application you selected.
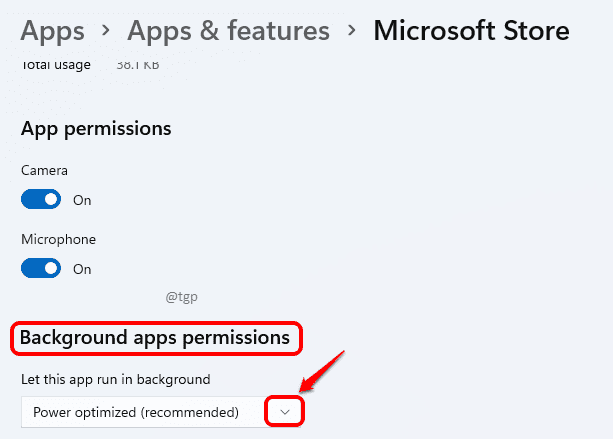
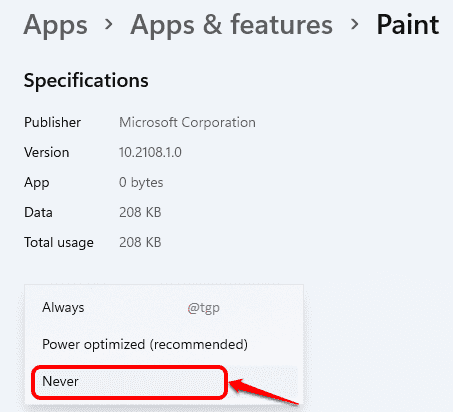
Paso 3: As below, locate the section Background app permissions. Click on the drop-down menu arrow associated with option Let this app run in the background.
Paso 4: As following choose Never from the drop-down list.
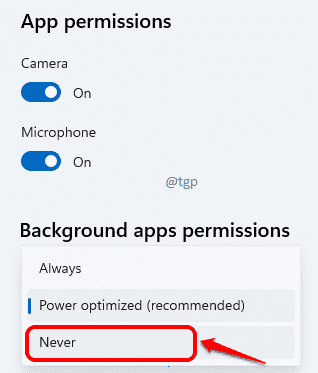
That is all. The application you selected will not run in the background from now on.
Method 2: through power and battery settings
Paso 1: Opened Settings pressing WIN and me keys at the same time.
Click on System tab on the left window pane and in the right window pane, click on Power and battery option.
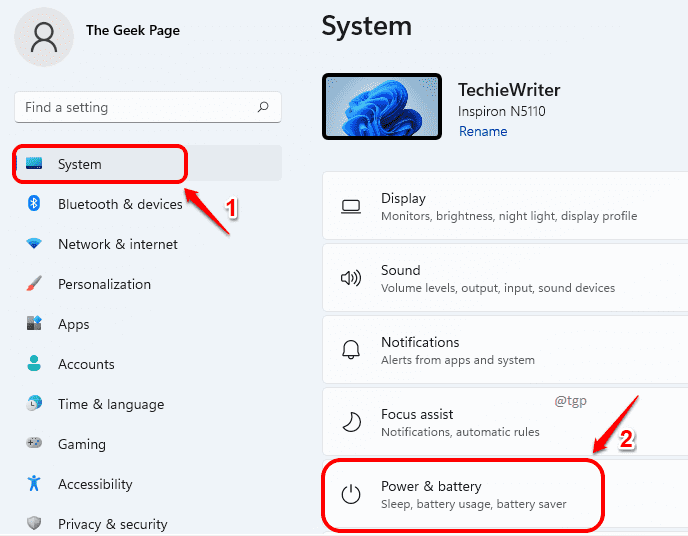
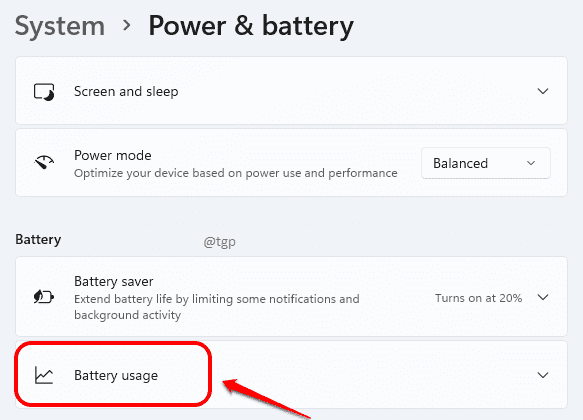
Paso 2: Scroll down and click Battery use Next.
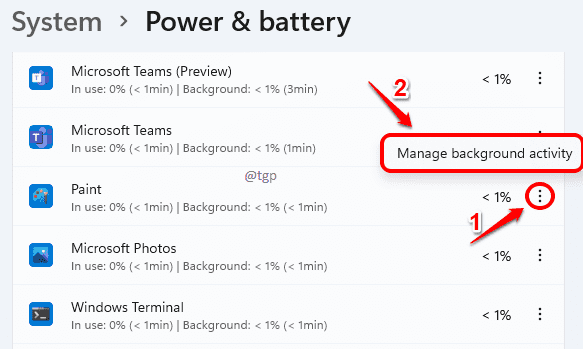
Paso 3: Below Battery use, click on the 3 vertical points icon of the application for which you want to disable background activity and then click the option Manage background activity.
Note: If you don’t see the Manage background activity in the menu, it means that the background activity of the app you selected cannot be managed.
Paso 4: Then click on the drop-down menu. arrow associated with option Let this app run in the background below section Background app permissions.
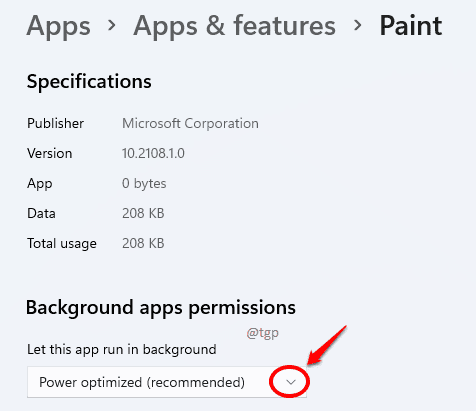
Paso 4: Choose the Never drop-down menu option.
That is all. You have successfully restricted the application from running in the background.
Method 3: through the local group policy editor
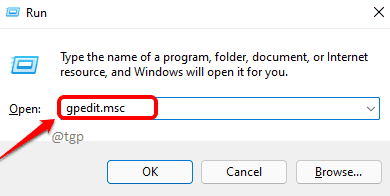
Paso 1: press Teclas WIN + R together to open the To run window. to write gpedit.msc and hit Pay in wrench.
This will launch the Local Group Policy Editor window.
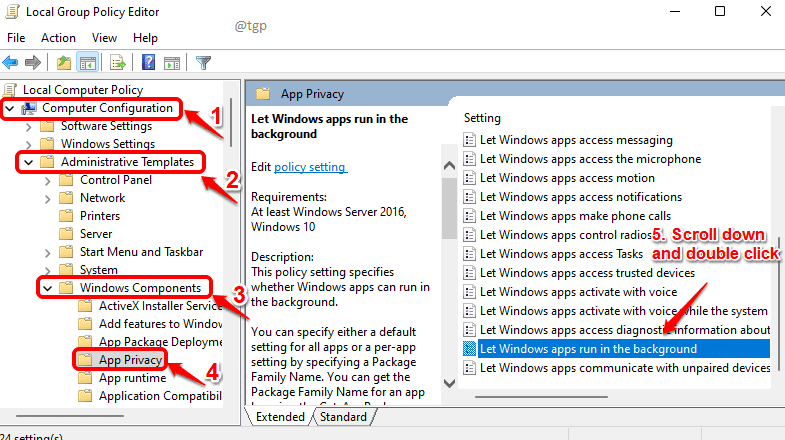
Paso 2: Now you have to navigate to the next route. Just click on the down arrow associated with each section to expand it.
Computer Configuration -> Administrative Templates -> Windows Components -> Application Privacy
Once you are in the privacy of the app, in the right window pane, find the Setting called Let Windows applications run in the background. Double click in this entry.
Paso 3: When Let Windows applications run in the background the window opens, choose the radio button by Disabled. Once done, press Request button then OK button.
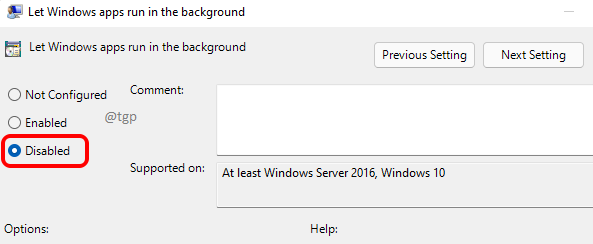
Apps running in the background will no longer bother you. Hope you found the article useful.
Related posts:
 How to access Steam games without an internet connection
  How to view FPS with Xbox Game Bar in Windows 10: Steps Made Easy
  Hacked account? How to check and remedy
  How to make video calls from WhatsApp Web
  How to increase the RAM memory of a desktop or laptop + Tips and Tricks
  How to organize your YouTube subscriptions into categories
+ Tips and Tricks
How to organize your YouTube subscriptions into categories
+ Tips and Tricks


