


How to fix Autoit error in Windows 11/10
Many Windows users have reported seeing an Auto it error on Windows startup. The error message shows a path. This path may vary from user to user. The error is known to be caused by Malware called Veronica. The full error message says:
Line (File:"C:GoogleGoogleupdate.a3x")):
Error: Error opening the file.
If you see this error on your system, don’t worry. In this article, let’s look at different ways to fix the problem.
Solution 1: Delete the registry keys
1. Open the Run dialog box using Windows + R
2. Type regeditar and hit Get into
3. In the UAC window that opens asking for permissions, click Yes
NOTE:
Editing the registry can harm your system even with the slightest mistake. It is recommended that you back up the registry before proceeding. To make a backup, in Registry Editor–> Go to File -> Export -> Save your backup file.
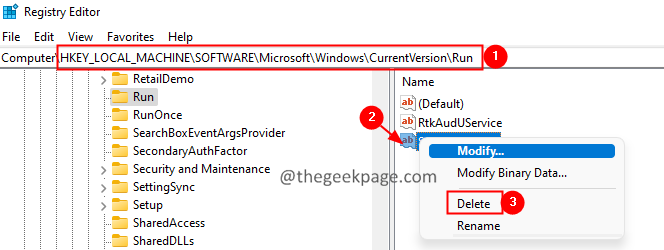
4. In the Registry Editor window, in the search bar at the top, copy and paste the following location
HKEY_LOCAL_MACHINESOFTWAREMicrosoftWindowsCurrentVersionRun
5. On the right side, find and delete the following keys. To remove a key, right-click the key and choose Delete.
Solution 2: Remove AutoIt
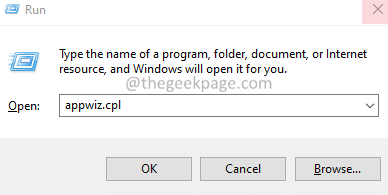
1. Open the Run dialog box with the keys Windows + R.
2. Type appwiz.cpl and press Get into.
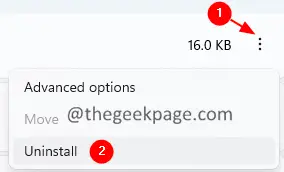
3. In the window that opens, find Automatic and click on the three points together with him.
4. Click on the uninstall button.
5. Follow the instructions on the screen and complete the uninstall process.
Solution 3 – Remove AutoIt from scripts
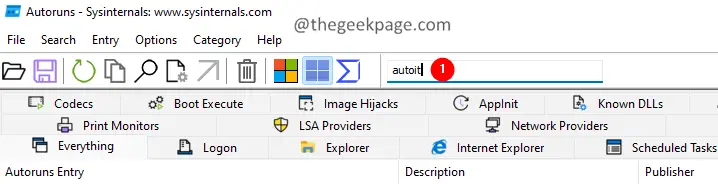
1. Download the Autorun for Windows.
2. Open the browser window, double-click the Autoruns64.exe
3. Now, open autoruns, in the filter field, enter Autoit3 and press Enter.
4. Locate the autoit hyphen and the right button of the mouse in that.
5. Select the Delete option.
Solution 4 – Reset Windows
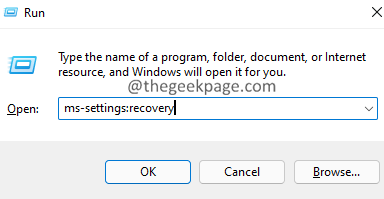
1. Open the Run dialog box with the keys Windows + R.
2. Type the following command and press Enter.
ms-settings:recovery
3. In the window that opens, click the Reset PC button.
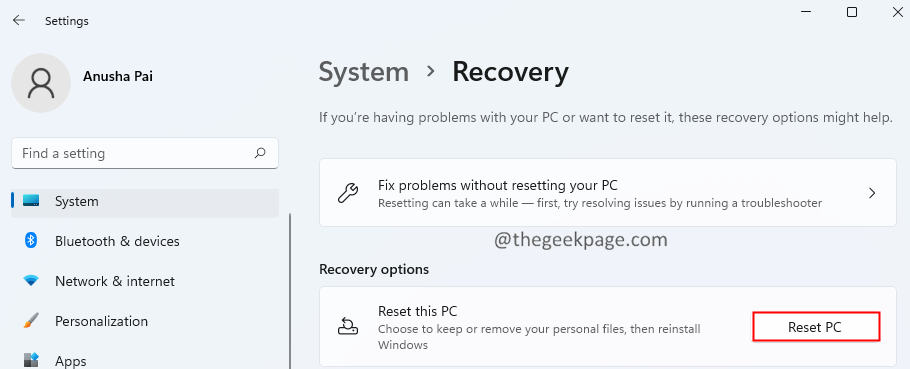
4. In the Reset this PC window, click Save my files.

That’s it.
We hope this article has been informative. Please comment and let us know the solution that helped you overcome this error.
Thank you for reading.
Related posts:
 How to access Steam games without an internet connection
  How to view FPS with Xbox Game Bar in Windows 10: Steps Made Easy
  Hacked account? How to check and remedy
  How to make video calls from WhatsApp Web
  How to increase the RAM memory of a desktop or laptop + Tips and Tricks
  How to organize your YouTube subscriptions into categories
+ Tips and Tricks
How to organize your YouTube subscriptions into categories
+ Tips and Tricks


