


How to Fix bddci.sys BSOD Error in Windows 11 Easily
Many Windows users have reported seeing a BSOD error with the following error message on their system:
Your PC ran into a problem and needs to restart. We're just collecting some error info, and then we'll restart  para you.
If you'd like to know more, you can search online later  para this error:bddci.sys
In this article, let’s see how to fix this problem easily in Windows 11.
Steps to follow to fix bddci.sys BSOD error in Windows 11:
1. Open the To run terminal by holding down the Windows Y R keys simultaneously.
2. Type ms-settings:recovery and press it’s fine.
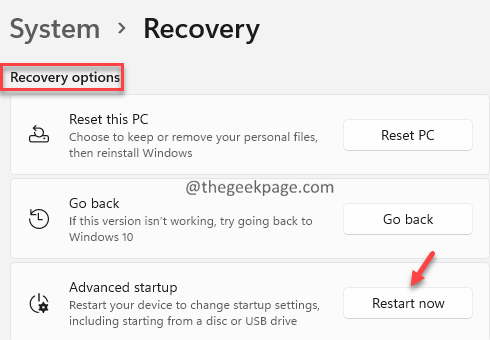
3. In the windows that open, locate the recovery options section. Next to Advanced startclick on Restart now button as shown below.
4. You can see the blue screen with the message Please wait.
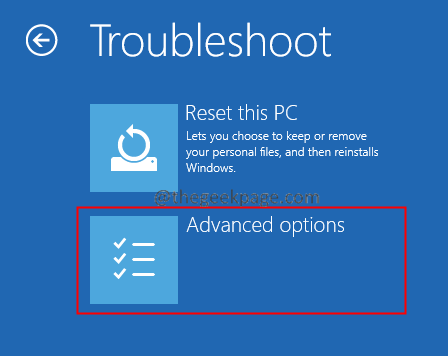
5. In the window that appears, click Solve problems roof tile.
6. Now click on the Advanced Options roof tile.
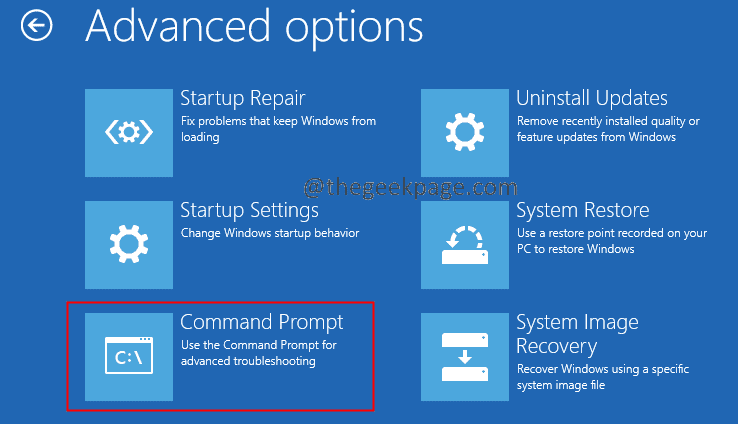
7. Click on the Symbol of the system roof tile.
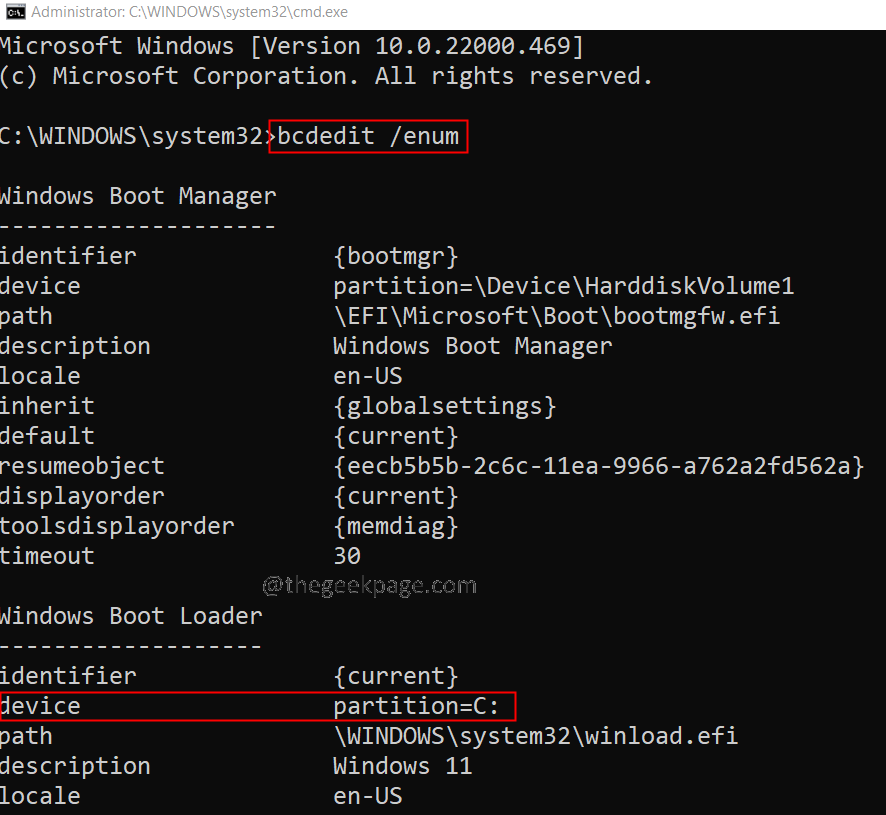
8. In the Command Prompt window that opens, enter the following commands one after another. Make sure to hit Enter after each command.
bcdedit /enum
9. Now check where Windows is installed. In the Windows Boot Loader section, check the value corresponding to the device option.
10. Once done, run the following commands one after another.
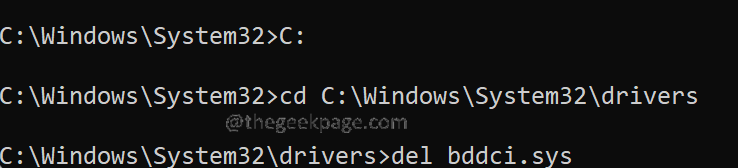
C:
cd C:WindowsSystem32drivers
del bddci.sys
10. After deletion, you can check whether the file was deleted successfully or not using the following command.
dir bd*.*
If you see the message File not Foundthis confirms the successful deletion of the file.
That’s it.
We hope this article has been informative. Please comment and let us know if these steps helped you fix this issue.
Thank you for reading.
Related posts:
 How to access Steam games without an internet connection
  How to view FPS with Xbox Game Bar in Windows 10: Steps Made Easy
  Hacked account? How to check and remedy
  How to make video calls from WhatsApp Web
  How to increase the RAM memory of a desktop or laptop + Tips and Tricks
  How to organize your YouTube subscriptions into categories
+ Tips and Tricks
How to organize your YouTube subscriptions into categories
+ Tips and Tricks


